BIT113: User Interface Design Project Planning

BIT113: User Interface Design
Team Project Planning Phase
Project Planning
This is the second of five phases for the Interface Design Project: (0) Definition (1)
Planning, (2) Design, (3) Implementation and (4) Deployment. In the Planning phase, your team will work with your team to better define the site users, investigate user preferences, organize the information from the client into content groupings, design the site navigation, and create an initial site sketch.
A. Create a Team Project Testing Server folder
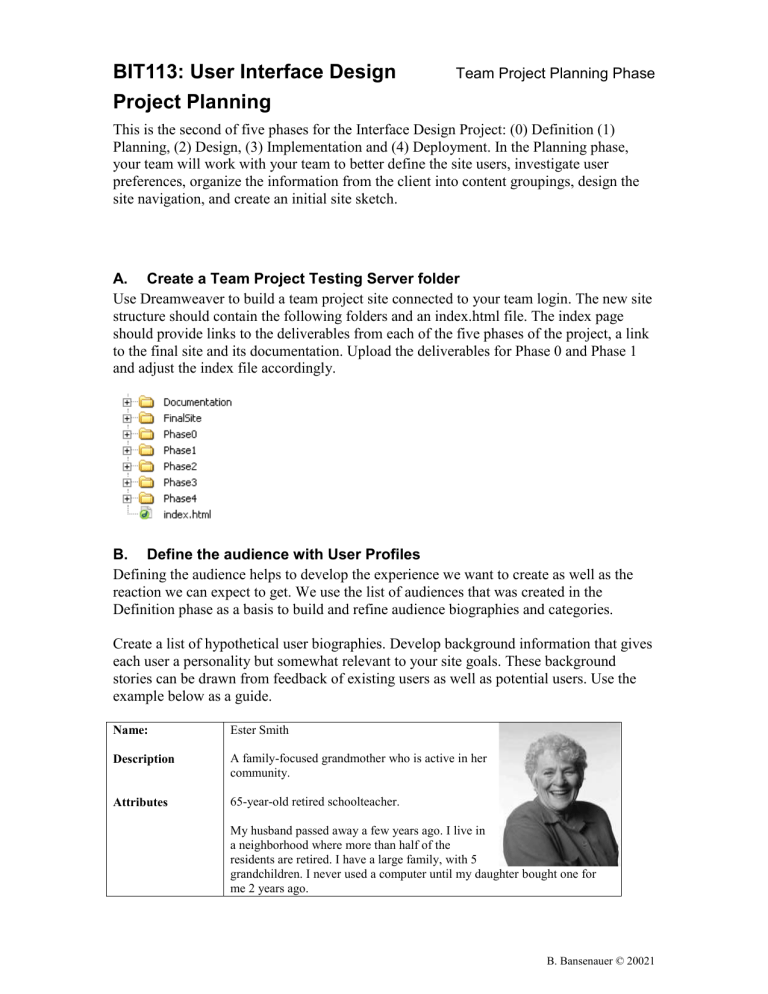
Use Dreamweaver to build a team project site connected to your team login. The new site structure should contain the following folders and an index.html file. The index page should provide links to the deliverables from each of the five phases of the project, a link to the final site and its documentation. Upload the deliverables for Phase 0 and Phase 1 and adjust the index file accordingly.
B. Define the audience with User Profiles
Defining the audience helps to develop the experience we want to create as well as the reaction we can expect to get. We use the list of audiences that was created in the
Definition phase as a basis to build and refine audience biographies and categories.
Create a list of hypothetical user biographies. Develop background information that gives each user a personality but somewhat relevant to your site goals. These background stories can be drawn from feedback of existing users as well as potential users. Use the example below as a guide.
Name:
Description
Attributes
Ester Smith
A family-focused grandmother who is active in her community.
65-year-old retired schoolteacher.
My husband passed away a few years ago. I live in a neighborhood where more than half of the residents are retired. I have a large family, with 5 grandchildren. I never used a computer until my daughter bought one for me 2 years ago.
B. Bansenauer © 20021
BIT113: User Interface Design
Concerns and
Priorities
Interests
Team Project Planning Phase
How can I stay close to my family?
I care deeply about strong family relationships. I plan and coordinate holidays and family get-togethers. I never forget birthdays and anniversaries. I e-mail family regularly, keep track of birthdays and anniversaries, plan family get-togethers for birthdays, anniversaries, and
Thanksgiving.
How can I contribute to my community most effectively?
I care deeply about the local retirement community. I organize and plan church events, and organize fund raising activities, as well as social events for the retirement community.
How can I ensure my financial independence?
I have enough money (in various low-risk investments), but I want to make sure I don’t overspend. I need to track general spending as well as investment performance. I also want to leave something for the rest of the family.
Cooking, playing bridge, teaching Sunday school, health issues
C. Develop the Content and Structure and Navigation
Group the Content
It’s important to stop, and think from the users’ point of view. The structure of a web site should always be user-centered in its design, that is, content should be relevant, and timely, and navigation labels should meet the expectations of the users when they click.
To develop and test content groupings within a user-centered design, wrok with your group through the following process:
1) Branching (also called Mind Maps):
Write the name of the site in the center of a piece of paper. Then around the center, write everything about the site you can think of, no matter how small or large.
2) Group the content.
Take every idea that was generated by branching, and group the items into related concepts or ideas. Some items may fit into more than one group. These types of items are areas that may need to be navigable from multiple points in the site, or appear as sub-navigation. Some elements may be better suited as sub-navigation under another label.
3) Name each group
Take each content group and try and create a name that fits the content. Names should use language that users will understand. This name will become the label name in the navigation. This is a process that may take time to develop, should be reviewed by the client and tested by users.
4) Prioritize the content
Define the priority of each element within a group as well as the priority of the groups themselves. Some elements in a group may be actual content, while others may be a certain tone or mood desired for that grouping.
B. Bansenauer © 20021
BIT113: User Interface Design
D. Investigate User Preferences
Team Project Planning Phase
Usability Testing for Text Labels and Content Grouping
Your team will use a card sort method to test the usability of groupings and the labels created each group:
1) Describe the purpose of the site in one or two sentences.
2) Provide the usability tester with the deck of content cards, shuffled so that they are no longer in groups. Have the tester to group the cards. Encourage testers to verbalize their thinking during the test. Write down any key insights.
3) Have the tester label each group.
A reverse card sort method can provide insight about labels and new ideas for content.
It better simulates what a user’s experience will be when viewing the finished site.
1) Create an index card with each proposed label on it. Display these cards to a usability tester.
2) Ask the tester what he or she would expect to get if this was a button on a web site and they clicked on it.
3) Each tester answers should be written down, along with their general thoughts.
Encourage testers to verbalize their thinking during the test. Write down any key insights.
4) Explore how the testers’ expectations match your grouping of the content. a.
If the majority of testers understand the label, and the content matches their expectations, this should be considered a good name for navigation. b.
If most testers are confused, or their thoughts don’t match the groupings, then changes to the structure need to be made based on the results given by the testers.
5) Modify the labels or grouping as needed and re-test with a new user.
E. Define Navigation
From the content grouping and usability testing, create a navigational structure. Prioritize the list of label names, either top to bottom, or left to right, depending on the layout of your site.
1) Define the global navigation
Create a navigational flow chart or outline view, showing each unique level of the site, and using the label names as your starting point.
2) Build a simple wireframe for your site
Use your final navigation model to create a simple wireframe mockup of the site main page. Each navigation option should display a new page which lists the topics
B. Bansenauer © 20021
BIT113: User Interface Design
Team Project Planning Phase
F. Site Design Sketches
Each member of your team should bring storyboard sketches for two-levels of the site to the next meeting. The sketches should include layout of navigational labels and content.
(see Design Sketch Assignment.) As a group, review, combine and select a single design for your site.
G. Final Submissions for Project Planning (due week 5)
1) Team site structure developed on the testing server. Complete deliverables for first two phases are uploaded.
2) A complete set of User Profiles (one for each type of user described in Phase 0)
3) Usability Test Results summary including description of key user insights content groupings suggestions and label brainstorming
4) A Navigational Flow Chart or Outline including the final content labels and a summary of the final content groupings. This can be in outline or diagram form.
5) A simple HTML wireframe mockup of the Navigation model.
B. Bansenauer © 20021


