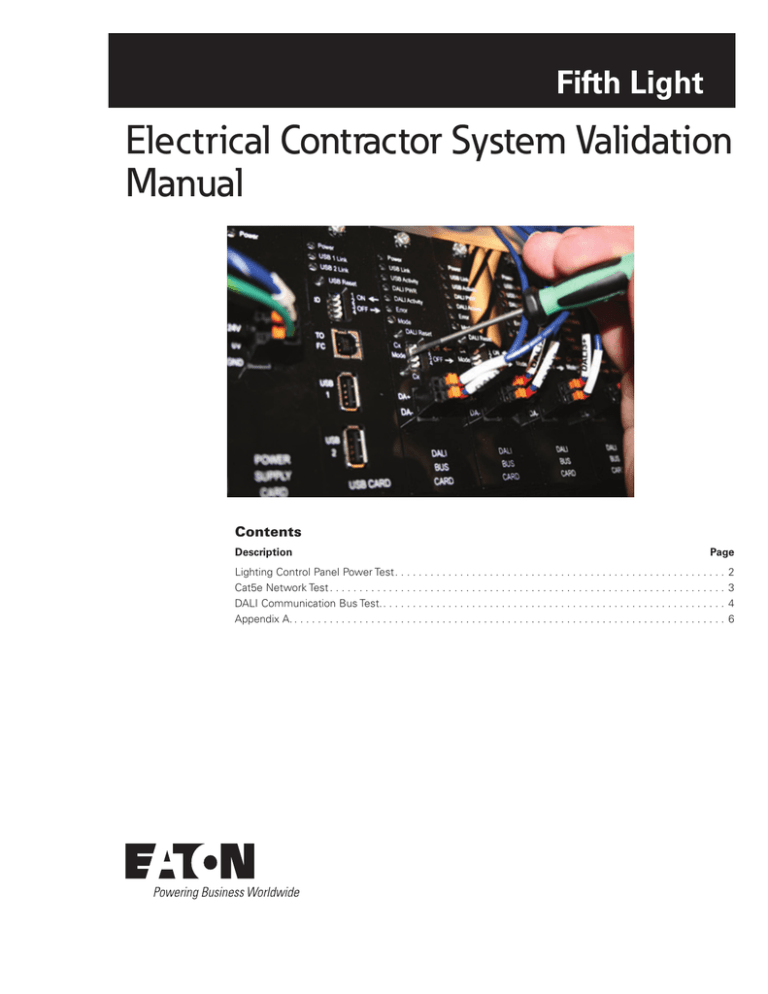
Electrical Contractor System Validation
Manual
Contents
Description
Page
Lighting Control Panel Power Test. . . . . . . . . . . . . . . . . . . . . . . . . . . . . . . . . . . . . . . . . . . . . . . . . . . . . . . . .
Cat5e Network Test. . . . . . . . . . . . . . . . . . . . . . . . . . . . . . . . . . . . . . . . . . . . . . . . . . . . . . . . . . . . . . . . . . . .
DALI Communication Bus Test.. . . . . . . . . . . . . . . . . . . . . . . . . . . . . . . . . . . . . . . . . . . . . . . . . . . . . . . . . . .
Appendix A.. . . . . . . . . . . . . . . . . . . . . . . . . . . . . . . . . . . . . . . . . . . . . . . . . . . . . . . . . . . . . . . . . . . . . . . . . .
2
3
4
6
Electrical Contractor System Validation Manual
Check List
November 2015
danger
Line voltage is present in the areas covered with a red block
in the picture below
IMPORTANT
Terminate the DALI Bus wires in the Lighting Control Panel (LCP)
first, before energizing the lighting circuits. After the lighting
circuits are energized, ensure the line voltage is not present on
the DALI Bus wires.
•
Ensure that all lighting loads are powered
•
Use a meter to check for line voltage on the wires as follows:
• Between either DALI wire to ground
• Across both DALI wires
•
There should be a maximum of 24 VDC between the DALI wires
and ground
IMPORTANT
IMPORTANT
Prior to energizing any fixture(s) ensure that there are no shorts
between the following:
•
The two DALI wires
•
Each DALI Bus wire and ground
•
Each DALI Bus wire and the line voltage wiring
All LCP connections must be verified for proper terminations
according to the corresponding LCP schematics. For safety
purposes, ensure that there are no faulty connections between
line voltage, neutral and ground wires. Be sure that all low
voltage wiring is connected or secured before energizing the
LCP.
Table 1. Lighting Control Panel Power Test
Step 1:
Ensure all circuit breakers, branch breakers and circuit protection within all LCPs are in the
Off position.
Step 2:
Energize the LCP by turning On the branch circuit breaker feeding the LCP. Verify that 120
VAC power is incoming at the LCP by measuring the voltage between the terminal blocks
labeled “L” for line voltage and “N” for neutral.
2
www.eaton.com/lightingsystems
Electrical Contractor System Validation Manual
Check List
November 2015
Step 3:
Turn the 120 VAC breaker labeled “CB1” inside the LCP to the On position.
Step 4:
Verify that 24 VDC is present between the terminal blocks “0V” and “1P” off the power
supply secondary.
Step 5:
Ensure all LCP’s have a suitable ground connection and that neutral (0 VDC) and ground are
at the same potential.
Step 6:
Repeat the steps 1-5 for all LCPs in the building.
Table 2. Cat5e Network Test
Step 1:
The LCP requires Ethernet connections for communication with the Lighting Management
Software and other integration pieces. Verify that Cat5e cabling has been pulled and
terminated to each designated LCP location and that a connection has been provided
between the Fifth Light system and the main network switch.
Step 2:
Verify that the data drops are in the correct locations (i.e. the data racks wor inside the
LCP).
Step 3:
Using a network cable tester, verify that each Cat5e cable is functional and data can pass
through it.
www.eaton.com/lightingsystems
3
Electrical Contractor System Validation Manual
Check List
November 2015
Table 3. DALI Communication Bus Test
Step 1:
Energize the DBC by turning circuit breaker “CB2” to the On position.
Step 2:
1. Review the LED indicators on the DALI Bus Card:
• “DALI PWR”: Should be illuminated. If not, verify the DALI Power Card is
connected and that the supply breakers are On.
• “DALI Activity”: Should be Off or flashing intermittently. If on solid, there is a
short on the DALI Bus that should be rectified.
• “Error”: The “Error” LED should be fading in and out or “breathing”.
NNote: If it is blinking, note the blink pattern and refer to the “DALI Card
LED Error Table” in Appendix A.
2. Once the LEDs are verified to be in proper operation, proceed to Step 3 in this
section.
Step 3:
Test Dimmable Devices – (This includes DALI Ballast/Drivers, Dimming Modules and
DACs).
1. On the DALI Bus Card for the bus under test, set the DIP Switch setting to
Commissioning Mode 1 (shown circled) with DIP Switch 1 set to On and 2, 3, 4
set to the Off position.
Then press and hold the commissioning button, labeled Cx, (shown boxed) until
the “Mode” LED Turns On. Next, follow the steps below:
• All lamps in the fixtures should dim down to a low light level output. The
lamps should then increase in light output and continue to cycle light output
every 5 seconds.
• Verify that all dimmable fixtures that should be connected to the DALI Bus are
cycling with this mode.
• If any lamps in the fixtures do not dim, turn off power to the affected fixture
and the DBC. Recheck all connections including the DALI Bus wire connection;
then repeat the test.
If the problem persists for a second time, set the device aside to be sent to
Fifth Light to determine if the device is faulty.
•
If fixtures are dimming that are not supposed to be connected to the DALI bus
under test, turn Off power to the fixture and the DBC. Recheck all connections
to ensure they are connected to the correct DALI Bus, then repeat the test.
2. To exit Commissioning Mode press and hold the commissioning button (shown
boxed) until the “Mode” LED turns Off.
NNote: Ensure that the Mode 2 DIP Switch is switched back to Off before entering
another Commissioning Mode.
4
www.eaton.com/lightingsystems
Electrical Contractor System Validation Manual
Check List
November 2015
Step 4:
Test DALI Field Relays
1. On the DALI Bus Card for the bus under test, set the DIP Switch setting to
Commissioning Mode 2 (shown circled) with DIP Switch 2 set to On and 1, 3, 4
set to the Off position.
Then press and hold the Commissioning button, labeled Cx, (shown boxed) until
the “Mode” LED turns On. Next, follow the steps below:
• Once Commissioning Mode 2 takes effect, all fixtures including those
connected to a DALI Field Relay will turn On and Off every 5 seconds.
• Verify that all fixtures/relays that should be connected to the DALI Bus are
cycling with this mode.
• If the fixtures do not turn On and Off, then turn Off power to the them and the
DBC. Recheck connections and repeat the test.
If the problem persists for a second time, set the device aside for further
investigation by Fifth Light.
•
If fixtures are switching that are not supposed to be connected to the DALI
Bus under test, turn Off power to the fixture and the DBC. Recheck all
connections to ensure they are connected to the correct DALI Bus then repeat
the test.
2. To exit Commissioning Mode, press and hold the commissioning button (shown
boxed) until the “Mode” LED turns Off.
NNote: Ensure that the Mode 1 DIP Switch is switched back to Off before entering
another Commissioning Mode.
Step 5:
Test DALI Multi-Sensors and Wallstations
1. On the DALI Bus Card for the bus under test set the DIP Switch to
Commissioning Mode 2 (shown circled) with DIP Switch 2 set to On and 1, 3, 4
set to the Off position.
Then press and release the commissioning button (shown boxed). Follow the
steps below to start the test:
• Once Commissioning Mode 2 takes effect, the LEDs on all of the DALI MultiSensors and wallstations on this DALI Bus will blink 5 times rapidly every 5
seconds.
• Verify that all Multi-Sensors and wallstations that should be connected to the
DALI Bus are cycling their LEDs with this mode.
• If the DALI Multi-Sensor’s or wallstation’s LEDs do not blink, recheck
connections; then repeat the test.
If the problem persists for a second time, set the device aside for further
investigation by Fifth Light.
•
If Multi-Sensors and wallstations that are not supposed to be connected to
this DALI Bus are blinking their LED’s recheck all connections to ensure they
are connected to the correct DALI Bus, then repeat the test.
2. To exit Commissioning Mode, press and hold the commissioning button (shown
boxed) until the “Mode” LED turns Off.
NNote: Ensure that the Mode 2 DIP Switch is switched back to Off before entering
another Commissioning Mode.
www.eaton.com/lightingsystems
5
Electrical Contractor System Validation Manual
Production Check List
November 2015
Appendix A
Table 4. DALI Card LED Error Table
Priority
Condition Identified
Status LED Pattern
Caused By
1 (highest)
Critical fault
100ms On, 100ms Off
(periodic)
Non-volatile memory (EEPROM) data error detected
Equipment requires service or replacement
2
Over-voltage condition on DALI Bus
4 short 250ms blinks separated by a
250ms Off time followed by 1750ms Off
(periodic)
An over voltage condition has recently been or is currently being sensed
on the DALI interface circuitry
3
USB communications watchdog time-out
3 short 250ms blinks separated by a
250ms Off time followed by 1750ms Off
(periodic)
Interval between receiving two valid USB commands exceeded watchdog
timer interval
4
DALI Bus fault
2 short 250ms blinks separated by a
250ms Off time followed by 1750ms Off
(periodic)
DALI Power Supply absent on DALI Bus device holding DALI Bus in active
state
DALI Bus held in a sustained active state by short circuit fault on DALI
Bus
5 (lowest)
Normal operation (default)
50ms On, 1950ms Off
(periodic)
No other fault or status conditions to display
Eaton
1000 Eaton Boulevard
Cleveland, OH 44122
United States
Eaton.com
Eaton
Lighting systems
203 Cooper Circle
Peachtree City, GA 30269
www.eaton.com/lightingsystems
© 2015 Eaton
All Rights Reserved
Printed in USA
Publication No. MN503004EN
November 1, 2015
Eaton is a registered trademark.
All other trademarks are property
of their respective owners.


