Experiment 7: Forces and Torques on Magnetic Dipoles
advertisement
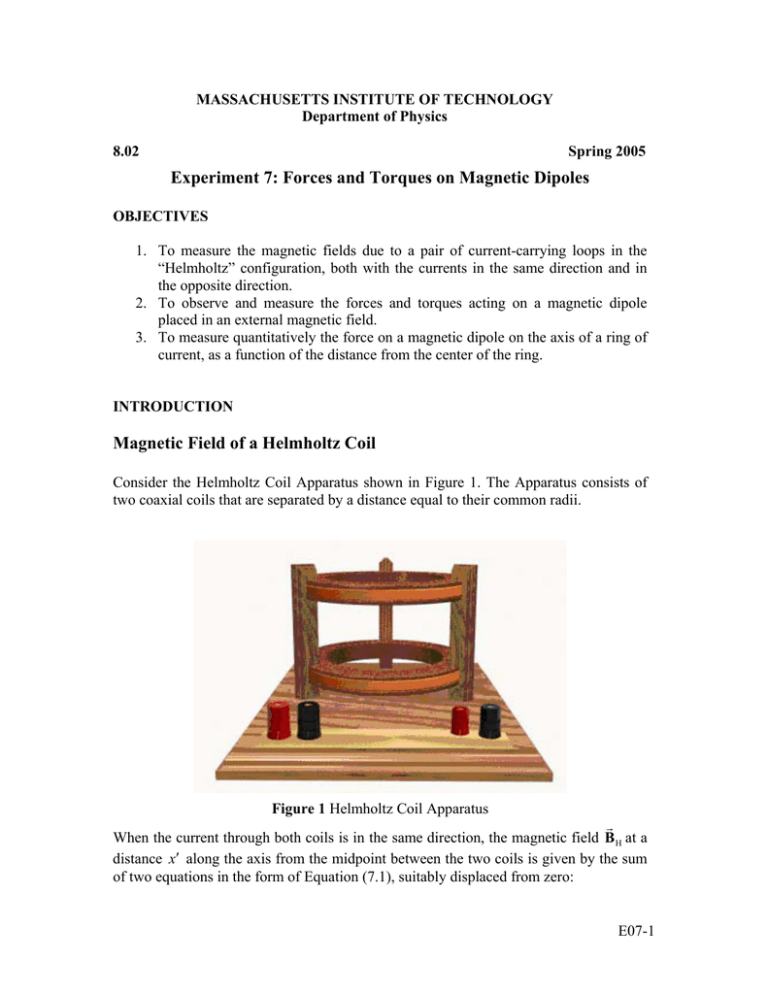
MASSACHUSETTS INSTITUTE OF TECHNOLOGY Department of Physics 8.02 Spring 2005 Experiment 7: Forces and Torques on Magnetic Dipoles OBJECTIVES 1. To measure the magnetic fields due to a pair of current-carrying loops in the “Helmholtz” configuration, both with the currents in the same direction and in the opposite direction. 2. To observe and measure the forces and torques acting on a magnetic dipole placed in an external magnetic field. 3. To measure quantitatively the force on a magnetic dipole on the axis of a ring of current, as a function of the distance from the center of the ring. INTRODUCTION Magnetic Field of a Helmholtz Coil Consider the Helmholtz Coil Apparatus shown in Figure 1. The Apparatus consists of two coaxial coils that are separated by a distance equal to their common radii. Figure 1 Helmholtz Coil Apparatus G When the current through both coils is in the same direction, the magnetic field B H at a distance x′ along the axis from the midpoint between the two coils is given by the sum of two equations in the form of Equation (7.1), suitably displaced from zero: E07-1 G N µ0 I R 2 1 B= x̂ 2 2 (x + R 2 )3/ 2 (7.1) G N µ0 I R 2 1 N µ0 I R 2 1 BH = x̂ + x̂ . 3/ 2 3/ 2 2 2 2 ⎡( x′ − R / 2 ) + R 2 ⎤ ⎡( x′ + R / 2 )2 + R 2 ⎤ ⎣ ⎦ ⎣ ⎦ (7.2) Near the midpoint ( x′ << R ), the above equation can be expanded in a Taylor Series as: G N µ0 I R 2 B H ( x′) = 3/ 2 (5R 2 4) where G ⎡ 6 x ′4 ⎤ ⎡ 6 x ′4 ⎤ +" +"⎥ x̂ = 1+ x̂ B c ⎢1+ ⎢ ⎥ 4 4 ⎣ 5R ⎦ ⎣ 5R ⎦ 3/ 2 G N µ0 I R 2 ⎛ 4 ⎞ N µ0 I x̂ x̂ Bc = = ⎜ ⎟ 3/ 2 R ⎝5⎠ (5R 2 4) (7.3) (7.4) is the value of the magnetic field at the center of the coil configuration ( x′ = 0 ). Notice that in this limit ( x′ R ), the field between the coils is nearly constant. We use this configuration of coils for precisely this reason—it gives us a region where the magnetic field is reasonably constant near the value given in Equation (7.4). The magnetic field along the common axis of the two coils (that is, a plot of Equation (7.2)) is given on the next page in Figure 4 (the black plot labeled “Helmholtz Coil”). Magnetic Field of Two Coils With Helmholtz Spacing but Opposite Currents When the currents through the coils are in the opposite directions, the magnetic field near the midpoint between the coils is nearly zero and is given by the difference of two equations in the form of Equation (7.1), appropriately displaced; that is Equation (7.2) with a minus before one of the terms instead of a plus. This field is plotted in the green plot labeled “Reverse” in Figure 4. Figure 4 also shows the field due to a single coil in the plane x′ = R . As we mentioned above, the calculations given indicate that when current flows in the same direction in the two coils, the resulting magnetic field is nearly uniform in the region near the midpoint between the coils. On the other hand, when currents flow in opposite directions in the two coils, the magnetic field is close to zero in that region. Note that these results assume that the same magnitude of current is flowing in each coil. E07-2 THEORY OF TORQUE AND FORCE ON A DIPOLE When a magnet that is free to move is placed near another fixed magnet, two things may happen; the free magnet may rotate as well as accelerate. In general, the free magnet experiences a torque that produces the rotation and a force that produces the acceleration. This may happen not only when the free magnet is placed near a permanent magnet, but also when the free magnet is near any object that is a source of a magnetic field, such as a current-carrying coil. We want to explore qualitatively the nature of this torque and force, and also measure the force quantitatively. IMPORTANT NOTE: In considering the interactions between magnetic dipoles and current-carrying wires, the greek letter “mu”, µ or µ , is used both for the magnetic moment and for the permeability of the appropriate material, as in µ 0 for the permeability of free space. For the purposes of these instructions, µ 0 , with the subscript “0”, will be used for the permeability of free space, while the erect symbol µ G will be used for the magnitude of a magnetic moment, µ= µ . Figure 2 Apparatus Figure 3 Tower assembly Our experiment uses a magnet sitting in an external magnetic field generated by currents in two coils in the Helmholtz configuration. We have two identical 168-turn coils, each E07-3 with a resistance of approximately 2.8 Ω (Figure 2). The coils are placed parallel to each other, separated by a distance equal to their mean radius R = 7.0 cm . A small, magnetized disk is mounted in a gimbal (so that the magnet is free to rotate about a horizontal axis) and suspended from a spring. The spring is free to move along the symmetry axis of the coils (the x-axis in the above equations) within a transparent tube Figure 3). Along the x-axis, the magnetic field of the coils is parallel to the x-direction and its magnitude is a function of the distance x along the axis: G B( x) = Bx ( x) î . (7.5) G For a planar loop of current, the magnetic dipole moment vector µ is defined in terms of the current I L , the area A of the loop, and the unit vector n̂ perpendicular to the plane of the loop: G G µ ≡ I L A = I L A n̂ (7.6) ( I L is used for the loop current to distinguish from the current in the coils used to generate the external magnetic field). The unit normal vector n̂ points in the direction defined by your right thumb when you curl the fingers of your right hand in the direction of the current in the loop. A permanent magnet also has a magnetic dipole moment. The torque on a small current loop or magnetic dipole placed in a magnetic field is directly related to the strength of the field: G G G τ = µ × B (7.7) G G If the dipole is free to move, it will rotate until µ is parallel to B (see the 8.02 Course Notes, Section 8.4, for a detailed discussion). G The force on the magnet, however, depends NOT on B itself but on the spatial rate of change (gradient) of the component of magnetic field parallel to the dipole moment. (See the 8.02 Course Notes, Solved Problem 8.9.4, for a presentation of a similar but equivalent discussion of this effect.) For this apparatus, we have G ∂B Fdipole = µ x î , ∂x G G since B and µ will point in the x-direction. (7.8) E07-4 FIELDS AND FIELD GRADIENTS FOR THE CONFIGURATIONS WE USE From Equations (7.7) and (7.8) above we see that the toque on a dipole depends on the local value of the magnetic field but the force on a dipole depends on the local spatial gradient of the magnetic field. We will use three different field configurations in this experiment, and here we discuss the field and the gradient of the field along the x -axis for each of these configurations, since these are the relevant quantities that determine the torque and force on the dipole. Figure 4 shows the x -component of the magnetic field for the three configurations we use in this experiment: (1 - red) current in a single (the top) coil; (2 - black) currents flowing in the same direction in the two coils (the “Helmholtz” configuration); and (3 green) currents flowing in opposite directions in the two coils (the “Reverse” configuration). Figure 4: The x-component of the magnetic field and its derivative for configurations, plus the same quantities for a single coil. (“Helmholtz” is current in the both coils flowing in the same direction, “Reverse” is current in both coils flowing in opposite directions). See page the last page of this writeup for an “iron-filings” representation of these three field configurations. E07-5 The salient features of Figure 4 that we will use in this experiment are that: 1. The “Helmholtz” field at the center of the two coils has a large absolute value and zero gradient. Therefore, a magnet place there should feel a large torque but zero force. 2. The “Reverse” field at the center of the two coils is zero, but has a large gradient. Therefore, a magnet placed there should feel zero torque but a large force. 3. For the “One Coil” configuration, the gradient along the axis is well defined and we will in fact measure that gradient (see Figure 7), which we derive analytically below. The Gradient of the Field Along the Axis of One Coil We here derive explicitly the equation for the gradient of the field on the axis of a single coil, since we will be able to measure this gradient directly in this experiment, by measuring the force on the magnet. The magnetic field along the axis of a coil is G N µ 0 I R 2 1 B= î 2 2 (x + R 2 )3/ 2 (7.9) (see the 8.02 Course Notes, Section 9.8, for a derivation of the above result). G If we place a magnetic disk of magnetic moment µ in the field, the force on the disk would be G ∂B 3 µ N I R2 x Fdisk = µ x ˆi = −µ 02 î . 2(x + R 2 )5/ 2 ∂x (7.10) The force is a maximum when the derivative of the x -component of the force is zero: ∂Fdisk , x ∂x = 0. (7.11) We can solve for the location of the maximum force by explicitly calculating this derivative; ∂Fx 3 µ0 N I R 2 ⎡ R 2 − 4x 2 ⎤⎦ = 0 =− µ 2 2 7/2 ⎣ ∂x 2 (x + R ) which implies that the maximum occurs at two points along the x -axis, at x = ± (7.12) R . 2 E07-6 The Gradient For Two Coils with Currents in Opposite Directions We also give, but do not derive, the expression for the gradient of the magnetic field at the center of coils carrying current in the reverse direction (see Figure 4), since we need this to interpret our experimental results below. This gradient is given by dBx dx x=0 3⎛ 4⎞ = ⎜ ⎟ 2⎝ 5⎠ 5/ 2 N µ0 I R2 (7.13) Therefore the force on the dipole when the dipole is placed at the midpoint between the coils in the “Reverse” configuration is non-zero and given by G Fdipole (x) x=0 =µ ∂Bx ∂x 3⎛ 4⎞ î = µ ⎜ ⎟ 2⎝ 5⎠ x=0 5/ 2 N µ0 I µ NI î = µ ( 0.859 ) 0 2 î 2 R R (7.14) SETUP – Measuring the Magnetic Field of the Coils Connecting the Magnetic Field Sensor to the 750 Interface The magnetic field sensor is plugged into the first analog channel “A” of the 750 Interface, as in previous experiments. Figure 5 The top of the magnetic field sensor, showing (from right to left) the RANGE SELECT switch, the TARE button, and the RADIAL/AXIAL switch, which is set to RADIAL E07-7 Remember that the Magnetic Field sensor measures one component of the magnetic field at a time. When the switch is set to AXIAL, the sensor will measure the component of the magnetic field along the axis of the probe, and will give a positive value when the magnetic field is pointing into the white dot on the very end of the probe. When the switch is set to RADIAL, the sensor gives a positive measurement when there is a component of the field perpendicular to the flat surface of the probe oriented into the surface of the probe at the white dot. We will be using both the AXIAL and the RADIAL settings in this experiment. Before you begin the experiment below, make sure the RANGE SELECT switch on the magnetic field sensor is set to 10 × , and the RADIAL/AXIAL switch is set to RADIAL.. Download the Data Studio file exp07.ds from the web page and save it on your desktop. If there is already a file by this name on your desktop, save over it, as it may not be set up properly. Open the file by double clicking on it. Your file has a Graph Display that is already set up to display Magnetic Field Strength versus time. EXPERIMENT Magnetic field of Two N-turn Coils in Helmholtz Configuration Connect the upper and lower coil to the DC power supply so that the coils are connected in series with the current flowing in the same direction through the coils. This will mean connecting the red post from one coil to the black post of the other. Adjust the power supply so that the voltage is 1.5 V and the current is approximately 0.30 A . Note that this is now half the current as in the first part (part A) of this experiment (why is this?), so to compare with the graphs in Figure 4, which always assume the same current, you must make appropriate allowances. Use the AXIAL setting of your Hall (Magnetic) Probe Sensor to measure the magnetic field along the axis of the coils. Use the AXIAL setting of your Magnetic Probe Sensor (commonly known as a “Hall Probe”) to measure the magnetic field along the axis of the coils. Start the probe at the bottom of the Helmholtz coil (in the wooden hole there) and move the probe upward as you take data. Start taking data by clicking the Start button. Try to move the probe upward with as uniform a velocity as possible, moving the probe as far above the upper coil as you started below the upper coil (roughly the coil radius). Your results will be displayed on the DataStudio graph. You may find that it’s hard to do all that’s needed simultaneously. Try having one group member start the data sampling while another moves the probe. After some practice, you might get a smoother graph. Question 1 (answer on your tear-sheet at the end): Does this graph look like the appropriate graph in Figure 4? E07-8 Magnetic field of Two N-turn Coils with Currents in Opposite Directions Connect the upper and lower coil to the power supply so that the coils are connected in series with the current flowing in opposite directions through each coil. Adjust the power supply so that the voltage is 1.5 V and the current is approximately 0.30 A . Use the AXIAL setting of your Hall (Magnetic) Probe Sensor to measure the magnetic field along the axis of the coils. Question 2 (answer on your tear-sheet at the end): Does this graph look like the appropriate graph in Figure 4? Torque and Force on a Magnetic Dipole in a Uniform Magnetic Field - Qualitative Check that the disk magnet is free to rotate within the gimbal mount before beginning. If you have to remove the spring and magnet from the tower, be very careful with the spring. Connect the DC power supply to the coils so that they are connected in series with the current flowing in the same direction in both coils – the Helmholz configuration. (This will mean connecting the red post from one coil to the black post of the other.) As you have seen in the first part of this experiment, this configuration of coils produces a very uniform field between the coils (see Figure 4). Turn on the power supply and increase both the current and voltage knobs until the voltage is about 6 V and then reduce the current knob until the current reading reaches 1A . (As you reduce the current, the voltage will also drop, reaching about 4.8 V .) Warning: do not let the current exceed 3 A or you may damage the coils. Turn off the power supply. Next, place the center of the disk magnet at the midpoint between the coils (marked x = 0 on the scale). Use the bar magnet on the table to randomly align the disk magnet. Now turn on the power supply. Question 3 (answer on your tear-sheet at the end): Did the disk magnet rotate? (Was there a torque on the magnet?) Question 4 (answer on your tear-sheet at the end): Did the spring stretch or compress? (Was there a force on the magnet?) Note the alignment of the magnet at the end of this trial. Is its North pole up or down? Turn off the power supply, and then reverse the connections to it, which causes the current to reverse in both coils. What do you expect will happen when you turn on the power supply? Turn on the power supply and see. E07-9 Question 5 (answer on your tear-sheet at the end): What happened to the orientation of the magnet when you changed the current direction in the coils in the Helmholtz configuration? Torque and Force On A Magnetic Dipole in a Non-Uniform Magnetic Field While you will have to take the data yourself, by reading the output of the DC power supply and the scales on the transparent plastic tube, the data analysis will be done in the Excel worksheet exp07.xls. Download this Excel spreadsheet from the "Current Assignment" page and save it on your desktop. Open it from your desktop. Turn off the power supply and reverse the connections to one of the coils. The coils will still be connected in series but now the currents in the coils will be flowing in opposite directions. Leave the DC power supply off for now. You should realize that the magnetic field between the coils is NOT uniform in this “Reverse” current arrangement (see Figure 4). At x = 0 , the magnetic field must be zero since the fields of the coils are oppositely directed, and field reverses direction as the x = 0 plane is crossed (Figure 4). Place the magnetic disk at x = 0 the midpoint between the disks where Bx ( x) x =0 = 0 . What do you expect to happen when the current is turned on? Turn on the current and check your prediction. Question 6 (answer on your tear-sheet at the end): Did the disk magnet rotate? (Was there a torque on the magnet?) Question 7 (answer on your tear-sheet at the end): Did the spring stretch or compress? (Was there a force on the magnet?) Lower the disk magnet to the base of the tower and then raise it very slowly until the disk is well past the center ( x = 0 ). Observe the behavior of the dipole carefully. Question 8 (answer on your tear-sheet at the end): Describe what happened. Question 9 (answer on your tear-sheet at the end): Why did this happen? Measuring the Dipole Moment of our Disk Magnet You will now measure the dipole moment of your magnet. Leave the coils connected as above, that is, with current running in opposite directions in the coils. Remove the cap, spring and magnet to prepare them for the measurement. Be very careful with the spring. Orient the magnet so that its North pole points down inside the gimbal and tape the magnet in place so that the magnet cannot rotate about its horizontal axis, but is still free to move vertically inside the tube. E07-10 While the apparatus is disassembled, calibrate the spring so that you can calculate the force acting on the spring by measuring its elongation. To do this, hang three one-gram ball bearings (provided) on the magnet and measure the elongation ∆L produced. Be careful not to over-stretch the spring, which could permanently damage the spring, which is somewhat fragile. Enter your measurements into the appropriate boxes in the spreadsheet exp07.xls, which will then determine k = F / ∆L (7.15) in SI units, newtons per meter. Replace the cap assembly on the apparatus. Now, place the disk magnet at the center position (x = 0) between the coils. The goal is to measure the force on the dipole produced by various currents (but not to exceed 3A !), and then use equation (7.14) above to deduce the magnitude of the dipole moment of the magnet. Turn on the power supply and adjust the current to the desired value, to begin with around 2.5 A . Then, with the power on and the current flowing position the magnet at the midpoint between the two coils. Record the current I. Then turn off the power supply and record the position x of the magnet. Repeat this same procedure with currents around 2.0 A , 1.5 A and 1.0 A . In the spreadsheet, enter your data in the table provided. The force corresponding to the position will be calculated, using your value of the spring constant determined previously, and the force as a function of current plotted. You should see a plot that looks the plot on the next page, Figure 6. The force on the magnet is given by Equation (7.14). With N = 168 and R = 0.07 m , we have G Fdisk (x) x =0 =µ ∂Bx ∂x T ⎞ ⎛ î = µ ⎜ 0.0370 ⎟ I î A⋅m ⎠ ⎝ x =0 (7.16) The force is predicted to be directly proportional to the current in the coil, which means that your graph ought to be a straight line. The slope of the best-fit straight line will be computed and the magnetic moment found from µ= slope A ⋅ m . 0.0370 T (7.17) E07-11 Question 10 (answer on your tear-sheet at the end): What is your measured value for µ in SI units? Figure 6 Force as a function of current for the reverse current configuration for the magnet at the midpoint between the two coils. Force on a Dipole On The Axis Of A Single Coil The goal here is to measure the force on the dipole at different positions above the coil while the current remains constant. According to equation (7.8), measuring the force is the same as a measurement of the gradient of the magnetic field along the axis, and we know theoretically what that gradient should be from equation (7.9). Leave the magnet taped in place in the gimbal as above. Remove the connections to the bottom coil so that current now flows only through the upper coil. Place the disk magnet above the upper coil, a centimeter or so. Set the DC power supply set for 1A and turn on the power supply. If the magnet is not attracted to the coil, reverse the connections to the power supply. You will now leave the current at a constant value of around 1A for the all the measurements below. With the power supply turned on, position the disk magnet 1 cm above the center of the top coil, and record that position as x f in your spreadsheet. You record this by using the scale on the plastic tube. Note that this scale is zero at the midpoint between the two coils, so your reading should be 4.5 cm when the magnet is 1 cm above the center of the top coil. Then turn off the power supply and record the new position of the magnet as E07-12 x0 in your spreadsheet. The Height above the center of the top coil ( x f − 3.5cm ) is computed by your spreadsheet, as well as the Elongation x0 − x f . Now repeat this procedure for six more values of x f (5.5 cm, 6.5 cm, 7.5 cm, 8.5 cm, 9.5 cm, and 10.5 cm). The spreadsheet will give a graph of the Elongation as a function of Height. Since the elongation of a spring is directly proportional to the magnitude of the spring force, and hence the magnetic force, this graph shows the force on the magnet as a function of distance from the coil. You should get a graph that looks something like Figure 7. In Figure 7, we have also put in a theoretical curve for what we expect to measure, using equation (7.10), with the sign reversed. The agreement is excellent. Force vs Distance 0.8 0.7 Displacement (cm) 0.6 0.5 Theory 0.4 Measured 0.3 0.2 0.1 0 1 2 3 4 5 6 7 Distance from center (cm) Figure 7 Displacement of the hanging magnet (which is proportional to the force on it) as a function of the magnet distance above the center of the top coil. Question 11 (answer on your tear-sheet at the end): From your graph, determine the distance (in cm) along the x -axis where the force is a maximum. Question 12 (answer on your tear-sheet at the end): How does the theoretical result of R x = ± for the maximum force magnitude (see Equation (7.12)) compare to your 2 experimental result? E07-13 One Coil Helmholtz Reverse E07-14 MASSACHUSETTS INSTITUTE OF TECHNOLOGY Department of Physics 8.02 Spring 2005 Experiment Summary 7: Forces and Torques on Magnetic Dipoles Group and Section __________________________ (e.g. 10A, L02: Please Fill Out) Names ____________________________________ ____________________________________ ____________________________________ Magnetic field of Two N-turn Coils in Helmholtz Configuration Question 1: Does your graph of the field along the axis look like the appropriate graph in Figure 4? Magnetic field of Two N-turn Coils with Currents in Opposite Directions Question 2: Does your graph of the field along the axis look like the appropriate graph in Figure 4? Torque and Force on A Magnetic Dipole in a Uniform Magnetic Field Question 3: Did the disk magnet rotate? (Was there a torque on the magnet?) Question 4: Did the spring stretch or compress? (Was there a force on the magnet?) Question 5: What happened to the orientation of the magnet when you changed the current direction in the coils in the Helmholtz configuration? Torque and Force On A Magnetic Dipole in a Non-Uniform Magnetic Field Question 6: Did the disk magnet rotate? (Was there a torque on the magnet?) Question 7: Did the spring stretch or compress? (Was there a force on the magnet?) E07-15 Question 8: Describe what happened when you moved the magnet past the midpoint of the two coils with the current in the “Reverse” configuration. Question 9: Why did this happen? Measuring the Dipole Moment of Your Disk Magnet Question 10: What is your measured value for µ in SI units? _________________________ Force on a Dipole on the Axis of a Single Coil Question 11: From your graph, determine the distance (in cm) along the x -axis where the force is a maximum __________________________ R for the maximum force 2 magnitude (see Equation (7.12)) compare to your experimental result? Question 12: How does the theoretical result of x = ± E07-16

