DO YOU WANT TO USE THE SORVALL RC60 ULTRACENTRIFUGE?
advertisement
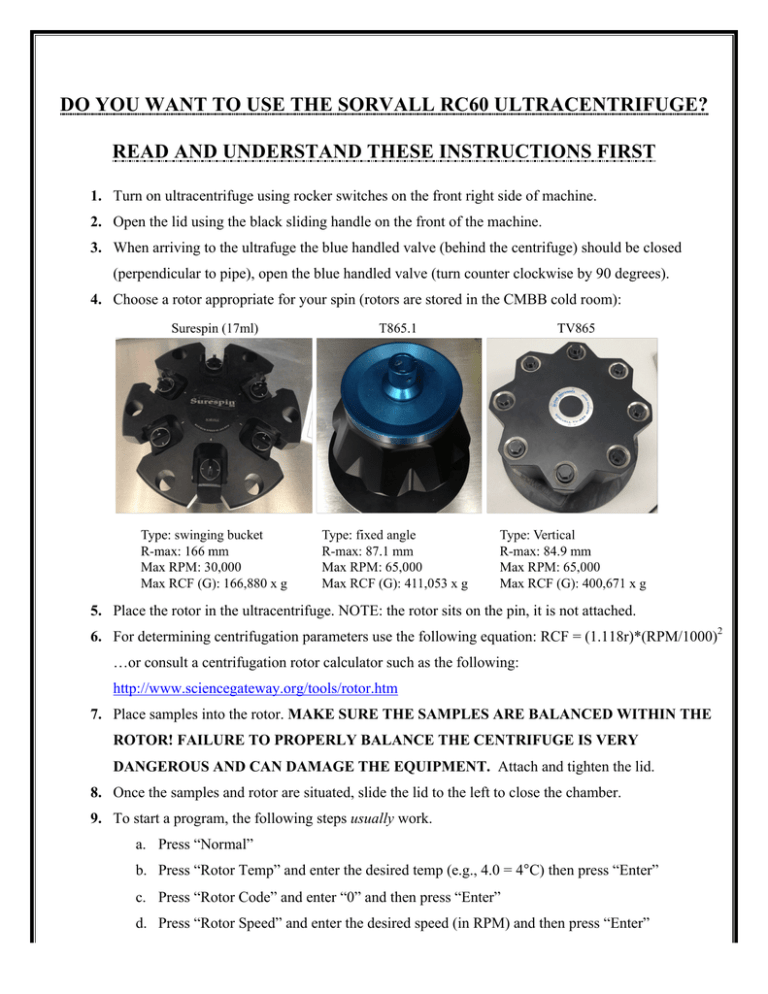
DO YOU WANT TO USE THE SORVALL RC60 ULTRACENTRIFUGE? READ AND UNDERSTAND THESE INSTRUCTIONS FIRST 1. Turn on ultracentrifuge using rocker switches on the front right side of machine. 2. Open the lid using the black sliding handle on the front of the machine. 3. When arriving to the ultrafuge the blue handled valve (behind the centrifuge) should be closed (perpendicular to pipe), open the blue handled valve (turn counter clockwise by 90 degrees). 4. Choose a rotor appropriate for your spin (rotors are stored in the CMBB cold room): 5. Place the rotor in the ultracentrifuge. NOTE: the rotor sits on the pin, it is not attached. 6. For determining centrifugation parameters use the following equation: RCF = (1.118r)*(RPM/1000)2 …or consult a centrifugation rotor calculator such as the following: http://www.sciencegateway.org/tools/rotor.htm 7. Place samples into the rotor. MAKE SURE THE SAMPLES ARE BALANCED WITHIN THE ROTOR! FAILURE TO PROPERLY BALANCE THE CENTRIFUGE IS VERY DANGEROUS AND CAN DAMAGE THE EQUIPMENT. Attach and tighten the lid. 8. Once the samples and rotor are situated, slide the lid to the left to close the chamber. 9. To start a program, the following steps usually work. a. Press “Normal” b. Press “Rotor Temp” and enter the desired temp (e.g., 4.0 = 4°C) then press “Enter” c. Press “Rotor Code” and enter “0” and then press “Enter” d. Press “Rotor Speed” and enter the desired speed (in RPM) and then press “Enter” e. Press “Time” and enter “desired time” and then press “Enter” (e.g., 0.1 = 10 mins; 1.0 = 1 hr; 1.25 = 1 hr 25 mins, etc.) f. Cross your fingers (both hands) then press “Start” 10. Once the centrifugation run initiates, you should hear the vacuum pump kicking in. The rotor will start slowly and it may take several minutes for the rotor to reach the desired speed. Be patient. The display showing the vacuum should move toward the right. If it doesn’t hold a vacuum and/or the rotor doesn’t start spinning, or if it displays a start-up failure, remember the old saying “If at first you don’t succeed….try, try again.” The following strategies often are successful: a. Allow the run to stop, then release the vacuum by depressing the “stop” button, open the chamber fully then close the chamber and start again at step #9. b. Allow the run to stop, then release the vacuum by depressing the “stop” button, open the chamber fully, power off the ultracentrifuge wait 30 seconds and power it back on again, start again at step #9. c. Pray to the centrifuge gods. 11. When the program is complete, and the rotor is done spinning (this may take a while), press “Stop,” at which time the vacuum will release and then you can open the door to remove your samples. 12. Power off the ultracentrifuge. Leave the lid slightly open so it can air out. 13. Turn the blue handled valve to the off position (90 degrees clockwise). 14. Record info about the run in the instrument log book. 15. Inspect the rotor and centrifuge chamber. If you make a spill, clean out the sample from the rotor and/or chamber. If there has been a spill in the rotor, clean the rotor with soap and water, allow to dry and then return the rotor to the cold room. If you have any questions about the operation of this instrument, please ask your research mentor or contact Dr. Liepman (aliepman@emich.edu)
