Document 12861431
advertisement
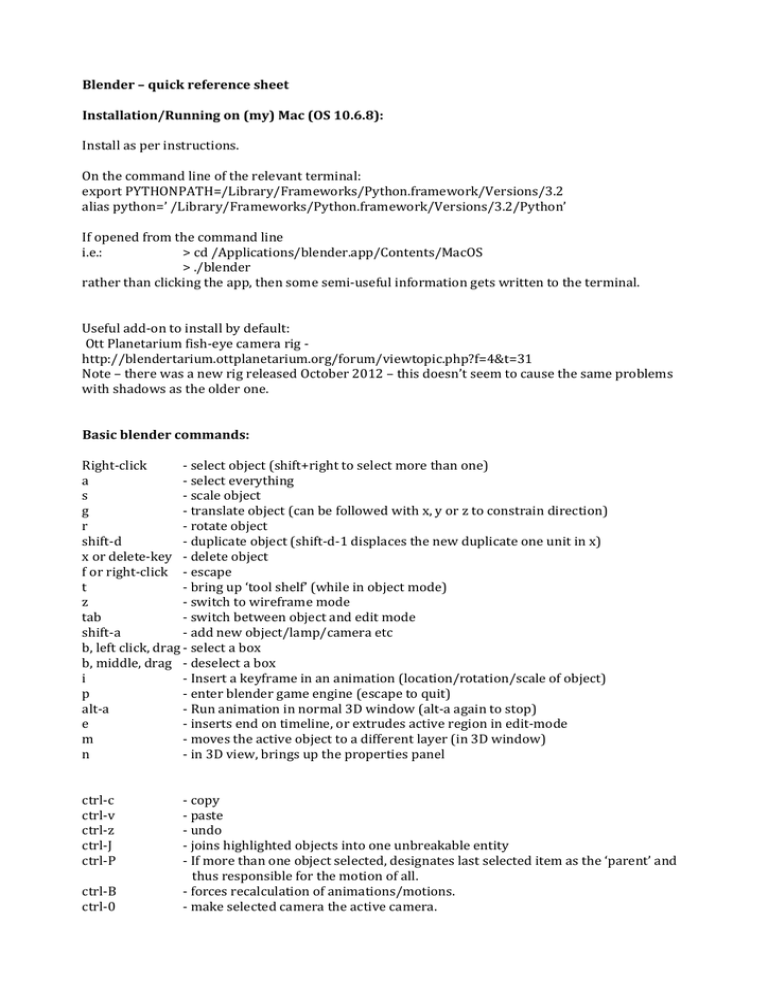
Blender – quick reference sheet Installation/Running on (my) Mac (OS 10.6.8): Install as per instructions. On the command line of the relevant terminal: export PYTHONPATH=/Library/Frameworks/Python.framework/Versions/3.2 alias python=’ /Library/Frameworks/Python.framework/Versions/3.2/Python’ If opened from the command line i.e.: > cd /Applications/blender.app/Contents/MacOS > ./blender rather than clicking the app, then some semi-­‐useful information gets written to the terminal. Useful add-­‐on to install by default: Ott Planetarium fish-­‐eye camera rig -­‐ http://blendertarium.ottplanetarium.org/forum/viewtopic.php?f=4&t=31 Note – there was a new rig released October 2012 – this doesn’t seem to cause the same problems with shadows as the older one. Basic blender commands: Right-­‐click -­‐ select object (shift+right to select more than one) a -­‐ select everything s -­‐ scale object g -­‐ translate object (can be followed with x, y or z to constrain direction) r -­‐ rotate object shift-­‐d -­‐ duplicate object (shift-­‐d-­‐1 displaces the new duplicate one unit in x) x or delete-­‐key -­‐ delete object f or right-­‐click -­‐ escape t -­‐ bring up ‘tool shelf’ (while in object mode) z -­‐ switch to wireframe mode tab -­‐ switch between object and edit mode shift-­‐a -­‐ add new object/lamp/camera etc b, left click, drag -­‐ select a box b, middle, drag -­‐ deselect a box i -­‐ Insert a keyframe in an animation (location/rotation/scale of object) p -­‐ enter blender game engine (escape to quit) alt-­‐a -­‐ Run animation in normal 3D window (alt-­‐a again to stop) e -­‐ inserts end on timeline, or extrudes active region in edit-­‐mode m -­‐ moves the active object to a different layer (in 3D window) n -­‐ in 3D view, brings up the properties panel ctrl-­‐c -­‐ copy ctrl-­‐v -­‐ paste ctrl-­‐z -­‐ undo ctrl-­‐J -­‐ joins highlighted objects into one unbreakable entity ctrl-­‐P -­‐ If more than one object selected, designates last selected item as the ‘parent’ and thus responsible for the motion of all. ctrl-­‐B -­‐ forces recalculation of animations/motions. ctrl-­‐0 -­‐ make selected camera the active camera. ctrl-­‐alt-­‐0 -­‐ move active camera to current viewing angle (note should be in perspective) ctrl-­‐alt-­‐q -­‐ in 3D mode, gives you a quad view Cursor controls: Shift+C -­‐ Move cursor to origin Shift+S-­‐>Cursor to Grid -­‐ snaps the cursor to the grid View menu-­‐>View Properties -­‐ lets you type in the exact position C -­‐ center view around cursor Views: Centre-­‐click+drag manipulates the view in real time, can use shift-­‐centre-­‐drag to change rotation of view. Number pad (not numbers in row at top) manipulates 3D view 0 -­‐ camera view 7 -­‐ top view (x vs y) 5 -­‐ flat (not perspective view), escape to leave 3 -­‐ side view (y vs z) 1 -­‐ side view (x vs z) In wireframe mode (accessed with z): t – brings up toolbox, can increase number of rows/segments in sphere or turn shading smooth In edit mode (accessed with tab): Select edges or faces, then e to extrude Modes: Object mode -­‐ edits whole objects Edit mode -­‐ vertices, faces and edges Window mode: 3D -­‐ works well for basic point and click manipulation scripting -­‐ good for python, replace one editor with a ‘timeline’ for animation, or with ‘Info’ Manipulating Cameras: “Lock camera to view” can be set in the properties tab (n) when in camera-­‐view mode (0). The camera focal length can be set in its properties editor and acts as a zoom mode. ctrl-­‐alt-­‐0 moves the active camera to current viewing angle (note should be in perspective) “rotate around selected object” can be set in the camera preferences. Properties Editor: Appears on the right in a standard setup, looking like this: From left to right, the boxes are for Render -­‐ output of final, can set image size, frame rate, file format etc. Shortcut for this is F5 Scene – look at components including objects, cameras, lamps etc. Can change active camera. World – Object – Constraints – Modifiers – Wireframe properties – Materials – “diffuse” affects the base colour, “specularity” affects the shine, “transparency” can be set with a tick box Textures – Can select an image or an inbuilt texture. To wrap a flat image around a sphere, select cords=”generated” and mapping=”sphere” Particles – Physics When selected object is a lamp, a new box appears in place of materials and wireframe. Colour, energy and shapes of lamps can be altered in this tab Basic Animation (Timeline Editor): An object moves smoothly between keyframes on a timeline. -­‐ i inserts the keyframe (set for location, rotation or scale) -­‐ left-­‐click to set position on timeline -­‐ g moves objects to the frame you’ve clicked on in the timeline -­‐ e sets an end frame in the timeline -­‐ m sets a ‘marker’ on a frame (these can be renamed via ‘marker’ dropdown menu on dope sheet or by pressing ctrl-­‐m with the marker selected) -­‐ With marker selected, and camera selected, pressing ctrl-­‐B in timeline binds the two. The “dope sheet” editor lets you manipulate keyframes and the like Useful tutorials: http://cgcookie.com/blender/get-­‐started-­‐with-­‐blender/ -­‐ “Getting Started with Blender”, 7 short tutorials, worth working through first. http://vimeo.com/40896996 -­‐ “Simple Earth” -­‐ how to make, material and texture a simple Earth Model http://zomobo.net/play.php?id=1OePNW34-­‐z4 -­‐ “Writing a Python Script that Creates a Simple 3D Model” – basic scripting, note that the bottom right window in scripting view should be set to ‘info’ in Blender 3.6 http://www.youtube.com/watch?v=rb-­‐yYkTJFao -­‐ silent tutorial on how to set up a simple circular orbit by shifting the rotation centre. http://www.youtube.com/watch?v=R2lNjLZgq_A -­‐ interesting thoughts on how to do the sun from about 7min in http://www.youtube.com/watch?v=BICquCXfX14 -­‐ “physics in Blender” (2.5) – shows how to make a set of falling dominos. http://en.wikibooks.org/wiki/Blender_3D:_Noob_to_Pro -­‐ good, text-­‐based tutorial http://cgcookie.com/blender/2012/05/02/creating-­‐a-­‐tornado-­‐in-­‐blender-­‐with-­‐particles-­‐and-­‐the-­‐ smoke-­‐simulator/ -­‐ good tutorial for handling particles and smoke. http://www.youtube.com/watch?v=ZbMe3z7YWEs -­‐ Blender 2.6 Tutorial 28 -­‐ Essential Camera Tips (x5) Webpages for reference and resources: Forum for planetarium developers -­‐ http://blendertarium.ottplanetarium.org/forum Image textures should be in a 2-­‐1 ratio for spheres (360 around equator, 180 pole to pole) http://svs.gsfc.nasa.gov/vis/a000000/a003800/a003895/index.html -­‐ star maps http://earthobservatory.nasa.gov/Features/BlueMarble/BlueMarble_monthlies.php -­‐ Earth textures http://visibleearth.nasa.gov/view_cat.php?categoryID=1484 -­‐ Earth textures http://planetpixelemporium.com/sun.html -­‐ sun and planet textures http://www.nasa.gov/multimedia/3d_resources/images.html -­‐ wraps for other planets http://www.planetaryvisions.com/Texture_map.php?pid=36 -­‐ Paid website, including uranus, and planetary textures more generally, but low res for free, and only half of mercury http://library.thinkquest.org/27626/ -­‐ planetary textures http://svs.gsfc.nasa.gov/Gallery/index.html has a lot of useful imagery generally. http://www.nasa.gov/multimedia/3d_resources/models.html -­‐ Models of spacecraft/astronauts suitable for importing into Blender Simple Exercises: To create planet Earth (http://vimeo.com/40896996): 1) in 3D view shift-­‐a to insert-­‐> mesh -­‐> uvsphere 2) t to bring up toolbar on left (if not present); set “shading” to “Smooth” 3) In right hand properties bar, select “material”, click “new” 4) Still in “material” set Specular-­‐> Intensity to 0.0 5) In right hand properities bar, select “texture”, click “new” 6) Under ‘Type’ set “Image or Movie” 7) Go to http://earthobservatory.nasa.gov/Features/BlueMarble/BlueMarble_monthlies.php 8) Find an image you like and download it. 9) Still in the textures tab, find ‘Image’ and click the “Open” button 10) Select your image 11) Under “Mapping”, set “Projection” to “Sphere” To set it in simple, circular orbit around the ‘World’ origin (in x, y plane): 1) Select ‘planet’ or other object 2) Move it to desired start of orbit (not on origin) 3) Press shift-­‐c to move cursor to origin 4) On the ‘3D’ task bar (bottom of main view screen’ click on the ‘Object’ menu 5) Select Transform -­‐> Origin to 3D cursor 6) On timeline, check current frame is 0 7) In the properties panel, under the ‘object’ tab, check the rotation is 0,0,0 8) Insert keyframe (i) either as LocRot or LocRotScale 9) Go to end of video sequence (or desired frame) 10) Change the rotation to 0,0,360 11) Insert keyframe 12) Press play button. To add a fish-­‐eye camera to an existing scene 1) go to file-­‐> append 2) Browse to <path>/fisheyeCamera-­‐b26x.blend/Object 3) Select all three components beginning with 00 4) Enter. To put a texture on the inside of a sphere: 1) See planet Earth above 2) In Edit mode (accessed via tab), look at the left-­‐hand toolbox (accessed with t) 3) Under ‘Normals’ click ‘Flip Direction’ 4) Normal direction can be seen in edit mode. Click the + symbol on the right hand side of the 3D view. Under ‘Mesh Display’ there are click boxes for ‘Normals’. Scripting Basics: There’s a ‘Scripting’ view available from the ‘Info’ editor. This brings up a text editor, a 3D view and a console editor (and possibly something else), as well as the properties and layout editors, and an info window stretched across the top (drag the bottom edge of this to expand it if so desired). New editors can be opened and merged by clicking and dragging on the lower left corner. It’s useful to have either an info or a timeline editor open depending on what you’re doing. When the Gui is used to perform simple actions, the Python equivalent appears in the ‘Info’ editor. This is not true for complex operations which might otherwise lack arguments. The ‘Text’ editor can be used either to create a new programme file, or to open an existing one (menus -­‐> Text -­‐> Open Text Block, or Alt-­‐O). Once a programme script is open, it can also be run from this window (click on ‘Run Script’). If editing the programme file outside the ‘Text’ editor, a red symbol will occur inviting you to reload the file from disk. Begin a programme file with #!BPY import bpy in order to set the Blender Python environment, and import the appropriate package. Basic operations in Blender python are part of the bpy.ops package. They simply return a statement ‘finished’ rather than a python object. Examples include (add a sphere, shrink it, and make it smooth): bpy.ops.mesh.primitive_uv_sphere_add(segments=32, ring_count=16, size=1, location=(0, 0, 0), rotation=(0, 0, 0)) bpy.ops.transform.resize(value=(0.5, 0.5, 0.5), constraint_axis=(False, False, False),) bpy.ops.object.shade_smooth() Information about the objects themselves is contained in a python directory structure The objects in a scene are in bpy.data.objects. A shortcut to the currently active object is stored in bpy.context.active_object. Each object has a long list of attributes and sub-­‐attributes, which can be modified either by bpy.ops operations or by direct editing. So, a simple programme to set up the solar system looks like: #!BPY import bpy import math import mathutils # ******************************************************************************** # Create sphere to represent the Sun -­‐ if to same scale as planets, it would reach almost to the orbit of Mars! bpy.ops.mesh.primitive_uv_sphere_add(segments=32, ring_count=16, size=0.5, location=(0, 0, 0), rotation=(0, 0, 0)) bpy.ops.object.shade_smooth() Oursun=bpy.context.active_object #Retain a label to this sphere for later use # ******************************************************************************** # Create other planets (and retain a label for them in ‘planets’) names=['mercury','venus','earth','mars','jupiter','saturn','uranus','neptune'] pos=[1.00,1.87,2.58,3.94,13.44,24.68,49.58,77.78,102.] # Scaled so Mercury orbit is 1 unit size=[0.038,0.095,0.1,0.053,1.12,0.94,0.40,0.39] # Scaled so Earth is 0.1 orbit in radius planets=names for n,plan in enumerate(names): bpy.ops.mesh.primitive_uv_sphere_add(segments=32, ring_count=16, size=size[n], location=(pos[n], 0, 0), rotation=(0, 0, 0)) bpy.ops.object.shade_smooth() planets[n] = bpy.context.active_object # ******************************************************************************** # Now orbits (set up to orbit for a number of earth years, with a number of frames per earth year) # Angle through which the planets move in one earth orbit (in radians). Given by 2*!pi/period (in earth years) ang=mathutils.Vector([26.0713,10.2166,6.28319,3.34212,0.529780,0.212055,0.0741379,0.0377822]) frame=120. # Number of frames in one earth year years=5. # Number of Earth years to create frames for. ang2=ang*years frame2=frame*years for n,plan in enumerate(planets): bpy.ops.object.select_all() # Clear selection to make sure no objects are active bpy.ops.object.select_all() obj1=planets[n] # Pick object from list we made earlier bpy.context.scene.objects.active = obj1 # Set that object as ‘active’ bpy.context.scene.cursor_location = [0,0,0] # Move cursor to 0,0,0 bpy.ops.object.origin_set(type='ORIGIN_CURSOR') # Move object centre of rotation to cursor # Now set the rotation at the first frame to zero, and at the end frame to an appropriate value obj1.rotation_euler=[0,0,0] obj1.keyframe_insert(data_path="rotation_euler", frame=1.0) obj1.rotation_euler=[0,0,ang2[n]] obj1.keyframe_insert(data_path="rotation_euler", frame=frame2) In this, the orbit periods and radii are to scale against one another, and the planet radii are to scale against one another, but (i) the planet sizes aren’t scaled against the orbit radii and (ii) the orbits are circular, with the Sun at the focus. There is no true gravity. Angles in bpy are in radians, while in the GUI they’re in degrees. Mac Install issue – need package ‘Numpy’: Modified from http://bilgibots.wikispaces.com/Installing+Blender+with+Numpy+on+Mac+OS+X+Lion 1. Download and install Python 3.2 2. Download and install Blender 3. Download numpy source tar ball 4. Open the numpy tarball and cd into it. 5. Run the following commands 1. python3 setup.py build 2. sudo python3 setup.py install 6. Copy your built numpy folder to Blender's scripts/addons/modules folder as: cp -­‐r /Library/Frameworks/Python.framework/Versions/3.2/lib/python3.2/site-­‐ packages/numpy /Applications/blender.app/Contents/MacOS/2.63/scripts/addons/modules/ 7. Numpy complains about unittest, so move that module also as: cp -­‐r /Library/Frameworks/Python.framework/Versions/3.2/lib/python3.2/unittest /Applications/blender.app/Contents/MacOS/2.63/scripts/addons/modules/
