For Con-Tech Lighting Non-Magenic Metal Puck Lights: LV2-6 Series
advertisement
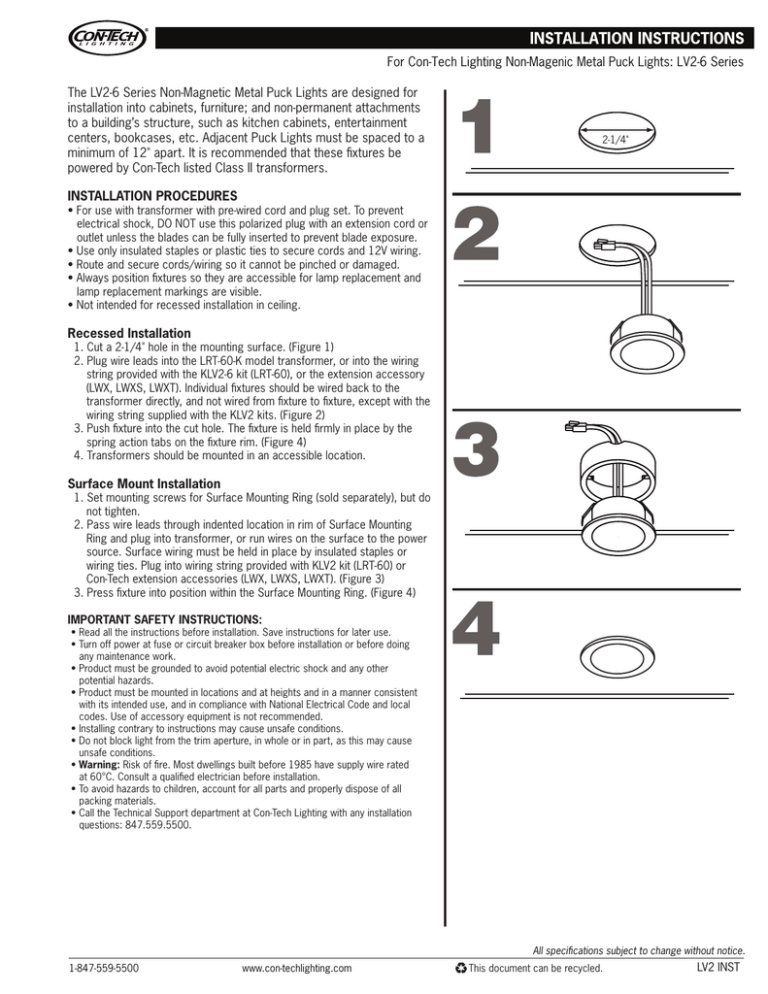
For Con-Tech Lighting Non-Magenic Metal Puck Lights: LV2-6 Series The LV2-6 Series Non-Magnetic Metal Puck Lights are designed for installation into cabinets, furniture; and non-permanent attachments to a building’s structure, such as kitchen cabinets, entertainment centers, bookcases, etc. Adjacent Puck Lights must be spaced to a minimum of 12" apart. It is recommended that these fixtures be powered by Con-Tech listed Class II transformers. 2-1/4" INSTALLATION PROCEDURES • For use with transformer with pre-wired cord and plug set. To prevent electrical shock, DO NOT use this polarized plug with an extension cord or outlet unless the blades can be fully inserted to prevent blade exposure. • Use only insulated staples or plastic ties to secure cords and 12V wiring. • Route and secure cords/wiring so it cannot be pinched or damaged. • Always position fixtures so they are accessible for lamp replacement and lamp replacement markings are visible. • Not intended for recessed installation in ceiling. Recessed Installation 1. Cut a 2-1/4" hole in the mounting surface. (Figure 1) 2. Plug wire leads into the LRT-60-K model transformer, or into the wiring string provided with the KLV2-6 kit (LRT-60), or the extension accessory (LWX, LWXS, LWXT). Individual fixtures should be wired back to the transformer directly, and not wired from fixture to fixture, except with the wiring string supplied with the KLV2 kits. (Figure 2) 3. Push fixture into the cut hole. The fixture is held firmly in place by the spring action tabs on the fixture rim. (Figure 4) 4. Transformers should be mounted in an accessible location. Surface Mount Installation 1. Set mounting screws for Surface Mounting Ring (sold separately), but do not tighten. 2. Pass wire leads through indented location in rim of Surface Mounting Ring and plug into transformer, or run wires on the surface to the power source. Surface wiring must be held in place by insulated staples or wiring ties. Plug into wiring string provided with KLV2 kit (LRT-60) or Con-Tech extension accessories (LWX, LWXS, LWXT). (Figure 3) 3. Press fixture into position within the Surface Mounting Ring. (Figure 4) IMPORTANT SAFETY INSTRUCTIONS: • Read all the instructions before installation. Save instructions for later use. • Turn off power at fuse or circuit breaker box before installation or before doing any maintenance work. • Product must be grounded to avoid potential electric shock and any other potential hazards. • Product must be mounted in locations and at heights and in a manner consistent with its intended use, and in compliance with National Electrical Code and local codes. Use of accessory equipment is not recommended. • Installing contrary to instructions may cause unsafe conditions. • Do not block light from the trim aperture, in whole or in part, as this may cause unsafe conditions. • Warning: Risk of fire. Most dwellings built before 1985 have supply wire rated at 60°C. Consult a qualified electrician before installation. • To avoid hazards to children, account for all parts and properly dispose of all packing materials. • Call the Technical Support department at Con-Tech Lighting with any installation questions: 847.559.5500. All specifications subject to change without notice. 1-847-559-5500 www.con-techlighting.com This document can be recycled. LV2 INST
