Using your homemade touchpad
advertisement

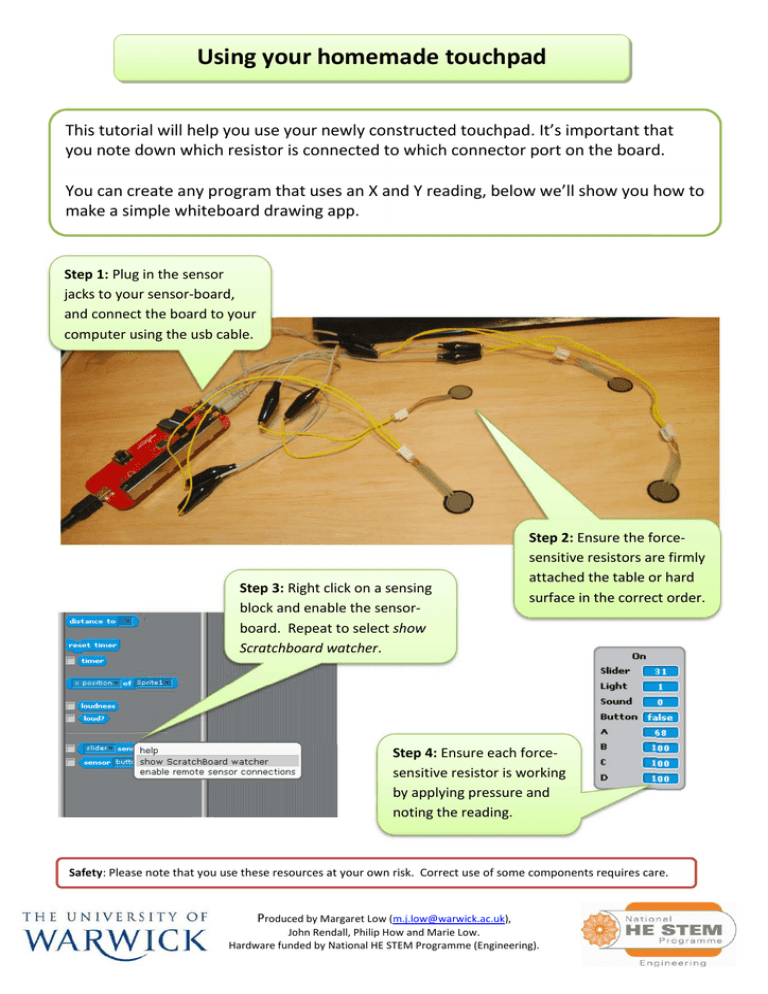
Using your homemade touchpad This tutorial will help you use your newly constructed touchpad. It’s important that you note down which resistor is connected to which connector port on the board. You can create any program that uses an X and Y reading, below we’ll show you how to make a simple whiteboard drawing app. Step 1: Plug in the sensor jacks to your sensor-board, and connect the board to your computer using the usb cable. Step 3: Right click on a sensing block and enable the sensorboard. Repeat to select show Scratchboard watcher. Step 2: Ensure the forcesensitive resistors are firmly attached the table or hard surface in the correct order. Step 4: Ensure each forcesensitive resistor is working by applying pressure and noting the reading. Safety: Please note that you use these resources at your own risk. Correct use of some components requires care. Produced by Margaret Low (m.j.low@warwick.ac.uk), John Rendall, Philip How and Marie Low. Hardware funded by National HE STEM Programme (Engineering). Page 2 of 3 Step 5: We will first need to make 6 new variables, four for storing the reverse of the sensor values, and two for the x and y position. Step 6: Assign each of the four variables to 100 minus each of the sensor values. This will reverse the value reported by the sensor and increase the value up to 100 as more pressure is applied. Step 6: Adding letters to each corner is helpful to remember which value corresponds to which sensor. Setting each letter’s ghost effect to the sensor value also helps. Safety: Please note that you use these resources at your own risk. Correct use of some components requires care. Produced by Margaret Low (m.j.low@warwick.ac.uk), John Rendall, Philip How and Marie Low. Hardware funded by National HE STEM Programme (Engineering). Page 3 of 3 Step 7: Set the X value to the sum of the sensor values on the right side, minus the sum of the sensor values on the left. Step 8: Set the Y value to the sum of the sensor values on the top, minus the sum of the sensors values on the bottom. Step 9: Multiply both values by the ranges of the X and Y axis. Step 10: Use the X and Y values in a program of your own choosing. This program will draw a line on the screen when the sensor board button is held down. Safety: Please note that you use these resources at your own risk. Correct use of some components requires care. Produced by Margaret Low (m.j.low@warwick.ac.uk), John Rendall, Philip How and Marie Low. Hardware funded by National HE STEM Programme (Engineering).


