How To: Create a C++ Program Using Microsoft Visual C++... Page 1 of 8 How To: Create a Program
advertisement

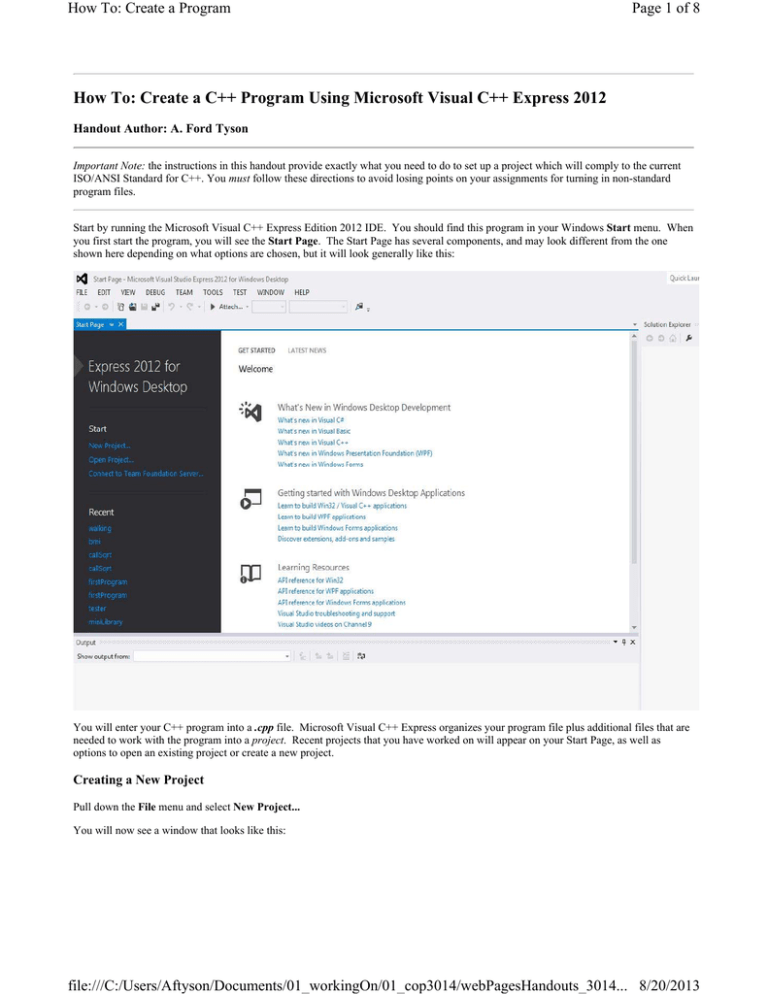
How To: Create a Program Page 1 of 8 How To: Create a C++ Program Using Microsoft Visual C++ Express 2012 Handout Author: A. Ford Tyson Important Note: the instructions in this handout provide exactly what you need to do to set up a project which will comply to the current ISO/ANSI Standard for C++. You must follow these directions to avoid losing points on your assignments for turning in non-standard program files. Start by running the Microsoft Visual C++ Express Edition 2012 IDE. You should find this program in your Windows Start menu. When you first start the program, you will see the Start Page. The Start Page has several components, and may look different from the one shown here depending on what options are chosen, but it will look generally like this: You will enter your C++ program into a .cpp file. Microsoft Visual C++ Express organizes your program file plus additional files that are needed to work with the program into a project. Recent projects that you have worked on will appear on your Start Page, as well as options to open an existing project or create a new project. Creating a New Project Pull down the File menu and select New Project... You will now see a window that looks like this: file:///C:/Users/Aftyson/Documents/01_workingOn/01_cop3014/webPagesHandouts_3014... 8/20/2013 How To: Create a Program Page 2 of 8 In this window, • • • • • • click on Win32 under Templates click on Win32 Console Application in the adjacent window frame type firstProgram as the name (replacing the default ConsoleApplication1) use the Browse button to select a location for your program folder check the box next to Create directory for solution (or leave it checked if it is already) click OK Microsoft Visual C++ Express will now create a new project for you in a new directory according to your choices. You will see a new window: Click on Next. In the next window, file:///C:/Users/Aftyson/Documents/01_workingOn/01_cop3014/webPagesHandouts_3014... 8/20/2013 How To: Create a Program Page 3 of 8 • select (check ) Console Application under Application Type • deselect (uncheck) Precompiled header under Additional options • select (check) Empty Project under Additional options and you should see this: Now click Finish. You now have a project, but it does not include a .cpp file (the "source code") as of yet. Add the Source File We need to add the .cpp source file for our program now. Under the Project menu, choose Add New Item. You will see a new window. In this window: • under Visual C++ click on Code • in the adjacent window click C++ File (.cpp) • type helloworld.cpp as the Name (replacing Source.cpp) You window will look like this: file:///C:/Users/Aftyson/Documents/01_workingOn/01_cop3014/webPagesHandouts_3014... 8/20/2013 How To: Create a Program Page 4 of 8 Next, after you click on Add, you will see a new window display allowing you to type your program into the upper left window pane. Type the program in as follows: file:///C:/Users/Aftyson/Documents/01_workingOn/01_cop3014/webPagesHandouts_3014... 8/20/2013 How To: Create a Program Page 5 of 8 Building and Running the Program Under the Build menu, select Build Solution. This option will pre-process and compile your program and also link it with the C++ language libraries that are needed to run it. If the program was typed in incorrectly, you may see compiler errors listed in the error window. If there are any, fix them and then re-build. When the build was successful, you will see this: Now we can run the program! To run it, go under the Debug menu and choose Start without Debugging. This will run the program normally, that is, not in "debugging" mode (we will learn about debugging later on). You will see this output window for the run, which is called the console window: file:///C:/Users/Aftyson/Documents/01_workingOn/01_cop3014/webPagesHandouts_3014... 8/20/2013 How To: Create a Program Page 6 of 8 To quit the program run, click on the X in the upper right corner of the console window. DISABLE LANGUAGE EXTENSIONS The Visual C++ system includes a number of features which are not available in standard C++. For programs to be most portable, these extensions should always be disabled. Also remember that your program grade will be decremented if non-standard language elements are found. We will discuss much more about this in class. To help prevent non-standard elements from compiling in your code, you should perform the following steps for every project you work on. Keep in mind that your most important references for what is currently standard are in-class discussions and your required course C++ textbook. Start with your firstProgram project space open. Go under the Project menu and select firstProgram Properties. Click on the triangle next to Configuration Properties, then click on the triangle next to C/C++. Underneath C/C++, click on Language. Your window should now look like this: file:///C:/Users/Aftyson/Documents/01_workingOn/01_cop3014/webPagesHandouts_3014... 8/20/2013 How To: Create a Program Page 7 of 8 Next, go to the right windowpane where you see Disable Language Extensions. Click on the area where you see No, pull down the triangle to the right side of this area, and change the option to Yes. You will now see this displayed: The /Za compiler option, when turned on, emits an error for language contructs that are not compatible with either ANSI C or ANSI C++. Finally, click on Apply first, and then click on Ok. You can quit the MS Visual program by going under the File menu and choosing Exit. Be sure to Save your program and project first, any time they have been modified. YOUR PROJECT FILES Microsoft Visual C++ Express automatically creates folders and files to carry out the operations required to work on your program. For example, if you look at two of the folders and the major files for the project we just created, you would see something like this: file:///C:/Users/Aftyson/Documents/01_workingOn/01_cop3014/webPagesHandouts_3014... 8/20/2013 How To: Create a Program Page 8 of 8 The ONLY file you need to turn to us for grading is your .cpp file. Do not turn in any of the other files for project grading. SUMMARY You have created a project using Microsoft Visual C++ Express, then entered and run a C++ program successfully. After you have completed this process once or twice, it will be easy and you'll be able to set up a new project very quickly. You should use these same instructions to create every program you work on in this course and turn in for grading. NOTE ON RE-OPENING A PROJECT TO WORK ON IT AT ANOTHER TIME If you want to work on the program you just created at another time in the future, start by double-clicking on the .sln file. That is the quickest and easiest way to get back to the point where you can work on your program. You do not need to start MS Visual C++ prior to clicking on the .sln file, as MS Visual C++ should start automatically as soon as you load the .sln. Think of .sln as standing for the word "solution." Last Update: August 20, 2013 A. Ford Tyson file:///C:/Users/Aftyson/Documents/01_workingOn/01_cop3014/webPagesHandouts_3014... 8/20/2013


