Getting started Settlement: Learn how to use your terminal
advertisement

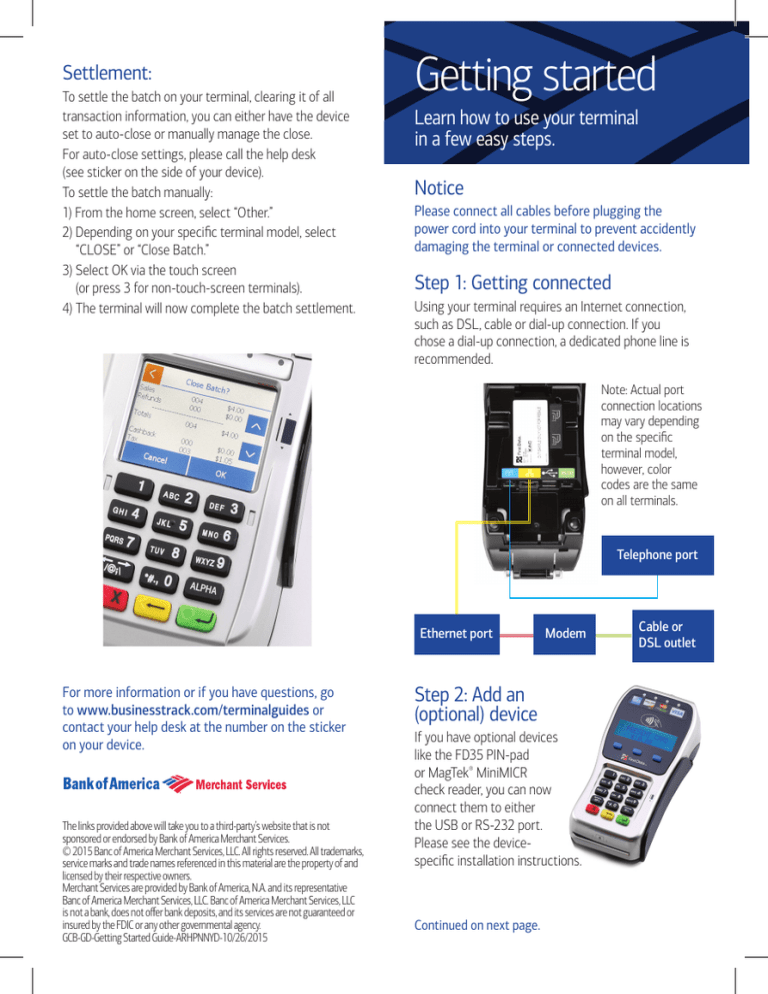
Settlement: To settle the batch on your terminal, clearing it of all transaction information, you can either have the device set to auto-close or manually manage the close. For auto-close settings, please call the help desk (see sticker on the side of your device). To settle the batch manually: 1) From the home screen, select “Other.” 2) Depending on your specific terminal model, select “CLOSE” or “Close Batch.” 3) S elect OK via the touch screen (or press 3 for non-touch-screen terminals). 4) The terminal will now complete the batch settlement. Getting started Learn how to use your terminal in a few easy steps. Notice Please connect all cables before plugging the power cord into your terminal to prevent accidently damaging the terminal or connected devices. Step 1: Getting connected Using your terminal requires an Internet connection, such as DSL, cable or dial-up connection. If you chose a dial-up connection, a dedicated phone line is recommended. Note: Actual port connection locations may vary depending on the specific terminal model, however, color codes are the same on all terminals. Telephone port Ethernet port For more information or if you have questions, go to www.businesstrack.com/terminalguides or contact your help desk at the number on the sticker on your device. The links provided above will take you to a third-party’s website that is not sponsored or endorsed by Bank of America Merchant Services. © 2015 Banc of America Merchant Services, LLC. All rights reserved. All trademarks, service marks and trade names referenced in this material are the property of and licensed by their respective owners. Merchant Services are provided by Bank of America, N.A. and its representative Banc of America Merchant Services, LLC. Banc of America Merchant Services, LLC is not a bank, does not offer bank deposits, and its services are not guaranteed or insured by the FDIC or any other governmental agency. GCB-GD-Getting Started Guide-ARHPNNYD-10/26/2015 Modem Step 2: Add an (optional) device If you have optional devices like the FD35 PIN-pad or MagTek® MiniMICR check reader, you can now connect them to either the USB or RS-232 port. Please see the devicespecific installation instructions. Continued on next page. Cable or DSL outlet Getting started (continued) Step 3: Load printer paper Open the printer cover’s latch as shown in the photos below. Load a roll of paper into the printer. Make sure the thermal print-side of the paper faces you as it prints out of the device. Close the cover and tear off any excess paper. Basic operations The following operations are meant to cover the most common transactions to get you started quickly. For more detailed assistance, please refer to www.businesstrack.com/terminalguides. Sale: Your customer may offer a card for payment by: 1) Inserting a chip card into the slot at the front of the terminal or PIN pad, called the “dip slot.” Reminder: the chip card must remain in the dip slot until the device prompts the customer to remove it. 2) Swiping the card through the magnetic stripe reader. 3) Tapping a contactless card or phone. Step 4: Connect to a power supply Now you need to assemble the power supply. Plug the powercord into the power adapter (A). A B Next connect the small end of the power plug to the terminal (B). Rotate the plug so that the cord is pointed toward the back of the terminal and ensure it lies flat and underneath the terminal. Finally, plug the AC power cord into a surge protector (recommended) or a standard electrical outlet. Your terminal should be connected and power up. The screen will light up and display the home screen. Then: • Follow the onscreen prompts. • If prompted, your customer will enter their PIN or will have the option to press “Cancel X” to bypass. • The device will either automatically print a receipt or prompt for customer receipt. To skip this step, press “ENTER” or “CANCEL” (red button). Refund: To issue a refund to the cardholder: 1) From the home screen, select “Other.” 2) Select “Refund.” 3) Enter the amount. 4) Instruct your customer to insert, swipe or tap their card (see options above, under Sale). 5) Select “Credit”. 6) T he device will either automatically print a receipt or prompt for customer receipt. To skip this step, press “ENTER” or “CANCEL” (red button). Continued on next page.


