Creating a Learning Module:
advertisement
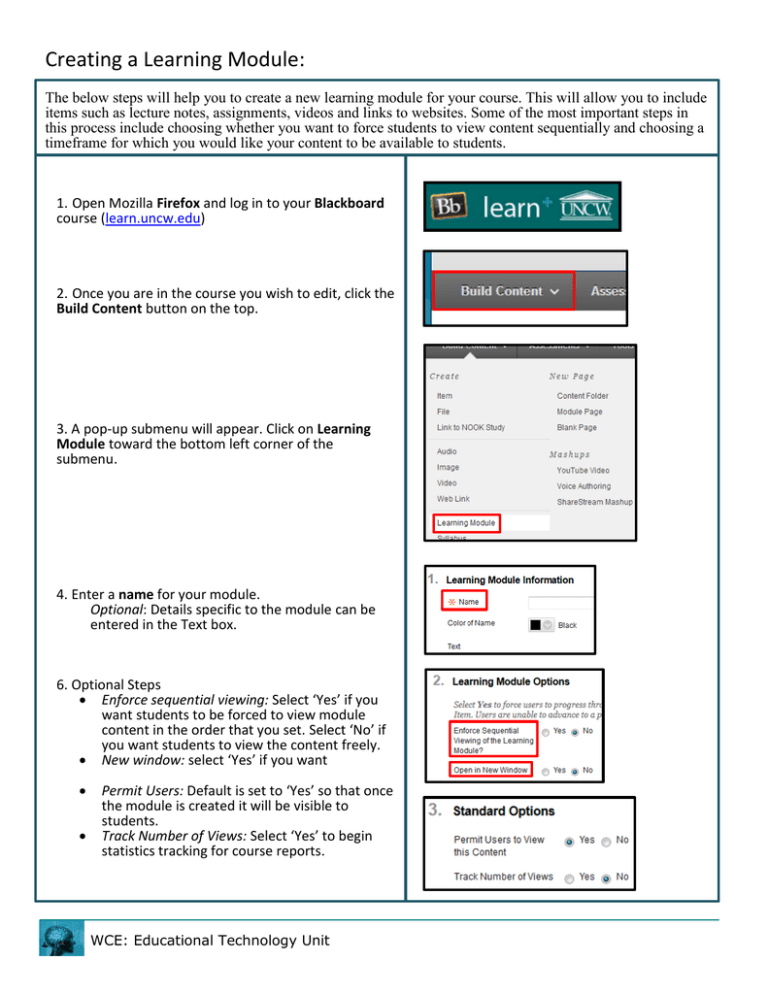
Creating a Learning Module: The below steps will help you to create a new learning module for your course. This will allow you to include items such as lecture notes, assignments, videos and links to websites. Some of the most important steps in this process include choosing whether you want to force students to view content sequentially and choosing a timeframe for which you would like your content to be available to students. 1. Open Mozilla Firefox and log in to your Blackboard course (learn.uncw.edu) 2. Once you are in the course you wish to edit, click the Build Content button on the top. 3. A pop-up submenu will appear. Click on Learning Module toward the bottom left corner of the submenu. 4. Enter a name for your module. Optional: Details specific to the module can be entered in the Text box. 6. Optional Steps Enforce sequential viewing: Select ‘Yes’ if you want students to be forced to view module content in the order that you set. Select ‘No’ if you want students to view the content freely. New window: select ‘Yes’ if you want Permit Users: Default is set to ‘Yes’ so that once the module is created it will be visible to students. Track Number of Views: Select ‘Yes’ to begin statistics tracking for course reports. WCE: Educational Technology Unit Creating a Learning Module: Date and Time Restriction: Modules can be displayed a certain date, until a certain date or between certain dates. Leaving both dates blank will display your module upon submission, assuming you permitted users to view the module. Table of Contents: Default option allows for a Table of Content to be present in the module. If you choose to delete this option, then select ‘No’. Hierarchy Display: If you would like to display hierarchy of items within your module, then select a display option from the dropdown menu. o Options: Letters, Mixed, Numbers, and Roman Numerals 7. Click the Submit button. WCE: Educational Technology Unit
