ADP1655 Evaluation Board EVAL-ADP1655 FEATURES
advertisement
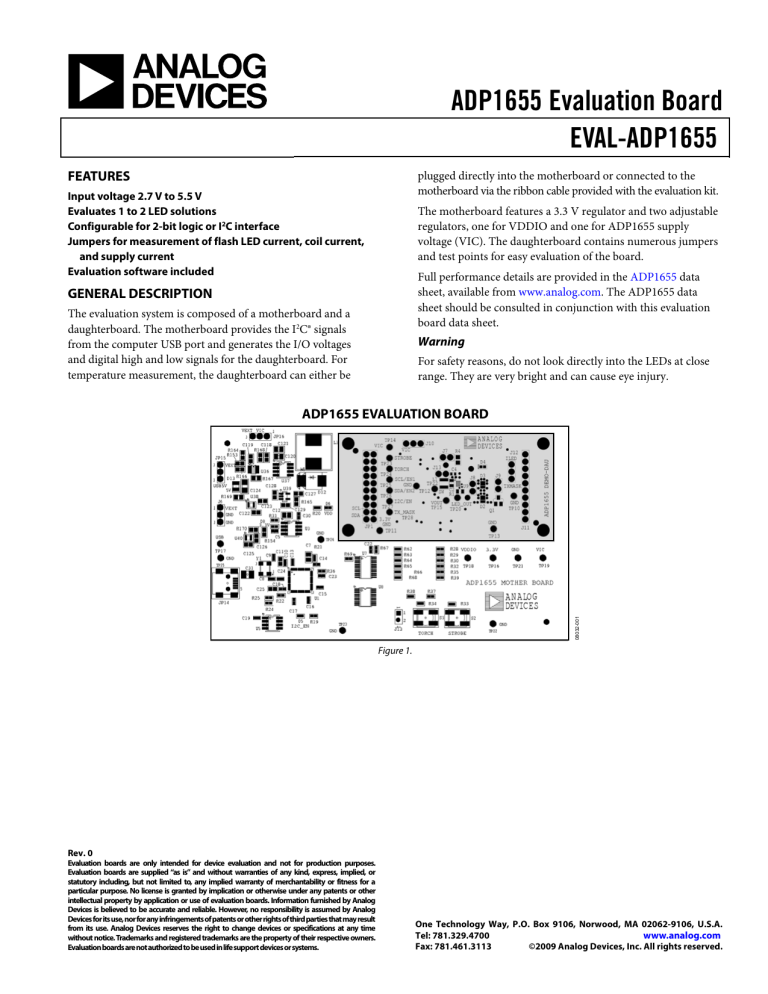
ADP1655 Evaluation Board EVAL-ADP1655 plugged directly into the motherboard or connected to the motherboard via the ribbon cable provided with the evaluation kit. FEATURES Input voltage 2.7 V to 5.5 V Evaluates 1 to 2 LED solutions Configurable for 2-bit logic or I2C interface Jumpers for measurement of flash LED current, coil current, and supply current Evaluation software included The motherboard features a 3.3 V regulator and two adjustable regulators, one for VDDIO and one for ADP1655 supply voltage (VIC). The daughterboard contains numerous jumpers and test points for easy evaluation of the board. Full performance details are provided in the ADP1655 data sheet, available from www.analog.com. The ADP1655 data sheet should be consulted in conjunction with this evaluation board data sheet. GENERAL DESCRIPTION The evaluation system is composed of a motherboard and a daughterboard. The motherboard provides the I2C® signals from the computer USB port and generates the I/O voltages and digital high and low signals for the daughterboard. For temperature measurement, the daughterboard can either be Warning For safety reasons, do not look directly into the LEDs at close range. They are very bright and can cause eye injury. 08032-001 ADP1655 EVALUATION BOARD Figure 1. Rev. 0 Evaluation boards are only intended for device evaluation and not for production purposes. Evaluation boards are supplied “as is” and without warranties of any kind, express, implied, or statutory including, but not limited to, any implied warranty of merchantability or fitness for a particular purpose. No license is granted by implication or otherwise under any patents or other intellectual property by application or use of evaluation boards. Information furnished by Analog Devices is believed to be accurate and reliable. However, no responsibility is assumed by Analog Devices for its use, nor for any infringements of patents or other rights of third parties that may result from its use. Analog Devices reserves the right to change devices or specifications at any time without notice. Trademarks and registered trademarks are the property of their respective owners. Evaluation boards are not authorized to be used in life support devices or systems. One Technology Way, P.O. Box 9106, Norwood, MA 02062-9106, U.S.A. www.analog.com Tel: 781.329.4700 Fax: 781.461.3113 ©2009 Analog Devices, Inc. All rights reserved. EVAL-ADP1655 TABLE OF CONTENTS Features .............................................................................................. 1 Timeout Duration Programming................................................7 General Description ......................................................................... 1 Fault Detection Status ...................................................................7 ADP1655 Evaluation Board ............................................................ 1 LED Amount Detection ...............................................................7 Revision History ............................................................................... 2 History ............................................................................................7 Installation Instructions................................................................... 3 Evaluation Board Overview .............................................................9 Installing ADP1655 Evaluation Software .................................. 3 Motherboard ..................................................................................9 Installing the USB Driver ............................................................ 4 Daughterboard............................................................................ 10 Using the Software GUI ................................................................... 5 Evaluation Board Schematics and Artwork ................................ 12 Hardware Configuration and Monitors .................................... 5 PCB Layout ................................................................................. 14 LED Current Programming ........................................................ 6 Ordering Information .................................................................... 16 Software or Hardware STROBE for Flash ................................. 6 Bill Of Materials.......................................................................... 16 Enabling Up to 500 mA LED Currents ..................................... 7 Ordering Guide .......................................................................... 17 Software or Hardware Torch ....................................................... 7 ESD Caution................................................................................ 17 REVISION HISTORY 7/09—Revision 0: Initial Version Rev. 0 | Page 2 of 20 EVAL-ADP1655 INSTALLATION INSTRUCTIONS INSTALLING ADP1655 EVALUATION SOFTWARE Insert the ADP1655-EVALZ setup CD into the CD-ROM and run the file Setup.exe. When the dialog box shown in Figure 2 appears, click Next >> to install the files to the default destination folder, or click Browse… to choose a different location. 08032-004 1. Figure 4. Installation Summary Wait while the program installs. 08032-002 3. Figure 2. ADP1655 Evaluation Software Setup Click I accept the License Agreement(s) and then Next >> to continue. 08032-005 2. Figure 5. Installation Progress Click Finish to complete installation. 08032-003 4. Figure 3. License Agreement Click Next >> to continue. 08032-006 1. Figure 6. Installation Complete Rev. 0 | Page 3 of 20 EVAL-ADP1655 After file installation is completed, the window in Figure 7 opens. Click Restart to complete the operation. 2. 3. Click Next > to install the driver. Click Continue Anyway and then Finish to complete the driver installation. 08032-007 5. Figure 7. Restart Prompt Window INSTALLING THE USB DRIVER 08032-009 Plug the ADP1655 board into the computer using the USB cable provided with the evaluation kit. When the system recognizes the board, the Found New Hardware Wizard dialog box appears. Figure 9. New Hardware Installation 08032-008 1. Figure 8. New Hardware Wizard Rev. 0 | Page 4 of 20 EVAL-ADP1655 USING THE SOFTWARE GUI 1 2 3 08032-010 1VIC AND VDDIO VOLTAGE SETTINGS. 2VOLTAGE, CURRENT, AND EFFICIENCY MONITORS. 3DIGITAL INPUT CONTROLS. 4MOTHERBOARD HARDWARE ENABLE BUTTONS. 4 Figure 10. ADP1655 Graphical User Interface (GUI), Hardware Configuration and Monitors Window HARDWARE CONFIGURATION AND MONITORS Follow these three steps to load the ADP165 evaluation software: 1. 2. 3. Before running the software, ensure that the board is plugged into the computer USB port (USB5V LED, D13, on the motherboard should light up). Click the Start button, located at the bottom left-hand corner of your desktop. Select All Programs, then the Analog Devices folder, and then ADP1655 Evaluation Software 0v3 to load the software (see Figure 10). If you are powering the ADP1655 daughterboard from the motherboard (see Figure 16) you can change the VIC voltage by moving the VIC voltage slider and clicking Update VIC. The VDDIO voltage can be changed by moving the Vddio voltage slider and clicking Update Vddio. Voltages and currents on the daughterboard can be monitored by clicking the Monitor Voltages and Currents button. Rev. 0 | Page 5 of 20 EVAL-ADP1655 9 1 2 3 4 7 8 5 6 08032-011 1 I2C REGISTER 0x06 CONTROLS: STROBE POLARITY, Tx_MASK ENABLE. 2 I2C REGISTER 0x04 CONTROLS: OUTPUT MODE, PEAK CURRENT LIMIT. 3 I2C REGISTER 0x03 CONTROLS: WHITE LED CURRENT SETTING. 4 I2C REGISTER 0x05 CONTROLS: FAULT REGISTER READ. 5 I2C REGISTER 0x02 CONTROLS: FLASH TIMER SETTING. 6 I2C REGISTER PROGRAM BUTTONS. 7 DIGITAL INPUT CONTROLS. 8 MOTHERBOARD HARDWARE ENABLE BUTTONS. 9 GUI PAGES: USER REGISTERS, HISTORY, AND H/W CONFIG & MONITORS. Figure 11. ADP1655 Evaluation Software GUI, User Registers Window STROBE Enabled Flash LED CURRENT PROGRAMMING 2 Before changing settings in the ADP1655 registers, the I C interface has to be enabled by clicking the I2C_EN button (the button turns green and the I2C_EN LED on the motherboard lights up) in Section 7 of the user registers window (see Figure 11). To program the LED current, set Assist Light Current and Flash Current in Section 3 and click the Program 0x03 button. For USB powered demonstrations, a minimum Flash Current setting of 200 mA should be used to avoid exceeding the USB current source capability of 500 mA. SOFTWARE OR HARDWARE STROBE FOR FLASH There are three ways to initiate Flash. I2C Enabled Flash 1. 2. 3. 1. 2. 3. 4. Set I2C_EN in Section 7 of the user registers window. In Section 2, set Output Mode to Flash, set 1 - Strobe Mode ON, and set 1- Output ON. Click the Program 0x04 button. Click the Strobe button in Section 7 to initiate Flash. The length of the Flash event can be programmed by setting the value under S/W Flash Timer in Section 5 and clicking the Program 0x02 button. To initiate Flash again, reprogram Register 0x04 and click Strobe again. STROBE can be enabled either from the user registers window by clicking Strobe under the Input Controls (Section 7) or from the hardware STROBE button on the motherboard. To use the hardware button, strobe button has to be enabled in Section 8 of the user registers window. Set I2C_EN in Section 7 of the user registers window. In Section 2, set Output Mode to Flash and set 1- Output ON. Click the Program 0x04 button to initiate Flash. The length of the Flash event can be programmed by setting the value under S/W Flash Timer in Section 5 and clicking the Program 0x02 button. Rev. 0 | Page 6 of 20 EVAL-ADP1655 EN1 and EN2 Enabled Flash 2-Bit Logic Mode Note that it is recommended to use an external power supply for this operation because fixed Flash current values are set to 320 mA and 500 mA for two and one LED(s), respectively. Otherwise, the USB current sourcing limitation of 500 mA will be exceeded. Use the I2C_EN, EN1, and EN2 buttons in Section 7. 1. 2. 1. 2. TIMEOUT DURATION PROGRAMMING 3. Set I2C_EN low (button becomes gray). Set EN1 high (green). The red indicator LED (D4) should light up on the ADP1655 evaluation board. Set EN2 high (green) to initiate Flash. ENABLING UP TO 500 MA LED CURRENTS The ADP1655 limits LED output current to 400 mA by default if two LEDs are used. In one-LED operation, currents of up to 500 mA are automatically allowed. In I2C interface mode, it is possible for you to enable up to 500 mA of output currents in two-LED operation. 1. 2. 3. 4. Set I2C_EN in Section 7 of the user registers window. Disable the amount of LED detection by selecting 0 - LED Amount OFF in Section 3. Click the Program 0x03 button. Click the Program 0’s to 0x05… button in Section 6. This allows you to use any Flash current setting from 200 mA to 500 mA. SOFTWARE OR HARDWARE TORCH 2 I C Logic Mode 1. 2. 3. Set I2C_EN high (green) in Section 7 of the user registers window. In Section 2, set Output Mode to External Torch, set 1 - Torch Mode ON. Click the Program 0x04 button. The torch current level can be programmed by setting the desired value under Assist Light Current in Section 3. To light up the LEDs, click the Torch button in Section 7. In addition, the TORCH hardware button on the motherboard can be used by clicking torch button in Section 8. Set I2C_EN low (button becomes gray). Click the Torch button in Section 7 (input controls) to light up the LEDs in torch mode, or use the TORCH hardware button on the motherboard, which must first be enabled via the torch button in Section 8 of the user registers window. Timeout is hardware limited to a maximum of 850 ms. Desired Flash timeouts can be set by changing the setting under the S/W Flash Timer box in Section 5 and clicking the Program 0x02 button. FAULT DETECTION STATUS Faults in Section 4 is used to read back the fault detection status from the ADP1655. Click Read 0x05 to view information about the fault. I2C_EN must be high (green) to be in read mode. Overvoltage fault occurs when the output voltage is greater than 9.5 V (typical). A timeout fault occurs when the STROBE button on the evaluation board is pressed longer than the programmed timeout duration in strobe level-sensitive mode. A thermal fault occurs when the device junction temperature is greater than 150°C. A short-circuit fault occurs if the LED_OUT pin remains grounded during startup. LED AMOUNT DETECTION The amount of LEDs is detected by the ADP1655 and the detection is enabled from 1 - LED Amount ON in Section 3. The amount of LEDs is measured during the start of either Flash or torch, and the default level for whether one or two LEDs are connected to the output is set at 4.3 V (typical). Detection level can be changed to 4.3 V plus VREF offset using the Vref Offset box. HISTORY Whenever you issue a command (both read and write), it is recorded in the History tab, shown in Figure 12. To display the History dialog box, click the History tab on the evaluation software GUI. You can copy and paste the history into a file for future evaluation purposes. Rev. 0 | Page 7 of 20 08032-012 EVAL-ADP1655 Figure 12. History Rev. 0 | Page 8 of 20 EVAL-ADP1655 EVALUATION BOARD OVERVIEW MOTHERBOARD USE JP16 TO POWER VIC FROM USB SUPPLY (USEFUL WHEN NO EXTERNAL DC SUPPLY AVAILABLE) U36, ADP1864: STEP-DOWN DC-TO-DC CONTROLLER AND U38, AD5622: I2C-CONTROLLED DAC ADJUSTABLE VIC SUPPLY CONNECT MOTHERBOARD TO DAUGHTERBOARD DIRECTLY AT HEADER OR WITH RIBBON CABLE JP15: SUPPLY SELECTION FOR U36 AND U39 U39, ADP1712: ADJUSTABLE 300mA LDO AND U40, AD5622: I 2C-CONTROLLED DAC ADJUSTABLE VDDIO SUPPLY ADP3303: 3.3V, 200mA LDO SUPPLY FOR CY68013A CY68013 A MICROCONTROLLER: PROVIDES USB-TO-I 2C CONVERSION TORCH AND STROBE: USE PUSH-BUTTONS FOR EXTERNAL TORCH OR FLASH. BUTTONS HAVE TO BE ENABLED FROM SOFTWARE GUI. 08032-014 USB MINI B TYPE CONNECTOR Figure 13. Motherboard The ADP1655 motherboard provides the interface signals to the ADP1655 flash driver IC. Signals of the interface are controlled via the evaluation software GUI. however, the ribbon cable provided with the evaluation kit must be used to connect the motherboard and the daughterboard because the Cypress CY68013A is not rated at −40°C. The Cypress Semiconductor Corporation CY68013A provides the USB interface and I2C signals. The selected I2C frequency is 400 kHz. The EEPROM U5 M24C64 provides the USB address of the board. The interface VDDIO voltage is adjusted using evaluation software GUI and is set to 1.9 V by default. Table 1. Recommended Jumper Setting Jumper JP15 JP16 Typically, the daughterboard is inserted directly into the 20-pin header of the motherboard. For temperature measurements, Rev. 0 | Page 9 of 20 Function Motherboard regulator input voltage selection ADP1655 input voltage selection Setting Short 1 and 2 (USB powered) Open EVAL-ADP1655 DAUGHTERBOARD CONNECT DC SUPPLY WITH SHORT CABLES 2.65 – 5.5V MEASURE SUPPLY CURRENT WITH CURRENT LOOP ADP1655 EVAL BOARD CLOSE J9 FOR 1 LED EVALUATION MEASURE INDUCTOR CURRENT WITH CURRENT LOOP MEASURE IHPLED WITH CURRENT LOOP 08032-016 ADP1655 Figure 14. Daughterboard The ADP1655 evaluation daughterboard is designed to quickly evaluate key parameters of the ADP1655 IC. The board layout footprint is extended so that parts can be exchanged and headers are available to measure currents using a current probe or ammeter. Connect a power supply or Li-Ion battery with 2 A capability to VIC. Up to 1.8 A can be drawn from the battery; therefore, short, thick cables are recommended to minimize the IR drops. A high current can cause a big IR drop, and VIN of ADP1655 can be low enough to put the part into UVLO. ADP1655 DAUGHTERBOARD BOTTOM SIDE IQ IQ is the supply current and can be measured by using an ammeter across J7. On the bottom side of the ADP1655 daughterboard, Resistor R7, Resistor R9, and Resistor R13, as well as IC U20 and IC U22, are connected to the supply voltage, which affect IQ measurement. Follow the instructions described in Figure 15 for ADP1655 shutdown and standby mode current measurements. IL IL is the inductor current and can be measured by using a current loop across J13. ILED ILED is the LED current and can be measured by using an ammeter or current loop across J8. High VF LEDs REMOVE R7, R9, AND R13 FOR SHUTDOWN AND STANDBY CURRENT EVALUATION 08032-017 LIFT UP PIN 1 AND PIN 8 OF U20 AND U22 FOR SHUTDOWN AND STANDBY CURRENT EVALUATION By default, R1 is 0.1 Ω. It can be replaced with another resistor for current measurement or for increasing the LED_OUT voltage (to simulate a higher boost ratio for a high VF LED). Figure 15. Daughterboard Modifications for ADP1655 Shutdown and Standby Current Measurement. Rev. 0 | Page 10 of 20 EVAL-ADP1655 One-LED Evaluation The J9 jumper can be placed to short D3 for the evaluation of the one-LED solution. Power Board from USB Port Only Jumper JP16 on the motherboard. Figure 16 illustrates jumper settings for USB powered operation. Ensure that the LED current is less than 200 mA to avoid exceeding the 500 mA current limit of the USB. To power the board via the USB without using an external supply, short Pin 1 and Pin 2 on both Jumper JP15 and SHORT J7, J8, AND J13 SELECT TXMASK ON JP12 CONNECT MOTHERBOARDTO DAUGHTERBOARDDIRECTLY AT HEADER OR WITH RIBBON CABLE 08032-018 SHORT PIN 1 AND PIN 2 OF JP15 AND JP16 Figure 16. Powering ADP1655 from USB Port Rev. 0 | Page 11 of 20 EVAL-ADP1655 08032-015 EVALUATION BOARD SCHEMATICS AND ARTWORK Figure 17. ADP1655 Evaluation Motherboard Schematic Rev. 0 | Page 12 of 20 08032-019 EVAL-ADP1655 Figure 18. ADP1655 Evaluation Daughterboard Schematic Rev. 0 | Page 13 of 20 EVAL-ADP1655 08032-021 PCB LAYOUT 08032-022 Figure 19. Evaluation Daughterboard Top Layer 08032-023 Figure 20. Evaluation Daughterboard VIC and 3.3 V Plane Figure 21. Evaluation Daughterboard GND Plane Rev. 0 | Page 14 of 20 08032-024 EVAL-ADP1655 Figure 22. Evaluation Daughterboard Bottom Layer (View from the Top) Rev. 0 | Page 15 of 20 EVAL-ADP1655 ORDERING INFORMATION BILL OF MATERIALS Table 2. Description Daughterboard Capacitor, MLCC, 10 µF, 10 V, 0805, X5R Capacitor, MLCC, 10 µF, 6.3 V, 0603, X5R Reference Designator Qty Manufacturer/Vendor Part Number C2, C34 C4 2 1 Murata TDK, Murata Capacitor, MLCC, 22 pF, 50 V, 0805, C0G C6, C20 2 Capacitor, MLCC, 1 µF, 25 V, 0805, X7R C21, C26 2 Vishay/Murata or equivalent Murata/Taiyo Yuden Capacitor, MLCC, 10 nF, 50 V, 0805, X7R C27, C28, C32, C33 4 Capacitor, MLCC, 100 nF, 50 V, 0805, X7R Resistor, 0.100 Ω, 1%, 0805, SMD Resistor, 0.033 Ω, 1%, 0805, SMD Resistor, 1 kΩ, 1%, 0805, SMD Resistor, 33 kΩ, 1%, 0805, SMD Resistor, 10 k Ω, 1%, 0805, SMD Resistor, 10 kΩ, 1%, 0805, SMD Resistor, 15 kΩ, 1%, 0805, SMD Resistor, 0 Ω, 1%, 0402, SMD White LED Indicator LED, Red, 0402 Connector Header, 2 pins × 1 Connector Header, 3 pins × 1 Connector Header, 10 pins × 1 Connector Header, 10 pins × 2 Inductor, 2.2 µH, 3 mm × 3 mm C29, C35 R1 R4 R5, R6, R11, R12 R7, R9 R8, R10 R13 R14 R16 D2, D3 D4 J7, J8, J9, J13 J10, J12 J11 JP1 L1 2 1 1 4 2 2 1 1 1 2 1 4 2 1 1 1 Vishay/Murata or equivalent Murata Vishay or Equivalent Vishay or Equivalent Vishay or Equivalent Vishay or Equivalent Vishay or Equivalent Vishay or Equivalent Vishay or Equivalent Vishay or Equivalent OSRAM/LumiLEDs Lumex Samtec Samtec Samtec Samtec TOKO TP10 to TP15, TP20, TP22 to TP28 U9 U20, U22 U26 U27 14 1 2 1 1 Samtec Analog Devices Analog Devices Analog Devices Analog Devices GRM21BR61A106K C1608X5R0G106MT, GRM188R60J106ME VJ0805A220JXACW1BC, GRM2165C1H220JZ01 GRM219R71E105KA, TMK212BJ105KG-T VJ0805Y103KXACW1BC, GRM2195C1H103JA01 GRM21BR71H104K WSL0805R1000FEB WSL0805R0330FEA CRCW08051K00FKEA CRCW080533K0FKEA CRCW080510K0FKEA CRCW080510K0FKEA CRCW080515K0FKEA CRCW04020K00FKEA LUWC9SP or PWF4 SML-LX0402SIC-TR TSW-150-07-T-S TSW-150-07-T-S SSQ-110-01-G-S SSW-110-03-G-D FDSE0312-2R2M, DE2810C, DE2812C, or 1117AS-2R2M TSW-150-07-T-S ADP1655 AD22057YRZ AD7998BRUZ AD8542ARZ C7 C124 C5, C13, C15 to C18, C22, C23, C30 C11, C25 C31 C8, C9 C19 C122, C125, C128 C12 C10, C24 C118, C129 C120, C121 C14 C123, C126 C119 C127 R19, R20, R31 R21, R36 1 1 9 2 1 2 1 3 1 2 2 2 1 2 1 1 3 2 Murata Murata Murata Murata Murata Murata Murata Murata Murata Murata Murata Murata Murata Vishay or equivalent Vishay or equivalent Murata Vishay or equivalent Vishay or equivalent GRM219R61A106K GRM31MR61A106K GRM155R71C104K GRM188R61A225K GRM32ER61A476K GRM1555C1H6R2B GRM155R61A105K GRM188R61A105K GRM21BR71E105K GRM155R71H103K GRM188R71H103K GRM21BR60J226M GRM155R71H102K VJ0603A101JXACW1BC VJ0603A271JXACW1BC GRM188R60J475K CRCW04021K00FKED CRCW0402100KFKED Connector Header, 1 pin × 1 ADP1655, 12-Ball WLCSP AD22057, 8-Lead SOIC AD7998, 20-Lead TSSOP AD8542, 8-Lead SOIC Motherboard Capacitor, MLCC, 10 µF, 10 V, 0805, X5R Capacitor, MLCC, 10 µF,10 V, 1206, X5R Capacitor, MLCC, 100 nF,16 V, 0402, X5R Capacitor, MLCC, 2.2 µF,10 V, 0603, X5R Capacitor, MLCC, 47 µF, 10 V, 1210, X5R Capacitor, MLCC, 6.2 pF, 50 V, 0402, C0G Capacitor, MLCC, 1 µF, 10 V, 0402, X5R Capacitor, MLCC, 1 µF, 10 V, 0603, X5R Capacitor, MLCC, 1 µF, 25 V, 0805, X7R Capacitor, MLCC, 10 nF, 50 V, 0402, X7R Capacitor, MLCC, 10 nF, 50 V, 0603, X7R Capacitor, MLCC, 22 µF, 6.3 V, 0805, X5R Capacitor, MLCC, 1 nF, 50 V, 0402, X7R Capacitor, MLCC, 100 pF, 50 V, 0603, C0G Capacitor, MLCC, 270 pF, 50 V, 0603, C0G Capacitor, MLCC, 4.7 µF, 6.3 V, 0603, X5R Resistor, 1 kΩ, 1%, 0402, SMD Resistor, 100 kΩ, 1%, 0402, SMD Rev. 0 | Page 16 of 20 EVAL-ADP1655 Description Resistor, 330 Ω, 1%, 0402, SMD Open Resistor, 10 kΩ, 1%, 0402, SMD Resistor, 1.5 kΩ, 1%, 0402, SMD Resistor, 4.7 kΩ, 1%, 0402, SMD Resistor, 0 Ω, 1%, 0402, SMD Resistor, 180 kΩ, 1%, 0402, SMD Resistor, 33 kΩ, 1%, 0402, SMD Resistor, 39 kΩ, 1%, 0603, SMD Resistor, 182 kΩ, 1%, 0603, SMD Resistor, 27 kΩ, 1%, 0603, SMD Resistor, 0.02 Ω, 1%, 0805, SMD Resistor, 1 kΩ, 1%, 0603, SMD Resistor, 1 kΩ, 1%, 0805, SMD LED, 0402, Green LED, 0805, Green Diode Schottky, 15 V, 3 A, SMC Connector Header, 2 pins × 1 Connector Header, 10 pins × 1 Connector Header, 10 pins × 2 Connector Header, 3 pins × 1 Connector Receptacle, Mini USB2.0, 5-Position Inductor, 2.2 µH, 10 mm × 9.7 mm × 4 mm Switch Push-Button Connector Header IC MCU USB Peripheral High Speed 56-QFN ADP3303, 3.3 V IC SRL EEPROM I2C, 64 kB, SO-8 IC 10-Bit Voltage Clamp, 24-TSSOP ADG734BRUZ, 20-Lead TSSOP ADP1864, 6-Lead TSOT MOSFET P-Channel, 20 V, 9.8 A, 8-SOIC AD5622, SC70, Date Code Later Than 0749 ADP1712, 5-Lead TSOT Crystal, 24 MHz Reference Designator R33, R34 R37, R38 R22 R24, R25, R30, R32 R28, R29, R35, R39 R62 to R66, R68 R67 R69 R153, R154, R166, R170 R164 R165 R167 R168 R169 D5, D6, D8 D13 D12 J13 J12 JP8 JP15, JP16, J6 JP14 Qty 2 N/A 1 4 4 7 1 1 4 1 1 1 1 1 1 1 1 1 1 1 3 1 Manufacturer/Vendor Vishay or equivalent No assembly Vishay or equivalent Vishay or equivalent Vishay or equivalent Vishay or equivalent Vishay or equivalent Vishay or equivalent Vishay or equivalent Vishay or equivalent Vishay or equivalent Panasonic-ECG Vishay or equivalent Vishay or equivalent Lumex Lumex Vishay, IR Sullins Electronics Sullins Electronics Sullins Electronics Sullins Electronics Hirose Electronics Part Number CRCW0402330RFKED No assembly CRCW040210K0FKED CRCW04021K50FKED CRCW04024K70FKED CRCW04020K00FKED CRCW0402180KFKED CRCW040233K0FKED CRCW060339K0FKEA CRCW0603182KFKEA CRCW060327K0FKEA ERJ-6BWF020V CRCW06031K00FKEA CRCW08051K00FKEA SML-LX0402SUGC-TR SML-LXT0805GW-TR 30BQ015TRPBF PEC36SAAN PEC36SAAN PEC36DAAN PEC36SAAN UX60-MB-5ST L3 S2, S3 TP16 to TP19, TP21 U1 U3 U5 U7 U8 U36 U37 U38, U40 U39 Y1 1 2 5 1 1 1 1 1 1 1 2 1 1 TDK C & K Components Sullins Electronics Cypress Semiconductor Analog Devices STMicroelectronics NXP Semiconductors Analog Devices Analog Devices Vishay/Siliconix Analog Devices Analog Devices CTS Electronic Components VLF10040T-2R2N7R1 KT11P3JM34LFS PEC36SAAN CY7C68013A-56LFXC ADP3303-3.3V M24C64 GTL2010PW ADG734BRUZ ADP1864AUJZ SI4463BDY AD5622YKSZ ADP712AUJZ-R7 CTX651CT ESD CAUTION ORDERING GUIDE Model ADP1655-EVALZ1 1 Description Evaluation Board Z = RoHS Compliant Part. Rev. 0 | Page 17 of 20 EVAL-ADP1655 NOTES Rev. 0 | Page 18 of 20 EVAL-ADP1655 NOTES Rev. 0 | Page 19 of 20 EVAL-ADP1655 NOTES ©2009 Analog Devices, Inc. All rights reserved. Trademarks and registered trademarks are the property of their respective owners. EB08032-0-7/09(0) Rev. 0 | Page 20 of 20
