registry on your computer. When you change your NetID password,... Configuring Microsoft Windows XP for WPA2 Enterprise: Windows Wireless Important note:
advertisement
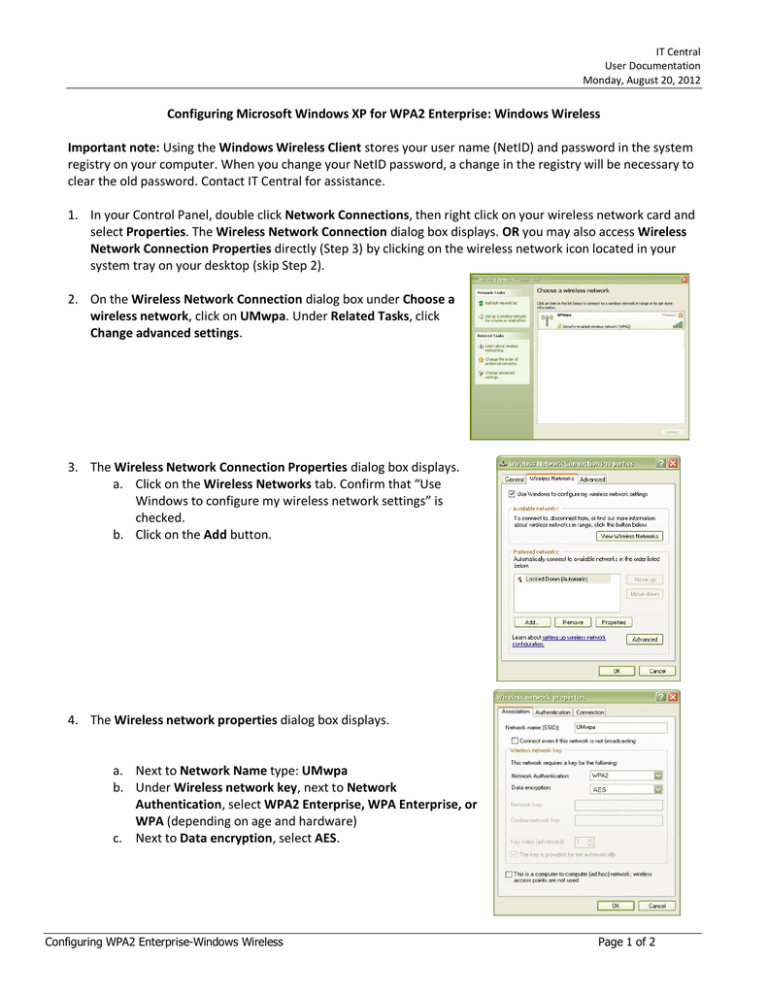
IT Central User Documentation Monday, August 20, 2012 Configuring Microsoft Windows XP for WPA2 Enterprise: Windows Wireless Important note: Using the Windows Wireless Client stores your user name (NetID) and password in the system registry on your computer. When you change your NetID password, a change in the registry will be necessary to clear the old password. Contact IT Central for assistance. 1. In your Control Panel, double click Network Connections, then right click on your wireless network card and select Properties. The Wireless Network Connection dialog box displays. OR you may also access Wireless Network Connection Properties directly (Step 3) by clicking on the wireless network icon located in your system tray on your desktop (skip Step 2). 2. On the Wireless Network Connection dialog box under Choose a wireless network, click on UMwpa. Under Related Tasks, click Change advanced settings. 3. The Wireless Network Connection Properties dialog box displays. a. Click on the Wireless Networks tab. Confirm that “Use Windows to configure my wireless network settings” is checked. b. Click on the Add button. 4. The Wireless network properties dialog box displays. a. Next to Network Name type: UMwpa b. Under Wireless network key, next to Network Authentication, select WPA2 Enterprise, WPA Enterprise, or WPA (depending on age and hardware) c. Next to Data encryption, select AES. Configuring WPA2 Enterprise-Windows Wireless Page 1 of 2 IT Central User Documentation Monday, August 20, 2012 5. Select the Authentication tab. a. Next to EAP type, select Protected EAP (PEAP) b. Uncheck Authenticate as computer when computer information is available. c. Click on the Properties tab. 6. The Protected EAP Properties dialog box displays. a. Uncheck Validate server certificate. b. Under Select Authentication Method, assure that Secured password (EAP-MSCHAP v2) is selected. c. Confirm that Enable Fast Reconnect is unchecked. d. Click on the Configure button. 7. The EAP MSCHAPv2 Properties dialog box displays. a. Uncheck Automatically use my Windows logon name and password. b. Click OK. c. Click OK on remaining dialog boxes that display to exit out of wireless configuration. 8. If you have successfully completed this process an alert will display from your system tray (next to the time display on your task bar). Click inside the alert to validate your credentials. 9. An Enter Credentials dialog box displays. a. Enter your User name (NetID) and password. Do not enter domain. b. Click OK. c. After your credentials successfully authenticate, you will UM wireless network. Configuring WPA2 Enterprise-Windows Wireless a Logon be on the Page 2 of 2
