Working with My Dashboards Quick Reference
advertisement

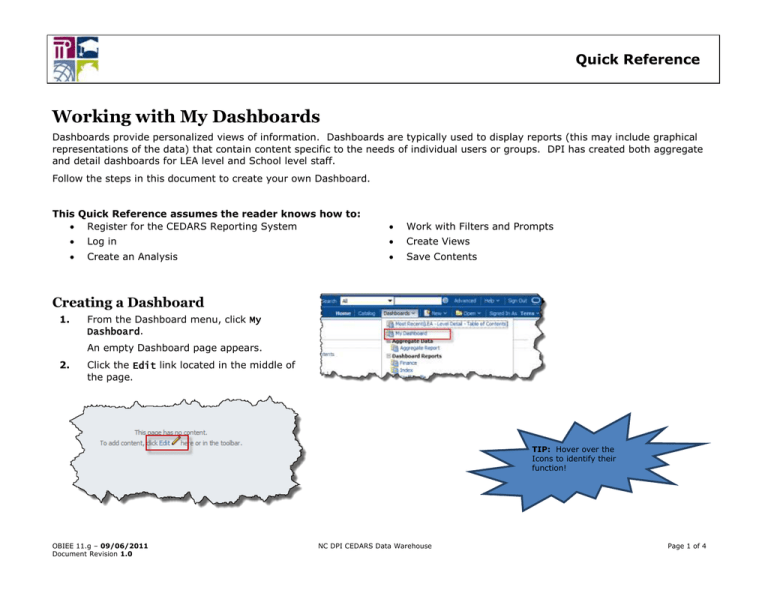
Quick Reference Working with My Dashboards Dashboards provide personalized views of information. Dashboards are typically used to display reports (this may include graphical representations of the data) that contain content specific to the needs of individual users or groups. DPI has created both aggregate and detail dashboards for LEA level and School level staff. Follow the steps in this document to create your own Dashboard. This Quick Reference assumes the reader knows how to: Register for the CEDARS Reporting System Work with Filters and Prompts Log in Create Views Create an Analysis Save Contents Creating a Dashboard 1. From the Dashboard menu, click My Dashboard. An empty Dashboard page appears. 2. Click the Edit link located in the middle of the page. TIP: Hover over the Icons to identify their function! OBIEE 11.g – 09/06/2011 Document Revision 1.0 NC DPI CEDARS Data Warehouse Page 1 of 4 Working with My Dashboards The Dashboard Editor page appears; notice the three main sections: Dashboard Objects: Allows the user the ability to format the look of the page as well as add links, images and text. Quick Icons: Provides options to add or remove pages, a list of tools to review Dashboard properties or print and save. Catalog: Houses any saved content to which the user has access. Dashboard Objects Allows the user the ability to format the look of the page as well as add links, images and text. Quick Icons Provides options to add or remove pages, a list of tools to review Dashboard properties or print and save. Catalog Houses any saved content to which the users have access to. 3. From the Dashboard Objects panel, click and drag a Column to the workspace. Note: Columns and Sections help you to organize the content on your page. You must have at least one column on your page to add content. 4. From the Catalog, expand the appropriate folder, click and drag the appropriate reports into your column and sections. 5. Repeat steps 3 and 4 as needed. 6. To add more tabs for more content, click the Add Dashboard Page icon located in the Quick Icons section of the page. OBIEE 11.g – 09/06/2011 Doc Revision 1.0 NCDPI NC WISE Page 2 of 4 Working with My Dashboards Naming My Dashboard Tabs 1. From the Quick Icons, click Save. Warning: 2. If you do not save prior to naming your Dashboard you will lose the content from your page. Click the Tools icon located in the top right corner, click Dashboard Properties. TIP: Hover over the Icons to identify their function! The Dashboard Properties tile opens. 3. Click page 1 to highlight the row. This activates the tool icons located above the table. 4. Click the Rename icon. 5. Type a meaningful name, click OK. 6. Click OK in the Dashboard Properties tile. You are returned to the Dashboard Editor. OBIEE 11.g – 09/06/2011 Doc Revision 1.0 NCDPI NC WISE Page 3 of 4 Working with My Dashboards Saving and Viewing My Dashboards 1. From the Quick Icons, click Save. When the My Dashboards page is saved, the format in which content will be viewed is stored. 2. From the Quick Icons, click Run. Your content now appears on your My Dashboard tab(s). Editing My Dashboards 1. From the My Dashboard page, click the Page Options icon located in the top right corner. 2. Click Edit Dashboard. The Dashboard Editor page appears. Add or edit content as needed. 3. From the Quick Icons, click Save. 4. From the Quick Icons, click Run. Your content now appears on your My Dashboard tab(s). This document is the property of the NC DPI and may not be copied in whole or in part without the express written permission of the NC DPI. OBIEE 11.g – 09/06/2011 Doc Revision 1.0 NCDPI NC WISE Page 4 of 4


