Adding an event to the Schedule
advertisement
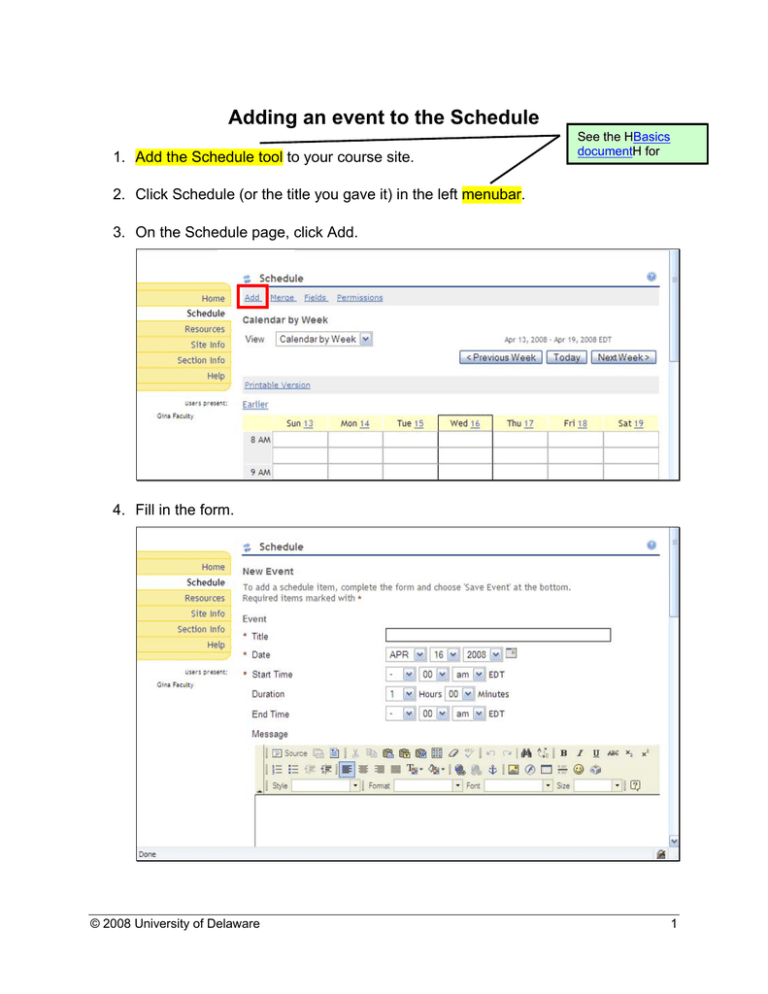
Adding an event to the Schedule 1. Add the Schedule tool to your course site. See the HBasics Basics documentH document forfordetails. 2. Click Schedule (or the title you gave it) in the left menubar. 3. On the Schedule page, click Add. 4. Fill in the form. © 2008 University of Delaware 1 a. By default, your event will be visible to all users of your site. If you want specify a subgroup whose members will see the event the, click Display to selected groups. b. Groups you have already created will be listed for you to choose. See the HBasics documentH for © 2008 University of Delaware 2 c. By default, your event will be posted once. You can duplicate it by clicking Frequency and selecting how often you want the event to appear in the Schedule. Fill in any other appropriate information based on your choice, such as the starting and ending dates for a weekly event. When you have finished, click Save Frequency to return to the previous screen. © 2008 University of Delaware 3 See the HBasics documentH for d. You can add files and web links (URL) to the event by clicking Add Attachments. e. When you are satisfied with your event, click Save Event. © 2008 University of Delaware 4 5. On the Schedule, you can view the details of the event by clicking its title. 6. When viewing an event, you can navigate to other events or go back to the Schedule. If you have the required permissions, you will be able to edit or delete an event. © 2008 University of Delaware 5
