CSE651 Android Development ... Goal: To set up an Android development environment, understand it...
advertisement
CSE651 Android Development
Summer 2014
Goal: To set up an Android development environment, understand it and deploy you first application.
This first app will just take an input message and display it in the output. (You can add the processing
part later on)
What you will need: Android application development environment with Eclipse and Android plug-in.
http://developer.android.com/sdk/index.html?hl=sk
Based on the tutorial available at: http://developer.android.com/training/basics/firstapp/index.html
These are several steps if you were installing ADK bundle from the scratch. This has been done/installed
for you already in the lab machines. You can directly proceed to step 4.
1.
2.
3.
4.
5.
6.
Download ADT from http://developer.android.com/sdk/index.html
This is a total bundle. Move the downloaded zip file to a convenient location, say cse651.
Extract it using Windows explorer.
Click on the Eclipse folder eclipse application.
Name a location for your workspace when it request: c://documents/cse651/workspace
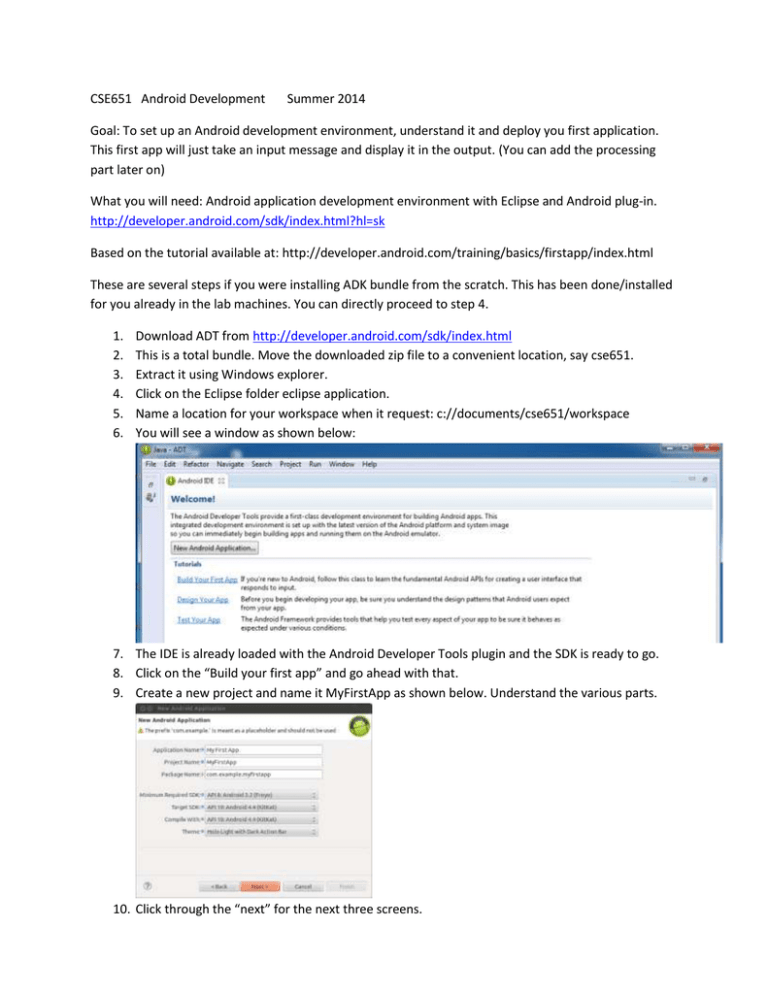
You will see a window as shown below:
7. The IDE is already loaded with the Android Developer Tools plugin and the SDK is ready to go.
8. Click on the “Build your first app” and go ahead with that.
9. Create a new project and name it MyFirstApp as shown below. Understand the various parts.
10. Click through the “next” for the next three screens.
11. In the next screen select “Blank Activity” and click next.
12. Leave the rest of them as default and click finish.
13. Before we run this basic application go through and understand the various classes, resources
and files that have been automatically created for you. This understanding is critical for further
development of the applications (on your own).
14. Look at the AndroidManifest.xml file and its parts. Look at the src/ and res/ directories from the
explorer on the left. src/ contains the “Activity” classes and res/ contains the resources defined.
15. You will see a virtual Android phone fully capable of any function/application that an Android
phone can do. However since it is emulated/virtual it will be slow. For development purposes
this is fine. You will have to be real patient with the times.
16. This first step illustrates the capabilities of the environment. Understand that if you have a real
android you can upload the same application in a similar way and see it working.
17. Click on the various items on the IDE and browse through them to get an idea of how they are
all connected, how methods defined are @override of the base class, and so on.
Next step is to develop a simple UI to an App:
In this exercise you will learn to create a linear layout, add a text field, add string resources, add a
button, and make the Input Box to fill in the screen width.
1. The graphical user interface for an Android app is built using a hierarchy of View and
ViewGroup objects. View is a base class for the widgets such as buttons and text boxes.
2. View objects are usually UI widgets such as buttons or text fields and ViewGroup objects are
invisible view containers that define how the child views are laid out, such as in a grid or a
vertical list.
3. Android provides an XML vocabulary that corresponds to the subclasses of View and
ViewGroup so you can define your UI in XML using a hierarchy of UI elements.
4. All those widgets you saw when clicked on the fragment_main.xml are based on the View class
and how they are arranged is decided in the ViewGroup class object.
5. In this lesson you will create a textfield and a button and in the next lesson we will add activity
to these widgets.
6. The widgets can be organized using a graphical layout or by manipulating the xml file. We will
manipulate the xml file in order to understand the working of this interface design.
7. Click on the “fragment_main.xml” at the bottom window and edit the file to have the following
content. (Don’t worry you can remove the default code that was there. Before you delete that
observe the hierarchical nature of the code there.
<LinearLayout xmlns:android="http://schemas.android.com/apk/res/android"
xmlns:tools="http://schemas.android.com/tools"
android:layout_width="match_parent"
android:layout_height="match_parent"
android:orientation="horizontal">
</LinearLayout>
8. Add a user editable textfield in the layout by adding xml commands as shown below: This should
embedded within the <LinearLayout>
<EditText android:id="@+id/edit_message"
android:layout_width="wrap_content"
android:layout_height="wrap_content"
android:hint="@string/edit_message" />
9. When you need to add text in the user interface, you should always specify each string as a
resource. String resources allow you to manage all UI text in a single location, which makes it
easier to find and update text. Externalizing the strings also allows you to localize your app to
different languages by providing alternative definitions for each string resource.
(There is button for adding and removing String resources. Somehow it does not work for me. So
you need make sure that strings.xml looks as follows: You may simply copy and paste from
below.
<?xml version="1.0" encoding="utf-8"?>
<resources>
<string name="app_name">My First App</string>
<string name="edit_message">Enter a message</string>
<string name="button_send">Send</string>
<string name="action_settings">Settings</string>
<string name="title_activity_main">MainActivity</string>
</resources>
10. (We are done with adding text field). Now add a button. In the LinearLayout after the text field
add the following XML statements to add a button.
<Button
android:layout_width="wrap_content"
android:layout_height="wrap_content"
android:text="@string/button_send" />
11. Run it and see the interface. Right click on MyApp and select Run as Application. You will wait
for the Android emulator to set up and then unlock, and select the MyApp application. You will
see the two widgets that you created.
12. Now make sure textwidth is expandable by set one more parameter in the EditText widget as
shown below. Save and run it again. You will see a longer text area.
<EditText
android:layout_weight="1"
android:layout_width="0dp"
... />
Next step is to add another activity to “send” the message.
1. To respond to the button's on-click event, open the fragment_main.xml layout file and add the
android:onClick attribute to the <Button> element:
<Button
android:layout_width="wrap_content"
android:layout_height="wrap_content"
android:text="@string/button_send"
android:onClick="sendMessage" />
2. Since onclick above is calling sendMessage function, we need to define this function in the /src
directory. Open the MainActivity class (located in the project's src/ directory) and add the
corresponding method and study the function & understand.
/** Called when the user clicks the Send button */
public void sendMessage(View view) {
// Do something in response to button
}
3. Now we need to add an Intent to this method or function. An Intent is an object that provides
runtime binding between separate components (such as two activities).
Inside the sendMessage() method, create an Intent to start an activity called DisplayMessageActivity
as shown below:
Intent intent = new Intent(this, DisplayMessageActivity.class);
4. This requires import of class Intent as import android.content.Intent;
Any import dependencies can be resolved by control-shift-o (we will use this repeatedly..)
5. The content of the sendMessage method will look like this: you need to resolve imports using contrlshift-o to remove some errors (that show up as red markers on the left of the main window)
Intent intent = new Intent(this, DisplayMessageActivity.class);
EditText editText = (EditText) findViewById(R.id.edit_message);
String message = editText.getText().toString();
intent.putExtra(EXTRA_MESSAGE, message);
6. Define the string EXTRA_MESSAGE as shown below in the main activity class:
public class MainActivity extends ActionBarActivity {
public final static String EXTRA_MESSAGE = "com.example.myfirstapp.MESSAGE";
...
}
7. To start an activity, call startActivity() and pass it your Intent. The system receives this call and starts
an instance of the Activity specified by the Intent.
With this new code, the complete sendMessage() method that's invoked by the Send button now
looks like this:
/** Called when the user clicks the Send button */
public void sendMessage(View view) {
Intent intent = new Intent(this, DisplayMessageActivity.class);
EditText editText = (EditText) findViewById(R.id.edit_message);
String message = editText.getText().toString();
intent.putExtra(EXTRA_MESSAGE, message);
startActivity(intent);
}
8. Now create a new activity in Eclipse to display the message: use the widget at the left most top
corner:
Fill the new activity as shown below:
9. All activities must be declared in your manifest file, AndroidManifest.xml, using an <activity>
element. The tool automatically does this for you. Make sure AndroidManifest.xml looks like as
shown below:
<application ... >
...
<activity
android:name="com.example.myfirstapp.DisplayMessageActivity"
android:label="@string/title_activity_display_message"
android:parentActivityName="com.example.myfirstapp.MainActivity" >
<meta-data
android:name="android.support.PARENT_ACTIVITY"
android:value="com.example.myfirstapp.MainActivity" />
</activity>
</application>
10. Now we have to receive the Intent (that was sent). You can get the Intent that started your activity
by calling getIntent() and retrieve the data contained within it. In the DisplayMessageActivity class’s
onCreate() method, get the intent and extract the message delivered by MainActivity. The complete
onCreate() method for DisplayMessageActivity now looks like this:
@Override
public void onCreate(Bundle savedInstanceState) {
super.onCreate(savedInstanceState);
// Get the message from the intent
Intent intent = getIntent();
String message = intent.getStringExtra(MainActivity.EXTRA_MESSAGE);
// Create the text view
TextView textView = new TextView(this);
textView.setTextSize(40);
textView.setText(message);
// Set the text view as the activity layout
setContentView(textView);
}
11. You can now run the app. When it opens, type a message in the text field, click Send, and the
message appears on the second activity.
12. You have completed your first app starting from the scratch.
Lessons learned:
1. This is a fine example object-oriented design, programming, class hierarchy, inheritance and
simple class design. Consider this as a working example for OOP.
2. This show exactly the insides of an app, thus provides a good understanding of the app design
process.
3. This development also shows the separation of the code and the declarative aspects of the code
like the resources and the Manifest and fragment xml files for resource description.
4. This also shows the capabilities of Eclipse development environment with Android plug-ins.
5. This also illustrates the emulated Android esp. when you are beginner developer.
6. The app actual shows the end points of the pipeline send and receive. If you add the
computational part, now you have full-fledged application. (Even simple reversing of the
message is a computation! Try it.).
Next step: http://developer.android.com/training/basics/actionbar/index.html

