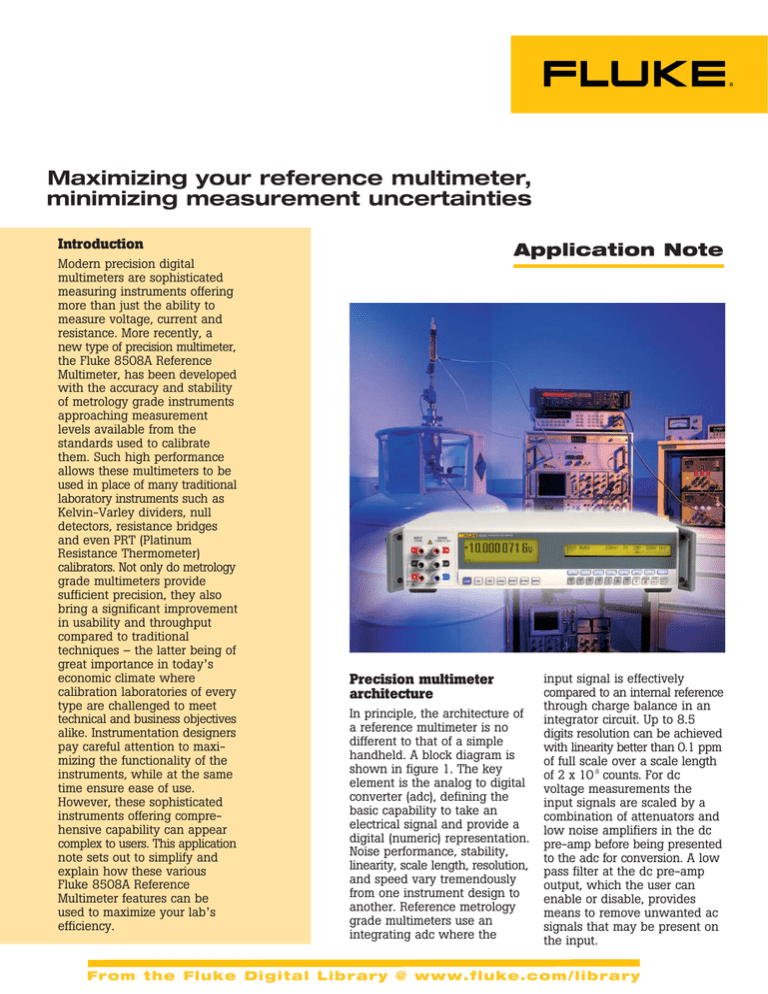
Maximizing your reference multimeter,
minimizing measurement uncertainties
Introduction
Modern precision digital
multimeters are sophisticated
measuring instruments offering
more than just the ability to
measure voltage, current and
resistance. More recently, a
new type of precision multimeter,
the Fluke 8508A Reference
Multimeter, has been developed
with the accuracy and stability
of metrology grade instruments
approaching measurement
levels available from the
standards used to calibrate
them. Such high performance
allows these multimeters to be
used in place of many traditional
laboratory instruments such as
Kelvin-Varley dividers, null
detectors, resistance bridges
and even PRT (Platinum
Resistance Thermometer)
calibrators. Not only do metrology
grade multimeters provide
sufficient precision, they also
bring a significant improvement
in usability and throughput
compared to traditional
techniques – the latter being of
great importance in today’s
economic climate where
calibration laboratories of every
type are challenged to meet
technical and business objectives
alike. Instrumentation designers
pay careful attention to maximizing the functionality of the
instruments, while at the same
time ensure ease of use.
However, these sophisticated
instruments offering comprehensive capability can appear
complex to users. This application
note sets out to simplify and
explain how these various
Fluke 8508A Reference
Multimeter features can be
used to maximize your lab’s
efficiency.
Application Note
Precision multimeter
architecture
In principle, the architecture of
a reference multimeter is no
different to that of a simple
handheld. A block diagram is
shown in figure 1. The key
element is the analog to digital
converter (adc), defining the
basic capability to take an
electrical signal and provide a
digital (numeric) representation.
Noise performance, stability,
linearity, scale length, resolution,
and speed vary tremendously
from one instrument design to
another. Reference metrology
grade multimeters use an
integrating adc where the
input signal is effectively
compared to an internal reference
through charge balance in an
integrator circuit. Up to 8.5
digits resolution can be achieved
with linearity better than 0.1 ppm
of full scale over a scale length
of 2 x 10 8 counts. For dc
voltage measurements the
input signals are scaled by a
combination of attenuators and
low noise amplifiers in the dc
pre-amp before being presented
to the adc for conversion. A low
pass filter at the dc pre-amp
output, which the user can
enable or disable, provides
means to remove unwanted ac
signals that may be present on
the input.
From the Fluke Digital Library @ www.fluke.com/library
For ac voltage measurement,
another signal path, also with
signal scaling, uses an rms to
dc converter to generate a
signal representing the rms
value of the input, which in
turn is measured by the adc. To
perform current measurements
the current converter circuit
incorporates current shunts that
produce a voltage proportional
to the current input for measurement by either the dc or ac
voltage sub-systems. By
employing appropriate design
techniques, the input burden
voltage that the multimeter
presents at its input terminals
when measuring current can
be essentially isolated from the
voltage developed across the
internal current shunts, reducing
the disturbance (burden voltage)
that it presents to the source of
current being measured.
Resistance measurement capability is provided by an internal
current source, generating a
range of stable constant currents,
that, together with the various
voltage ranges, allow resistance
to be measured by the simple
application of Ohms law. In the
case of the new 8508A
Reference Multimeter, ranges
are extended from 2 Ω to 20 GΩ
full scale. The input switching
design allows the reference
multimeter to have two sets of
input terminals, one on the
instrument front panel and one
on the instrument rear panel.
Both sets of terminals are
specified to full 1000 V rms
rating. With two channels,
ratiometric measurements can
be performed easily in both the
voltage and resistance functions.
ADC operation Choosing the appropriate
configuration for the
measurement
The multi-slope integrating adc
is capable of extremely high
resolution with linearity better
than 0.1 ppm of full scale.
However, high resolution, can
only be achieved at relatively
long integration times. In
addition to trading off conversion
speed and resolution, the
integration time has a direct
impact on noise rejection. The
integration itself effectively
averages any ac or noise
content in the signal being
measured, reducing variation in
the displayed reading. It can
also be used to reject unwanted
line frequency signals present
on the input being converted.
These unwanted signals
effectively appearing in series
with the input are commonly
known as series mode noise. If
the integration time is equal to
an exact multiple of the line
period, the unwanted line
frequency signal integrates out
to zero. The user is able to
select the resolution and, in the
8508A, can also choose between
a ‘normal’ and ‘fast’ adc mode,
thereby effectively determining
the integration time. Because
the adc integration time is
related to the power line
frequency, the user must ensure
the reference multimeter is
configured correctly for the line
frequency of the power supply
to which it is connected. This is
normally set during manufacture,
but can also be set by the user.
In the dc voltage function the
5.5 digit ‘fast’ mode has an
integration time of 3.3 ms at
50 Hz and 60 Hz line operation.
For all the other combinations
of resolution and adc normal/
fast selection, the integration
time is a multiple of power line
period. Provided the user
correctly configures the reference
multimeter for line frequency
the adc will provide rejection of
line related signal pickup in all
modes except 5.5 digit ‘fast’.
Up to 80 dB of rejection at line
frequency multiples is typically
achieved. Failure to set the
correct line frequency will
result in excessively noisy
readings when series mode line
pickup is present.
Choosing a higher resolution
mode will effectively mean
choosing a longer integration
time, and the signal will be
‘averaged’ within the adc
integrator for longer. In addition
to the higher resolution, the
result is lower reading to
reading runaround (noise) and
a lower effective bandwidth. At
the higher resolutions multiple
adc cycles are digitally averaged
to provide a single displayed
reading. The user can also
employ the reference multimeter’s math modes to digitally
average readings, allowing
flexibility in the trade off
between effective noise bandwidth and measurement time.
Choice of most appropriate
mode will depend on the application, required resolution and
signal characteristics. For most
calibration applications the 7.5
digit ‘fast’mode is appropriate,
producing readings with a
1280 ms conversion time at
50 Hz line (1067 ms at 60 Hz).
It should be noted that the
effective read rate, with the
reference multimeter free
running in internal trigger
mode, may not be as fast as
expected, especially when
considering the conversion
time alone. This is because the
adc conversions are triggered
by an internal clock at
approximately 2 Hz.
Fig. 1 Simplified DMM block diagram
2
Fluke Corporation Maximizing your reference multimeter, minimizing measurement uncertainties
Achieving a faster read rate
requires use of an external
hardware trigger signal or
triggering from the IEEE488
remote interface. This is equally
applicable to measurements
made in the resistance function,
which utilizes the dc voltage
measurement sub-system.
Practical dc applications
Typical metrology applications
include comparing voltage
standards and voltage ratio
measurements. For voltage
standards, the comparison will
typically be of two or more
voltages at nominally the same
level e.g. comparing two or
more 1 V standards with a
microvoltmeter or null detector.
Provided that the meter is
sensitive enough and the
difference between the
references is less than 10 µV,
this simple detector can give
very good results and is able to
resolve differences as small as
200 nV (0.2 ppm of 1 V).
However, if the reference
standards have a large voltage
spread the differences could be
as large as a millivolt. A typical
microvoltmeter under these
conditions would only resolve
20 µV on its 1 mV range, due
to the fundamental limitations
of scale length and resolution.
A reference multimeter on its
200 mV range can resolve
10 nV. Subject to noise
limitations, it could measure
two standards that were well
over 100 mV apart and still
resolve 10 nV. Electronic,
Zener-based references are
now widely used and often
have outputs at the 10 V, 1 V
and 1.018 V levels. Comparison
between the different voltage
outputs requires knowledge of
the voltage ratio. Traditionally,
high-precision voltage dividers
would be used for this task, a
known voltage at the 10 V
level would be divided by a
known ratio through the
(calibrated) divider and
compared at the 1 V or 1.018 V
level using a microvoltmeter.
The divider would have to be
known for all the required
ratios and would be adjusted to
null the microvoltmeter. The
reference multimeter can
replace these instruments and
simplify the measurement.
Figure 2 shows the basic
arrangement for comparing two
standards at the 10 V level –
the connections would be very
similar for 1 V or 1.018 V. Note
that the arrangement is very
similar to that described for
comparing dc standards with a
microvoltmeter except that now
the reference multimeter
(rather than a microvoltmeter)
can handle large differences
between the two devices
without sacrificing resolution.
There are no significant problems
with this measurement provided
that the reference multimeter
isolation to ground does not
load the output of either voltage
reference and that a preliminary
zero operation is performed to
remove any residual offsets in
the multimeter and its connecting
leads. The configuration shown
is effectively a potentiometric
or differential measurement.
The reference multimeter is
configured to measure the
difference between the two
voltage references.
Ratio mode and rear
inputs
The 8508A Reference
Multimeter has two input channels
that may be switched automatically to perform a ratio
measurement. In ratio mode,
the 8508A displays the ratio of
the inputs in the form F-R
(front minus rear), or F/R (front
as a percentage of the rear), or
(F-R)/R (the difference as a
percentage of the rear). The
most commonly used of these
ratios is F/R (i.e. the front as a
percentage of the rear). In this
mode with, for example, 10 V
connected to rear channel
(reference) and 1 V connected
to the front channel, the display
would show +10.000 000 %.
This is the ratio of the unknown
1 V to the known 10 V reference.
Note that the reference multimeter is measuring the whole
voltage for each channel and is
configured to a single (20 V)
range. The only error contributions to this measurement
are the uncertainty of the 10 V
reference standard, the noise
and differential linearity of the
reference multimeter and the
noise of the UUT 1 V standard.
Typical noise of the reference
multimeter is <50 nV pk/pk
(7½ normal & 8½ fast adc
modes) and differential linearity
in 8½ digit mode is better than
0.1 ppm of full scale over a
10:1 ratio. These figures are
similar to that which might be
obtained by a skilled metrologist
with a freshly calibrated voltage
divider and microvoltmeter.
Fig. 2 The basic arrangement for comparing two standards at the 10 V level
Fluke Corporation Maximizing your reference multimeter, minimizing measurement uncertainties
3
The reference multimeter can
make this measurement continuously and its linearity does
not change significantly with
time, so setup costs are lower
and the measurements are
automated, taking less time.
Figure 3 shows how the reference multimeter can be used to
measure the whole voltage of
each reference by using identical
multiple input channels in the
ratio mode. Confirmation of the
reference multimeter’s linearity
beyond the 0.1 ppm level is
difficult under normal circumstances. However, several
instruments have now been
evaluated against 10 V Josephson
arrays. In this measurement,
the Josephson system can be
made to generate a series of
voltages between 1 V and 10 V
with uncertainties at least an
order of magnitude better than
most precision or reference
multimeter’s linearity.
Resistance applications
Another very useful application
of the reference multimeter is
in resistance measurements. An
8½ digit reference multimeter
has virtually the same linearity
on its resistance function as for
dc voltage, except, in this case,
there are no resistance standards
accurate enough to be able to
prove resistance linearity in a
conventional sense. One of the
problems of trying to measure
resistance linearity directly is
the uncertainty of the individual
resistor values. For example,
measuring linearity on the 20 kΩ
range of an 8½ digit reference
multimeter with a maximum
indication of 19.000 000 0 kΩ
would require several different
resistance standards. Assuming
that measurements were to be
made at a minimum of five
evenly spaced points throughout the range, e.g. at zero, 5 kΩ,
10 kΩ, 15 kΩ, and 19.9 kΩ,
the difficulties in finding suitable
standards soon become obvious.
Typically, resistance standards
will be available at the normal
Fig. 3 Voltage ratio measurement
decade values of 10 Ω (25 Ω
may be available), 100 Ω, 1 kΩ,
10 kΩ, etc. and so do not
provide even coverage
throughout the range. When
one considers that some DMMs
have resistance linearity specifications of better than 0.3 ppm,
and that individual resistance
standards may have uncertainties
of 1 ppm or more, test methods
using separate resistors or
decade boxes will be inadequate.
For this reason, resistance
linearity is not usually measured
during routine calibrations of
reference multimeters.
However, linearity can be
verified in the following way.
Figure 4 shows the circuit
configuration for resistance
measurement used in a reference
multimeter. The resistance
option is primarily a range of
selectable constant currents.
A constant current generator
forces a current Ix to flow
through the test resistor Rx. A
true constant current source
will generate a current
independently of the voltage
developed across its terminals,
in this case designated Input Hi
and Input Lo.
Fig. 4 Reference multimeter ohms converter
4
Fluke Corporation Maximizing your reference multimeter, minimizing measurement uncertainties
It therefore follows that if a
known resistance is applied to
the reference multimeter and
the display value noted, the
insertion of an additional
resistance in series with the
Input Hi lead should not significantly affect the multimeter’s
reading. This will confirm that
the current source can deliver
the same current through a
range of resistance values. If it
can also be confirmed that the
voltage range used for the
resistance measurement is also
linear, there is then a technically
sound way of confirming good
resistance linearity without the
need for a resistance linearity
standard. Note that the series
resistance does not need to be
a precision resistor – it could
be a low-noise potentiometer.
True Ohms – Avoiding
thermal emf errors
A typical mistake is to confuse
the four-wire and True Ohms
resistance measurement
techniques. However, the two
principles are quite different
and are used to avoid resistance
measurement errors. It is
customary in a metrology
application to employ four-wire
sensing techniques for measuring
lower value resistors so that
series lead resistance errors are
eliminated. However, this technique does not take into account
the effects of voltage offsets.
Voltage offsets are caused
by junctions of dissimilar
metals at different temperatures
within the voltage measuring
circuit. Typical sources might
be within the resistor itself, or
connecting leads and terminals.
This is why temperature
uniformity within a calibration
laboratory is important. There
will also be voltage offsets
within the reference multimeter
itself. A simple zero operation
(a mathematical subtraction)
before the measurement
commences will remove all of
these ‘static’ offsets.
These voltage offsets can also
become ‘dynamic’ in their nature.
Changes in ambient temperature due to draughts, airflow
within a room or through an
instrument or even variations
in a room’s air-conditioning
temperature can lead to offsets
that are constantly changing.
Finally there are offsets
which occur as a result of
direct heating of the shunt
resistor by the energizing
current. Where large currents
are involved, this can also give
rise to thermo-electric effects
(Peltier and Seebeck) in external
connections too. These dynamic
thermal offsets only occur
when the current is flowing,
but because of their long
thermal time-constant, can be
measured. Traditional resistance
bridge measurements use a
specific process to isolate
resistance from other unwanted
parasitics i.e. voltage offsets. A
typical arrangement would be
to place the known and unknown resistors in series and
pass a current through them.
A voltage ratio measurement
would then be made of the
voltages developed across the
potential terminals of each
resistor. The current supply
would then be reversed and
the measurement repeated. The
current reversal will cancel
effects of the voltage offsets
because in one polarity they
would add to the measured
voltage and in the reverse
polarity would subtract from it.
The average voltage ratio from
the forward and reverse currents
will remove the offsets.
Unfortunately, this reversal
of current technique could only
be found in expensive resistance
bridges. Previous multimeter
designs have attempted to
overcome this problem using
either True Ohms or Offset
Compensated Ohms techniques.
These methods essentially
switch off the current source
and take an additional voltage
reading at zero current, then
subtract this result digitally
from the ‘current on’ voltage
reading, thereby eliminating
the effect of unwanted offsets
in the measurement path.
However, this technique suffers
the disadvantage that the
measurement current switches
at the read rate, modulating the
power dissipation and temperature of the resistor under
test. This effect can lead to
significant errors when
measuring certain types of
resistors, particularly low values,
and resistors that have large
temperature and power
dependencies – an example
being platinum resistance
thermometer elements.
However, the Fluke 8508A
Reference Multimeter has
enhanced resistance measurement capabilities and can now
compensate automatically for
any static or dynamic thermal
emfs. The current reversal True
Ohms technique has been
developed and implemented,
illustrated in figure 5. In this
case, the current source is
capable of being reversed.
With forward current:
V1 = I x R + Vth
With reverse current:
V2 = -(-I x R + Vth)
Averaging V1 and V2:
= 0.5(2 x I x R + Vth - Vth) = I x R
Sense path reversal ensures V1 and V2 have same polarity for adc conversion. Note that
any offset in the PD measurement path after the reversal switching is not cancelled but is
removed with zero calibration and input zero operations.
Fig. 5 Current reversal True Ohms
Fluke Corporation Maximizing your reference multimeter, minimizing measurement uncertainties
5
Fig. 6a Current reversal after each reading
Each reading consists of two
measurements, taken automatically under the control of
the multimeter’s processor. The
first reading is taken with the
current in the forward direction,
the second with the current in
the reverse direction and the
two measurements are averaged
to provide the displayed result.
The power dissipation in the
resistance under test remains
constant, as the current is
never switched to zero. Not
only is static thermal emf
cancellation achieved, but
changing thermal emfs are also
cancelled.
As with the dc voltage
function, when in the True
Ohms function the user is able
to select the resolution and adc
mode, effectively controlling
reading resolution and sample
(integration) time. At the higher
resolutions relatively long
effective integration times
would limit the effectiveness of
the True Ohms thermal emf
cancellation, if those thermal
emfs changed significantly
during the integration time. To
avoid this situation at the
higher resolutions where multiple
adc cycles are digitally averaged,
the current is reversed several
times during the reading
sequence, rather than just once.
Figure 6a shows four adc
cycles being averaged for a
reading in each polarity with
current reversal taking place
after each reading. Figure 6b
shows current reversal taking
place after each adc cycle.
Fig. 6b Current reversal after each adc cycle
The same number of adc cycles
occur for each polarity, but the
change in emf between
consecutive polarity reversals is
much smaller so cancellation is
more effective.
Ohms guard
Another consideration when
measuring higher value
resistances is the effect of
parallel leakages in the measurement circuit. Such leakages
will divert some current away
from the resistor being measured
and cause an error in the
measurement. A reference
multimeter’s ohms guard can
effectively remove the effects of
leakage provided that a suitable
connection for the guard is
available.
Fig. 7 Ohms guard connections
6
Fluke Corporation Maximizing your reference multimeter, minimizing measurement uncertainties
The Fluke 8508A Reference
Multimeter’s resistance function
has an ‘Ext Grd’ option that
can be selected to make the
Guard terminal function as
Ω Guard. Figure 7 and 8 shows
the Fluke 8508A Reference
Multimeter’s Ohms guard in
use. The Lo Follower will
maintain Lo and Analog
Common (0 V) at the same
potential by forcing more
current through Rx and Ra until
Lo is at 0 V (Ib=0). The calibrated current Ix will then be
flowing through Rx. Note that
where the connection lead
insulation is suspect, running
Input Sense and Input Hi in
one shield, and Input Sense
and Input Lo in another, while
connecting both shields to
ohms guard, will remove any
leakage between Input
Hi/Sense Hi and Input Lo/Sense
Lo (See Figure 8).
This is because the leakage is
‘seen’ as a parallel resistance
path with a convenient tapping
(the cable screens) for ohms
guard. Provided the current
leakage resistance path is
greater than 250 Ω, not only
will the leakage current be
sourced from the Lo follower
(as Ia), but any lead capacitance
charge current will also be
driven resulting in reduced
settling times for high value
resistors.
Resistance transfers and
ratio
The Ratio function is available
on the Fluke 8508A’s Resistance
function. Furthermore, ohms
guard is also available on the
reference multimeter front and
rear inputs and is used to
eliminate lead leakages from
high resistance measurements.
When combined with ratio
switching, very high accuracy
automated resistance transfers
can be performed for both 1:1
and 10:1 ratios. In either case,
the reference multimeter will
be configured for the appropriate
resolution (5½ to 8½ digits),
adc speed, ohms source
current, analog/digital filter and
ratio mode for the particular
resistor values concerned.
The range selection will be
chosen to accommodate the
higher of the two resistor values.
For example, a 10 kΩ to 1 kΩ
ratio will use the reference
multimeter’s 20 kΩ range – the
multimeter’s excellent linearity
will ensure the maximum
transfer accuracy between the
two values. Figure 9 shows the
reference multimeter configured
via the front and rear input
terminals to compare two
resistance standards using
resistance ratio.
Fig. 8 Ohms guard operation
Fig. 9 Resistance ratio
Fluke Corporation Maximizing your reference multimeter, minimizing measurement uncertainties
7
True Ohms ratio
A unique extension to the True
Ohms and ratio capability has
now been incorporated into the
Fluke 8508A Reference
Multimeter design as a means
to avoid voltage offsets, and
the thermal effects of power
modulation in the resistances
being measured as the stimulus
and measurement are scanned
between the two channels.
Instead of switching stimulus
current between channels, the
two channels are effectively
configured in series, as shown
in figure 10, so that the stimulus
current flows continuously
through both resistances being
measured. Only the potential
difference measurement is
scanned, measuring the ratio of
the voltage across each resistor
with the same constant current
flowing continuously through
both. The power dissipation in
either resistor is constant
throughout, regardless of which
part of the measurement cycle
is being executed. This technique
is most beneficial on the lower
resistance ranges where stimulus
currents are higher, for example
100 mA on the 2 Ω range.
Because lower value resistors
are typically measured at
relatively low voltages, thermal
emf errors can also be more
significant, so this special ratio
feature is combined with the
True Ohms function, including
current reversal.
Fig. 10 True Ohms ratio
Fig. 11 Voltage ratio (resistance)
8
Fluke Corporation Maximizing your reference multimeter, minimizing measurement uncertainties
When the ratio mode is selected
in the True Ohms function, the
multimeter operates automatically
in this ‘voltage ratio’ manner.
Voltage ratio technique
for low value resistances
Where the value of the resistors
to be measured is very low,
e.g. 100 mΩ or less, a voltage
ratio technique, similar to that
used in figure 10, can also be
used. Here, an external current
source provides the test current
which is passed through the
series connected resistors. The
reference multimeter is used in
its voltage ratio mode. Using
the voltage ratio mode as
shown in Figure 11, a 1 A or
10 A source could be used.
This method allows the
resistance ratio range to be
extended and include values
below 0.1 Ω, e.g. 10 mΩ, or
even 1 mΩ. As mentioned
earlier, thermal offsets will be
significant for low value resistors
– particularly where high
currents are involved, therefore
it will normally be necessary to
reverse the current and take
the average of the two voltage
ratio measurements.
Using your reference
multimeter for decade
box calibrations
For the calibration of decade
resistor boxes, the most
convenient method is to use
the reference multimeter’s
accuracy for a direct measurement i.e. not in ratio mode.
This is because of the number
of measurements required and
the reduced accuracy needed
for most decade boxes.
Dial # Step value
Most decade boxes are two
terminal with a significant zero
resistance. True Ohms is very
effective for this kind of measurement because it will remove
voltage offsets, but not be
affected by resistance offsets –
although the reference multimeter’s input zero function can
be used to suppress these too.
Figure 12 shows a decade box
connected to the reference
multimeter on the front input.
The rear input would not
normally be used, but for the
utmost accuracy a transfer
could easily be made to a
resistance standard connected
to the rear input. Note that the
front input could also be used
for either resistor. A two-wire,
six-dial decade box of nominally
10 kΩ would require four
ranges of the reference
multimeter to be used. The
reference multimeter would be
used in the True Ohms mode
with the ranges and resolution
set as shown in Table 1. First,
a four-wire zero would be
made by connecting Sense Hi
and Input Hi to Input Lo and
Sense Lo at the decade box Lo
terminal. The input zero is then
used to remove any residual
resistance offset. The multimeter
Input Hi and Sense Hi wires
would then be moved to the
resistor Hi with all decades set
to zero. The multimeter will
indicate the true zero error of
the decade box. After recording
the zero value, the resistance
offset will be removed by the
input zero function and each
decade measured in turn at
each dial setting up to a
maximum of 11.1111 kΩ. Note
that from the resolution table,
the relative accuracy of this
measurement is very high, and
because the reference multimeter
resolution is adjusted for each
decade, it will also be very fast.
Decade
Reference
Reference
Measurement resolution
Ω
maximum multimeter range multimeter digits % of step
ppm of kΩ
1
1 kΩ
10 kΩ
20 kΩ
7.5
0.0001
0.1
2
100 Ω
1 kΩ
2 kΩ
6.5
0.001
0.1
3
10 Ω
100 Ω
200 Ω
5.5
0.01
0.1
4
1Ω
10 Ω
20 Ω
5.5
0.01
0.01
5
0.1 Ω
1Ω
2Ω
5.5
1
0.1
6
0.01 Ω
0.1 Ω
2Ω
5.5
10
0.1
Table 1 Decade box and reference multimeter resolution
Fig. 12 Decade box calibration
Fluke Corporation Maximizing your reference multimeter, minimizing measurement uncertainties
9
High voltage resistance
measurements
By increasing the output
voltage drive capability of the
Lo Follower in figure 8, the
ability of the system to
measure high resistances can
be significantly improved, with
ranges up to 20 GΩ. In previous
implementations of this topology
the maximum voltage was 20 V,
but the Fluke 8508A design
increases this to over 200 V.
Therefore when using the
8508A’s Hi voltage resistance
function, extreme caution must
always be taken, as voltages
on the input terminals can
potentially reach well in excess
of the nominal 200 Vdc.
This technique requires use
of the higher voltage ranges
within the dc voltage measurement sub-system (the 200 V
range) with an input impedance
of approximately 10 MΩ.
However, this relatively low
impedance, in comparison with
the resistances to be measured
(up to 20 GΩ), is not a problem
as any input current taken by
the dc voltage measurement
sub-system is simply supplied
by the Lo Follower output via
the Input Hi terminal, which
does not affect the stimulus
current provided by the current
sink via the Input Lo terminal.
Measurement of high resistances
at higher voltages improves
noise performance, reduces the
impact of leakages (because
the stimulus current is higher)
and allows evaluation of resistor
voltage coefficients by making
measurements of the same
resistor in both normal and
high voltage resistance modes.
Fig. 13 Conventional DMM input ‘shunt’ configuration
voltage developed across the
shunt (Vs) is applied to the
multimeter’s ac or dc measurement circuit. A multi-range
instrument uses different values
of Rs for each range. Sufficient
voltage must be developed to
ensure adequate measurement,
but this voltage also appears at
the current input terminals as
the burden voltage Vin.
Developing a high burden
voltage can disturb the conditions
in the circuit where the current
is being measured when the
DMM is inserted to make the
measurement. Any external
stray capacitance present
between the input terminals
(such as lead capacitance)
effectively appears across the
shunt, and is exposed to Vo. For
lower current ranges the
relatively high impedance
values of the shunts increase
the susceptibility to stray
capacitance and can cause
frequency response degradation.
The design of a new generation
reference mulitmeters has
addressed these issues.
The Fluke 8508A uses a
‘virtual earth’ current measurement technique (figure 14) on
the 200 µA, 2 mA and 20 mA
ranges. This method essentially
minimizes the burdens previously
associated with the ‘shunt’
method and significantly
reduces the input resistance.
Here, the input current passes
through the feedback resistor
(Rs) of an inverting amplifier,
and the voltage developed at
its input (the virtual earth) is
zero, effectively isolating the
input burden voltage from the
voltage developed across the
shunt Rs.
Low burden ‘Virtual Earth’
current measurement
techniques
The majority of multimeter
instrument designs, including
Precision DMMs, utilize the
‘shunt’ method of current
measurement, as illustrated in
figure 13. Here, the input
current is passed through a
shunt resistor Rs and the
Fig. 14 Ammeter input ‘virtual earth’ current configuration
10
Fluke Corporation Maximizing your reference multimeter, minimizing measurement uncertainties
The output voltage Vo is I x Rs,
which can now be made sufficiently large for measurement
by the voltage measuring circuits.
The virtual earth current
measurement topology brings
greatest benefits for the lower
current ranges where the shunt
resistance values are relatively
high. For the higher current
ranges the ‘shunt’ topology can
be used successfully and is
employed in the Fluke 8508A
for 200 mA, 2A and 20 A ranges.
For the operator there are
two main advantages of using
a current measurement with
‘virtual earth’ input. Firstly, and
as discussed above, with an
input resistance of virtually
zero, current measurements are
far less invasive, disturbing the
conditions less when the
multimeter is inserted into the
circuit, because the voltage
developed across the multimeter
current input is much less. But
secondly, guarding arrangements
are also simplified. This is
because there is less opportunity
for leakage errors to take place,
as the voltage developed across
the multimeter input is much
lower. Leakage errors typically
become a problem when
measuring ac currents at higher
frequencies due to stray
capacitance in the cables used
to make connection to the
multimeter.
Solving the problem of
self heating in current
measurements
Most general-purpose multimeters
of 3 or 4½ digit resolution can
measure both ac and dc currents
up to 20 A at modest accuracy
levels. The temperature
coefficient characteristics of the
current shunts and the selfheating effects due to power
dissipation in the shunts limit
linearity and settling time
performance, adversely affecting
the multimeter’s accuracy.
Consequently, high current
ranges are usually absent from
higher precision multimeters.
Using state of the art
techniques, Fluke designers
have successfully overcome
these obstacles, allowing
metrologists to make practical
high current measurements
directly with the 8508A
Reference Multimeter. The Fluke
8508A Reference Multimeter
utilizes high accuracy current
shunts with extremely low
temperature coefficients and
minimal power dissipation.
Careful design of surrounding
circuitry and thermal management has optimized settling
time and linearity performance
consistent with the requirements
for metrology applications.
High current measurements
One of the new features to
come out with the launch of
the new generation reference
multimeter is that of higher
current measurement on both
ac and dc current ranges.
Previously, all leading edge
Precision DMM’s could only
measure current to 2 A fullscale, which posed a real
problem for applications that
required current calibration of
2 A or more. For example,
calibrating the ac or dc current
ranges of a multi-product
calibrator had always been a
two-stage affair. Typically,
current ranges up to 2 A would
have been calibrated using any
precision long-scale DMM as
normal. However, multi-product
calibrators like the Fluke
5520A have ac and dc current
ranges to 20 A and therefore
could not be calibrated by just
a Precision DMM alone. This
higher current 20 A range
would require the use of a
suitably calibrated current
shunt connected to the longscale precision DMM, set to the
appropriate voltage range at
the full-scale current passing
through the shunt.
The 8508A Reference
Multimeter can measure both
ac and dc currents to 20 A fullscale thereby, eliminating the
need for external current
shunts and connection cables,
and so making the process of
high current measurement a lot
easier to prepare and perform.
Using the reference
multimeter as a high
accuracy temperature
calibration tool
Reference multimeters like the
Fluke 8508A can now offer the
metrologist another string to
their high accuracy measurement bow. The highly accurate
temperature measurement
function on the Fluke 8508A
allows the user to perform a
further two more calibration
functions. Firstly, when coupled
to a PRT (Platinum Resistance
Thermometer) device with
known characteristics, the
reference multimeter can be
used simply as a means to read
a temperature being measured
by the PRT. This is useful when
calibrating temperature sources
like dry wells. Secondly, the
reference multimeter can also
be used to calibrate PRT or
SPRT (standard platinum resistance thermometer) probes. And
with two inputs, comparisons
and transfer measurements are
simple.
Prior to making any temperature measurement, the PRT
or SPRT’s coefficients and
configuration must be entered
into the reference multimeter.
The Fluke 8508A Reference
Multimeter can store up to 100
probe settings, all of which can
be edited or deleted as required.
It can also be set up for a 2, 3
or 4-wire PRT or SPRT probes
and for values of 25 Ω or 100 Ω.
For high accuracy SPRT calibration applications the ITS-90
sub ranges are supported, as too
are the Callendar van Duesen
conversion algorithms for PRT
probes for all industrial
applications.
Fluke Corporation Maximizing your reference multimeter, minimizing measurement uncertainties
11
The Fluke 8508A provides a
temperature readout by measuring the resistance of the PRT
or SPRT probe connected, and
converting the resistance value
to temperature. The multimeter
will auto-range between the
200 Ω ‘Lo I’ Ohms range and
the 2 kΩ ‘Normal’ Ohms range
depending on the resistance
value obtained at the temperature being measured. Current
reversal True Ohms is used
with a stimulus current of 1 mA.
The Fluke 8508A Reference
Multimeters can also be set up
to display one of three user
selectable units of measure –
degrees Centigrade, degrees
Fahrenheit or Kelvin, at up to
8.5 digits resolution.
PRT probe calibration
data and flexibility
The Fluke 8508A Reference
Multimeter can be supplied
with an extended range SPRT
or a secondary standard PRT
probe from Hart Scientific, a
Fluke company. Alternatively,
these probes can be purchased
as Fluke 8508A accessories. All
probes are supplied with a
detailed certificate of calibration
containing the coefficients
needed for the temperature
conversion algorithms, obtained
by calibration at low uncertainty
against Hart’s temperature and
resistance standards. To use
with the Fluke 8508A, the
probe coefficients must first be
entered into the reference
multimeter, so that the resistance
to temperature conversion
algorithms can correctly
convert the resistance values
obtained for that particular
probe, into accurate temperature
readings.
Having probes calibrated
independently from the
reference multimeter provides
users the flexibility to use any
other probe of appropriate
resistance with the reference
multimeter, and not just the
probe supplied.
Measurement uncertainty is not
sacrificed, as the route for
temperature traceability through
the established conversion
algorithms is based on resistance
measurements at specific
temperatures, and not a direct
temperature measurement.
Directly calibrating the 8508A
together with a specific probe
would not yield better temperature measurement uncertainties,
but would mean a significant
loss in flexibility when using
other probes.
This is a fine example of both
Fluke and Hart Scientific
working together to offer a
complete range of temperature
measurement solutions to meet
the needs of any such application.
An electrical and
temperature metrology
measurement in one
single solution
The reference multimeter has
many benefits, particularly for
users with both electrical and
temperature calibrations to
perform.
When used with an SPRT or
PRT probe, the reference multimeter’s PRT function is ideal
for precision temperature
measurements and calibrations.
The two-channel ratio capability
available in the True Ohms
function can also be used to
compare PRT probes directly in
terms of their resistances.
However, if measurement of
several PRT probes simultaneously is required, then one of
the many multi-channel precision
thermometry solutions offered
by Hart Scientific, a Fluke
company, would be ideally suited.
Fluke 8508A Reference Multimeter
Reference standard accuracy and stability, in one
functionally versatile, easy to use solution
Fluke Corporation
Maximizing your reference multimeter, minimizing measurement uncertainties
Summary
Since the introduction of the
Fluke 8508A in June 2002, the
reference multimeter is now
being seen as the natural
replacement for many of the
traditional measurement methods
currently used in electrical
metrology laboratories worldwide. Already, the Fluke 8508A
Reference Multimeter can be
found in national standards
labs, commercial laboratories
and even militaries around the
world. With greater accuracy
and stability, versatility and
ease of use the reference multimeter is now seen as the ideal
investment or long-scale DMM
upgrade for any electrical
metrology based application or
laboratory. And with yet more
functionality, the reference
multimeter is a much more
attractive and cost effective
alternative to the metrologist’s
former favorite – the precision,
long-scale DMM.
Fluke. Keeping your world
up and running.
Fluke Corporation
PO Box 9090, Everett, WA USA 98206
Fluke Europe B.V.
PO Box 1186, 5602 BD
Eindhoven, The Netherlands
For more information call:
In the U.S.A. (800) 443-5853 or
Fax (425) 446-5116
In Europe/M-East/Africa (31 40) 2 675 200 or
Fax (31 40) 2 675 222
Canada (800)-36-FLUKE or
Fax (905) 890-6866
From other countries +1 (425) 446-5500 or
Fax +1 (425) 446-5116
Web access: http://www.fluke.com/
©2003 Fluke Corporation. All rights reserved.
Trademarks are the property of their respective owners.
Printed in UK 4/2003 2090893 D-ENG-N Rev A, DS267
