Printmaking_K-6 - Elementary Art Teacher Handbook
advertisement
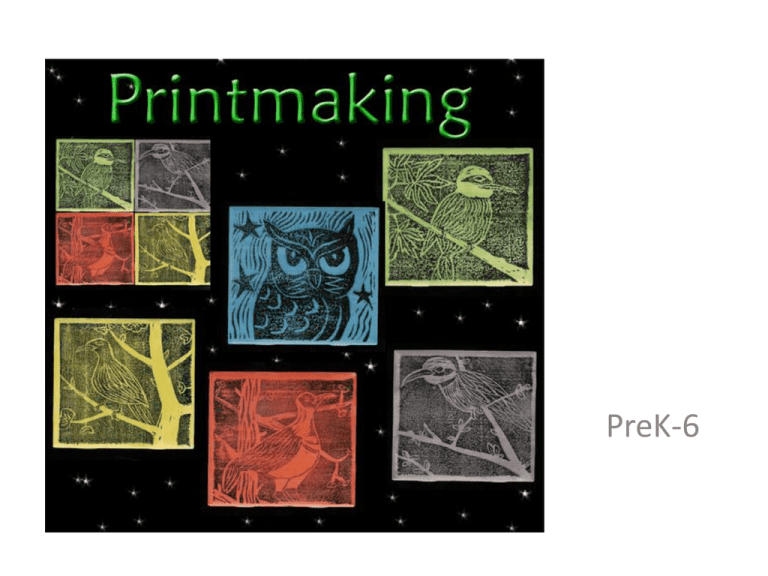
PreK-6 What is Printmaking Printmaking is the process of making artworks by printing, normally on paper. Except in the case of monotyping, the process is capable of producing multiples of the same piece, which is called a print. Each piece is not a copy but an original since it is not a reproduction of another work of art and is technically known as an impression. Painting or drawing, on the other hand, create a unique original piece of artwork. Prints are created from a single original surface, known technically as a matrix The vocabulary is wonderful: the term printmaking itself is an oxymoron, in that it means multiple original! Original means one of a kind, and a multiple is more than one, hence the oxymoron, and kids are never too young to learn what that fun sounding word means! Plate, edition, artist proof (AP), limited edition, plate mark, intaglio, serigraph (silkscreen), litho matter what level you teach, is to talk about where we see prints (or even imprints). As a female teacher, I would apply fresh lipstick before class and make a kiss print on a piece of paper to show the kids. Later, they would be able to identify this as a relief print, like linoleum, stamping tools, wood cut and so on… Printmaking is one of my favorite areas of teaching art; there are so many ways to create a print that neither you nor your students will be bored with the many choices of technique. Your students may learn just a few of the ways one can make a print, but they'll also gain an understanding of the vocabulary that goes along with the various types of prints. Printmaking is a wonderful, viable way to collect the art of others, so the understanding and knowledge you impart to them may go beyond creating their own prints--to becoming savvy art collectors! Setting Up: Preparing the Media and the Workspace Set aside a separate inking table, and another “clean” table, where students will take their inked plates to be printed on paper. An inking table should include areas for inking, which can consist of a series of styrofoam trays, one color per area, and one brayer for each. Pieces of plexiglass, large or small, and the backs of metal lunch trays are also good surfaces for inking. Squeeze out a line of ink (from a tube), or use a popsicle stick or stiff piece of cardboard, to lay out a strip of ink at the top of the inking station. This is called a reserve, from which you will draw more ink as needed. Set the brayer onto the ink, picking up an even line of ink. Then set the brayer in the center of the inking area and begin rolling it vertically and horizontally, until the ink is evenly spread and starts to make a “stick stick” noise. Now the brayer is properly inked and can be rolled onto a plate. You will need to reload the brayer (roller) frequently and pass over the plate in all directions until it is thoroughly covered with a thin and even coat. Too thick and it will begin to fill up the finely engraved lines...too thin and you will get an uneven, ghostly print. Brayers • Brayers come in all shapes and sizes, and printmakers have their personal preferences. A four-inch wide “soft rubber” brayer is the most versatile tool and the first kind of brayer to purchase for your students. Soft rubber brayers apply ink deeply and thoroughly onto collograph plates (made of layers of stiff paper). Often these brayers have plastic handles/casings that hold up well, and never get squeaky, the way looped metal handles do. • The hard black-rubber brayers are much stiffer, and many artists prefer these for applying pressure or burnishing during printmaking. There may be a slight advantage to using the hard brayer for inking styrofoam plates, though soft rubber brayers still work well on this material. • There are foam brayers, which are closer to very dense and fine sponges. These are also very versatile, since they can transform tempera paint into “ink” because they absorb the paint and can distribute it evenly, without sliding and dripping, onto both styrofoam and collograph printing plates. These brayers work with both printing ink and tempera paint. They are also good paint applicators, especially for rolling out thin layers of color over large areas, such as backgrounds for murals. The disadvantage to using these foam brayers is that they are harder to clean, since they must be soaked and gently squeezed out to remain flexible and soft • There are different widths of brayers. Four-inch brayers do most jobs, though having a few thinner brayers and a wider one allow for working on small areas and burnishing larger prints One local teacher’s advice!!! • We roll out ink on scrap pieces of foam core board (donated by a local frame shop). At the end of class, we just let the inking plates dry and use them again the next day. Saves lots of cleanup time and we will throw them away at the end of the project. I have one inking table and one printing table to keep prints clean. Palettes for Rolling Ink • Wrap an old magazine with aluminum foil to make a palate for your ink. • Plexiglass • Cafeteria Trays • Foam Trays • Table Top if it is smooth and non-porus • Wax Paper that has been taped down • The list goes on and on. Delayed Printing / Waking up Dried Ink If a large mural is planned for printing, it can often make sense to ink the various pieces for the mural, laying them ink-side up and making all composing decisions, without rushing because the ink might dry. Then, at the end of class, or even the next week – carefully sponge-dampen the mural paper, and with help, lay it directly over the composed inked printing plates, burnishing together with your hands. Often two such large prints can be pulled, using the dampen-end paper technique. Practice Makes Perfect!! Remember this takes a bit of practice and experience. If the ink starts to get too dry on the glass, a fine mist of water from a spray bottle and a little working with the scraper can salvage it. Plates can be inked and printed about six times before the image starts to deteriorate. Pulling the Plate When the plate is nicely inked take it to the clean area where you will place the plate face up allowing for a border edge for the paper. Gently place the paper on top of the plate starting at one corner and "laying" it on to prevent the paper moving in any way and smudging the image. With a clean hand, press all over the back of the paper to adhere the plate. Then burnish the whole area with the back of a spoon to transfer the ink to the paper. You can lift a portion of the print from the plate to check on the impression without detaching it completely. When you are satisfied with the print slowly "pull" it off the plate while holding down one corner with your finger Nature Prints Leaves, anything that can be painted and pressed makes nice prints, or rubbings (like bark, rocks or sandpaper) is another form of making a print - layering these with different colors could make an interesting picture. Fish Print:Gyotaku Japanese Fish Printing Fruit and Veggie Print Stamping For stamping, both printing ink and tempera paint can be used. Finding things to stamp with, this can also be stuff brought in by your artists - what can they find at home to print with? I use bottle tops, lids, foil balled up to make interesting designs, plastic bags bunched up with rubberbands, matchbox cars, any little plastic toys, even the curvy side of lasagna works. Collograph: Plate • Gluing yarn (I find thicker easier to glue, but thinner gives more detail), lace, fabric, burlap, textured materials to a piece of cardboard in a design. Let the yarn or material and glue dry, then apply ink to the plate - one or multiple colors will work - and print. Collograph Collograph The Collograph Plate can be art in and of itself!!! Draw on your dry prints!!! Glue Printing with Foil Plate Objectives: Student will: • create a number of line compositions to various music • create a glue relief print with interesting line quality • enhance a print with oil pastels showing knowledge of color planning Materials • • • • • • • • 6 x 9 inch paper (or desired size) India ink and brushes 6 x 9 inch cardboard (or desired size) white glue (Elmer's works fine) brayers, black printing ink, wooden spoons inking plates (Plexiglas works great) assorted printing papers (colors are nice to use) oil pastels Preparation & Instructions Collect an assortment of music (instrumental only). Pre-cut cardboard for printing plates (6 x 9 inches or 8 x 10 inches would be good). 1.Present life and times of Wassily Kandinsky - show and discuss examples of works (before or after the art making lesson). Kandinsky worked to music. 2.Paint along with students - make several of your own line works to the music. This doesn't take much demonstration. 3. Demonstrate how to make a printing plate with white glue - it is often best to put on two layers of glue (second layer after the first has dried depending on how thick you glue is). 4.Demonstrate proper printing method to get clean prints. Procedures • • • • • • • • 1. Paint with black ink to music - make a new composition for each selection of music. Save all paintings as they can be used for projects later. 2. Select favorite line painting to make a glue relief plate. Transfer lines to cardboard plate (recycled corrugated cardboard works great). 3. Go over lines with white glue (it may take two coats to cover) - let dry completely. While printing plates are drying, students could be painting left over line paintings. Use tempera or watercolors. 4. Seal printing plate 5. Print onto white or colored papers using black ink (or any dark color). Roll ink onto printing plate - thin even coats of ink. Move to clean surface - place paper over inked plate. Rub with back side of wooden spoon. 6. Enhance dried print with oil pastels. 7. Optional - make collage prints out of ones on colored paper (cut a part and piece back together again combining two prints). 8. Cover relief plate with aluminum foil. Texture with dull pencil - antique with tempera, India ink, or shoe polish. Glue Relief Printmaking - with foil plate - You can create a plate with Elmer’s glue Elmer's glue on scrap matboard, sealed with gloss medium & varnish. Light watercolor was applied before sealing so I could see the glue after it dried clear. It gave me more of a map the first time I went over it with an inked brayer. The inked plate, with a darker color applied to the raised glue areas. Pulling the Print Monotype Mono means one of a kind The traditional monotype is black & white, and it is printed with etching on a smooth glass plate. The painted image is then transferred by carefully placing paper on the plate and applying pressure. When the paper is removed, so is the painted image and most of the ink. Watercolor Monotypes: 1st Grade You can tape down foil to create area for monoprint Watercolor Monotypes: 3rd Grade Watercolor Monotypes: 7th Grade Watercolor Monotypes: 5th Grade Mono print with printing inks : 2nd grade Mono print with printing inks : 2nd grade Mono print with printing inks : 2nd grade Ghost Prints Result when a plate is printed once or twice again, after its initial inking, using up the remaining ink. Ghost prints can also be made after the printing plate has dried – even weeks later, because the ink is water soluble – by first wetting the printing paper with a damp sponge before printing the dried plate. Firmly rubbing the back of the damp paper into the plate will give the best results. Styrofoam Prints Using a tool such as a blunt pencil, carve or engrave lines, dots and larger flat areas into the styrofoam. Experiment with a variety of marks and shapes, including pressing small objects into the plate to make an impression. Styrofoam Prints RELIEF!!!!! Relief prints reverse the image from the block to the print. (Students must take care in reversing any letters or words as they plan their block.) Styrofoam Prints 1. Start by cutting off the rounded corners of your styrofoam tray so that it lays flat. This is the size of the surface you have to work with. 2. On a piece or scratch paper, draw a sketch to use for your print. Tip: Keep it simple… tiny details do not show up very well with this type of print. 3. Tape your drawing onto the foam plate. Transfer the image to the foam by tracing over your picture using a firm and steady pressure. When you have gone over the whole image, remove the tape and picture. You will need to go over the foam plate one more time with your pencil to carefully carve out the details. 4. Get your work area ready! Cover your work area.. Squeeze a finger sized amount onto your palate and roll back and forth and up and down with your rubber brayer until it is evenly covered. 5. Roll ink onto your foam printing plate. 6. Flip printing plate over onto a clean sheet of recycled paper. 7. Press firmly all around. Then carefully peel the paper off. 8. Allow to dry. Styrofoam Prints Styrofoam Print on Colored Paper These prints are made from Styrofoam printing plates....they used one color of ink (actually, I use Chromacryl) they had a choice of light or dark green for the foliage prints. They printed multiple copies on white paper. The animal image was printed in the same manner - they could use red, orange or yellow ink. When the prints were dry, they hand colored their prints using Sanford plastic markers (they are very crayon-like, but you can sharpen them in a regular pencil sharpener...they are "kind-of" erasable and they are hollow inside....I love them!) They cut out their animals and mounted them to the foliage prints using the foam 3D-O's. Teacher in Mumford-NY. Mary Lathron Cardboard Relief Prints * Corrugated Cardboard * Pencil * Marker * X-Acto Knife * Brayer (explained later) * Printing Ink (preferrably water-based) * Non-Porous surface for ink * Paper slightly larger than the cardboard Cardboard Relief Prints • Begin by drawing your design in pencil. An abstract design works tends to work best. If you have trouble seeing the pencil lines you can color in the shapes that will be cut away with a marker Using an X-Acto knife, lightly cut around the shapes. You are not trying to cut all the way through the cardboard, just throught the first layer. With kids, help them with this. Use your fingers to peal up a corner of the cardboard where you have cut. Pull the cardboard up lightly. You are trying to peal up the first layer to show the wavy center layer. Do this with all of the areas that you wish to be textured in the print. Ink Plate and Use the brayer to evenly roll the ink onto the printing surface. Once the surface is covered, you need to move quickly if using water-based ink. Lay the paper over the top of the printing surface. Use you hand to press down the paper. Be sure to rub the entire surface. lowly peel the paper up and let it dry. You can re-apply ink to the printing surface a number of times. Finished Cardboard Print Wood cut Woodcut • Woodcut, a type of relief print, is the earliest printmaking technique, and the only one traditionally used in the Far East. It was probably first developed as a means of printing patterns on cloth, and by the 5th century was used in China for printing text and images on paper. Woodcuts of images on paper developed around 1400 in Europe, and slightly later in Japan. These are the two areas where woodcut has been most extensively used purely as a process for making images without text. • The artist draws a sketch either on a plank of wood, or on paper which is transferred to the wood. Traditionally the artist then handed the work to a specialist cutter, who then uses sharp tools to carve away the parts of the block that he/she does not want to receive the ink. The raised parts of the block are inked with a brayer, then a sheet of paper, perhaps slightly damp, is placed over the block. The block is then rubbed with a baren or spoon, or is run through a press. If in color, separate blocks are used for each color. Woodcut by Edvard Munch Artists who worked with Woodcuts • Albrecht Dürer, Werner Drewes, Dulah Marie Evans, Hiroshige, Hokusai. Gustave Baumann Linoleum Prints Linocut • Linocut is a printmaking technique, a variant of woodcut in which a sheet of linoleum (sometimes mounted on a wooden block) is used for the relief surface. A design is cut into the linoleum surface with a sharp knife, V-shaped chisel or gouge, with the raised (uncarved) areas representing a reversal (mirror image) of the parts to show printed. The cut areas can then be pulled from the backing. The linoleum sheet is inked with a roller (called a brayer), and then impressed onto paper or fabric. The actual printing can be done by hand or with a press. • As the material being carved has no particular direction to its grain and does not tend to split, it is easier to obtain certain artistic effects than with most woods, although the resultant prints lack the wood character of wood block printing. Linoleum is also much easier to cut than wood, which must be carved away, but the pressure of the printing process degrades the plate faster. It is also difficult to create larger works due to the material's fragility Linocut Linoleum Prints • Draw your sketch • Carve out the positive (white) space • Take a minute to look at your drawing and decide which areas you want to leave and which areas you want to carve away. Remember that the raised areas will be what shows up in the ink. My biggest mistake when I first started, was trying to carve too deep into the linoleum. You really don't have to carve deep at all, just along the surface. The tools are sharp, and you can cut yourself so use with caution. • HAVE STUDENTS CROSS WRISTS TO ELIMINATE CUTS!!! • Ink your block and pull a print Linoleum Prints Draw right on linoleum: You can start with chalk Carve using linocut tool. They come in left handed and also in linozip (pull towards you). Cross wrists to avoid cutting. Ink Palette and plate Pull Print Print and Block are mirror images Finished Print Safe-T cut They even make it in woodgrain or in special shapes now!!! Random Tip Shared at a NYSATA Conference!!! TIP: When you are inking the linoleum block, set the block on top of a rubber-based shelf liner (this material is also used to keep carpets in place). It will hold the block in place quite well when you are inking. I think any hardware store or big chain retailer like Walmart all carry this. Clean Up Tips: Most printing inks, suitable for school use, are water-soluble. This means that while cleaning is easy with water, it is also important to keep prints away from water, as their ink will bleed (LITTLE WET HANDS!!!) Drying and Storing Work in Progress Printing ink can take a while to dry and can be quite sticky. You will want to have designated areas for students to lay both their prints and their plates to dry. With adult assistance, hanging prints on clotheslines (pinned back to back to make more space) is another option for drying many prints at one time. Wax paper works well for wrapping a semi-dry print for transport home, or a plate before it is put away in a portfolio. If pressed for space and must stack prints to dry, layering wax paper between wet prints keeps them from sticking together. A Word About Paper There are so many different types of paper available from handmade to bond, the choices are endless. For printing lessons in a classroom setting, all you really need is white bond paper, manilla, newsprint or bristol board. If you have access to (and a budget for) special printmaking papers, you will notice a definite difference in the quality of printing. Rice, mulberry and watercolour papers all work extremely well with printmaking projects. Keep in mind however that with printmaking, you tend to go through a lot of paper. If you have papermaking facilities at your disposal, why not have your students make their own printmaking paper?
