How To Use This Lab Skeleton
advertisement
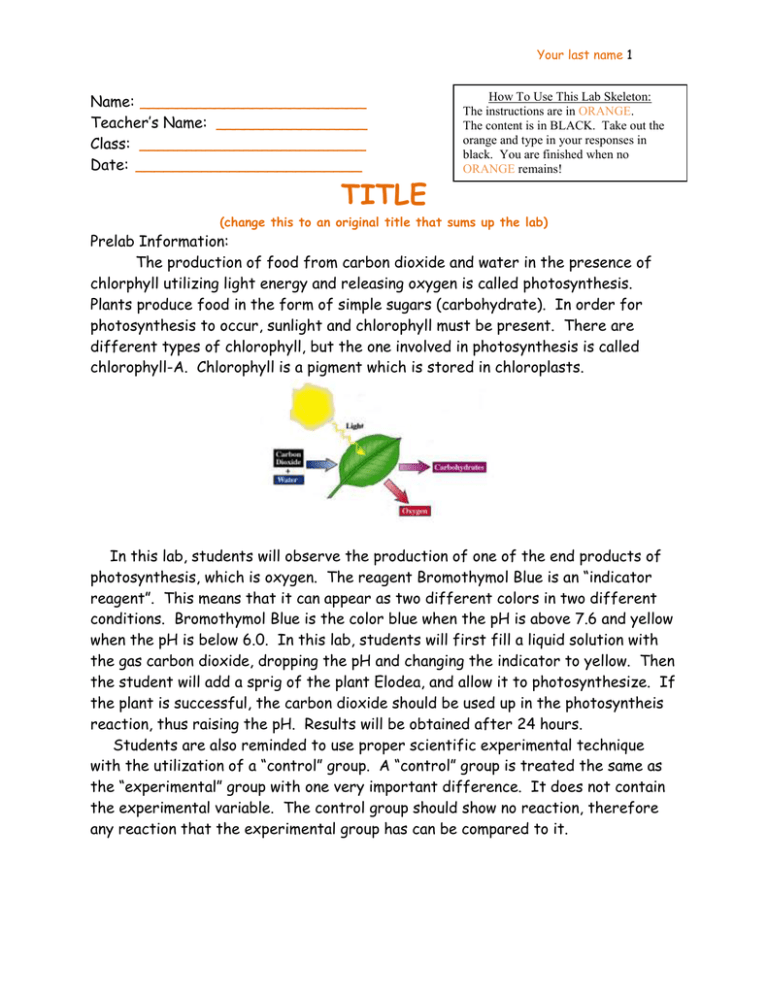
Your last name 1 Name: ________________________ Teacher’s Name: ________________ Class: ________________________ Date: ________________________ TITLE How To Use This Lab Skeleton: The instructions are in ORANGE. The content is in BLACK. Take out the orange and type in your responses in black. You are finished when no ORANGE remains! (change this to an original title that sums up the lab) Prelab Information: The production of food from carbon dioxide and water in the presence of chlorphyll utilizing light energy and releasing oxygen is called photosynthesis. Plants produce food in the form of simple sugars (carbohydrate). In order for photosynthesis to occur, sunlight and chlorophyll must be present. There are different types of chlorophyll, but the one involved in photosynthesis is called chlorophyll-A. Chlorophyll is a pigment which is stored in chloroplasts. In this lab, students will observe the production of one of the end products of photosynthesis, which is oxygen. The reagent Bromothymol Blue is an “indicator reagent”. This means that it can appear as two different colors in two different conditions. Bromothymol Blue is the color blue when the pH is above 7.6 and yellow when the pH is below 6.0. In this lab, students will first fill a liquid solution with the gas carbon dioxide, dropping the pH and changing the indicator to yellow. Then the student will add a sprig of the plant Elodea, and allow it to photosynthesize. If the plant is successful, the carbon dioxide should be used up in the photosyntheis reaction, thus raising the pH. Results will be obtained after 24 hours. Students are also reminded to use proper scientific experimental technique with the utilization of a “control” group. A “control” group is treated the same as the “experimental” group with one very important difference. It does not contain the experimental variable. The control group should show no reaction, therefore any reaction that the experimental group has can be compared to it. Your last name 2 PURPOSE: The purpose is the reason why the lab is being done. You type the purpose of the lab (in your own words) here. HYPOTHESIS: You type your hypothesis here. A hypothesis is a testable statement about what you think is going to happen when the experiment is performed. It should include both a guess AND a reason why you think that guess is correct. MATERIALS: You add a list of what you used. PROCEDURE: 1. 2. 3. 4. 5. 6. 7. Obtain two glass test tubes. Using masking tape and a sharpie marker, label one “control group” and the other “experimental group”. Put the names of the members of the group on the tubes as well. Place the test tubes in a beaker to ensure that they remain upright. Add 10mL water plus 1-2 drops of bromothymol blue to each test tube. Gently blow into the tube using a straw until the indicator changes color to yellow. This will ensure that the tubes are each full of carbon dioxide gas. Carefully add 5mL seltzer to get a more significant color change to yellow. Place a piece of Elodea in the “experimental” test tube. Record the pH and the color of both test tubes. Expose both test tubes to sunlight by leaving them near a window for at least 24 hours. After the 24 hour incubation period, record the pH and the color of both test tubes. Your last name 3 DATA: Neatly type your data below. Be sure that EVERY number has a unit and the correct number of significant figures is used for all calculations. Initial pH Final pH pH Initial Color Final Color Color Control Experimental For a visual representation, you will always want to graph your data. Pay attention to where the independent and dependent variables go. You can make a computergenerated graph, or you can print the graph grid below and hand-draw your graph Your last name 4 (use colored pencils to make it look really nice). For this experiment, you should have two lines on your line graph. Construct a legend so that the reader knows which line is which. Figure 1: Title (look back in your “How To Make A Graph” notes to see how to write a good title for a graph) LEGEND Your last name 5 Remember to label your axes! CONCLUSION: Use your answers to the following Analysis Questions (which you worked out on your Rough Copy) to construct a conclusion paragraph. YOU SHOULD NOT SHOW THE QUESTIONS IN YOUR FINAL DRAFT! Your interesting and well-written paragraph should contain the answers to all of the questions below. Remember to use scientific writing (passive voice, no personal pronouns). 1. Was the hypothesis supported or rejected? Why? 2. What does a yellow tube indicate? 3. What does a blue tube indicate? 4. Explain what occurred in the “control” test tube. 5. Explain what occurred in the “experimental” test tube. 6. How can a scientist be sure that a blue color change indicates that photosynthesis occurred? 7. Imagine this experiment was repeated in the same manner, however instead of filling the liquid solution with carbon dioxide (CO2), the student filled it with helium gas (He). What would the outcome of the experiment be? Your last name 6 8. Imagine this experiment was repeated in the same manner, however the test tubes were put into a dark closet instead of a sunny window. What would the outcome of the experiment be? 9. What changes or improvements could be suggested for a related experiment? After you have finished writing the Conclusion, go back and write the Title. The Title should be a short statement that sums up what the entire lab was about. Be creative – but make sure the title represents the experiment! You cannot use the title that your instructor used! Last-minute check! Did you use the spellchecking feature to make sure your words are spelled correctly? Have you removed ALL of the instructions from the lab skeleton? Are you going to make sure your lab report prints neatly (do not cut the data section or the graphs across two sheets of paper!) and is stapled in the upperleft hand corner?
