Five tips for efficient file management in Windows 7
March 3, 2011
By Susan Harkins
The Windows 7 environment will spook some XP users at first. It isn't an extension of XP; it's an entirely new
interface. Although the underlying file structure is the same, there's less to file management. The truth is,
storing and accessing files in XP and earlier versions required some knowledge of the file structure. Windows 7
doesn't require that knowledge -- the file hierarchy is behind the scenes. Consequently, users new to the PC will
find Windows 7 easy to use, but those upgrading from XP might be a bit disoriented. These five tips will help
your users acclimate themselves to Windows 7 so they can get to work a bit faster.
1: Documents aren't files
Documents is the XP My Documents folder, only better. It's no longer just a folder. Documents is now a library.
(I'll explain libraries next.) When you save an Office file, the application will default to Documents, just as it used
to default to My Documents. While you're learning Windows 7, save files to Documents because they'll be easy
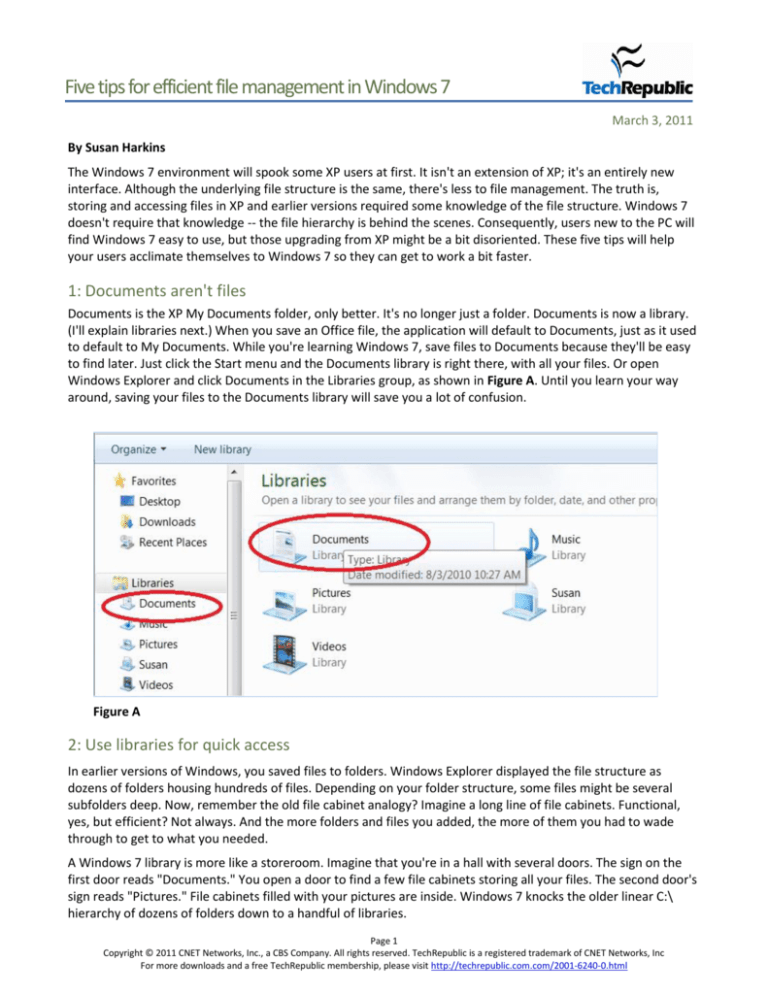
to find later. Just click the Start menu and the Documents library is right there, with all your files. Or open
Windows Explorer and click Documents in the Libraries group, as shown in Figure A. Until you learn your way
around, saving your files to the Documents library will save you a lot of confusion.
Figure A
2: Use libraries for quick access
In earlier versions of Windows, you saved files to folders. Windows Explorer displayed the file structure as
dozens of folders housing hundreds of files. Depending on your folder structure, some files might be several
subfolders deep. Now, remember the old file cabinet analogy? Imagine a long line of file cabinets. Functional,
yes, but efficient? Not always. And the more folders and files you added, the more of them you had to wade
through to get to what you needed.
A Windows 7 library is more like a storeroom. Imagine that you're in a hall with several doors. The sign on the
first door reads "Documents." You open a door to find a few file cabinets storing all your files. The second door's
sign reads "Pictures." File cabinets filled with your pictures are inside. Windows 7 knocks the older linear C:\
hierarchy of dozens of folders down to a handful of libraries.
Page 1
Copyright © 2011 CNET Networks, Inc., a CBS Company. All rights reserved. TechRepublic is a registered trademark of CNET Networks, Inc
For more downloads and a free TechRepublic membership, please visit http://techrepublic.com.com/2001-6240-0.html
Five tips for efficient file management in Windows 7
Libraries don't actually store your files. Your files are still stored in the traditional linear hierarchy. Libraries
simply pull related folders into one spot for quicker access. It's a virtual view of your hierarchy. I recommend
that you try to adjust to the library structure, but if you truly hate it, you can display a more traditional view. To
do so, choose Folder And Search Options from the Organize menu. In the Navigation Pane section, check the
Show All Folders option.
3: Avoid the HomeGroups password pitfall
HomeGroups are like libraries but they work with networked PCs. Any machine that's part of a HomeGroup can
grant read and write access to other machines in the HomeGroup. As you might expect, HomeGroups are
password protected. But rather than letting you enter your own password, Windows 7 generates a 10-character
password for you. Write this password down and don't lose it! You'll only need it once, when you connect the
first time. Once connected, you can change the password to whatever you like.
I don't know why Windows 7 forces this generated password on us, but it does, hence the warning. It's easy to
get distracted and forget the password or lose it before you have a chance to connect that first time. In addition,
this new feature works only with Windows 7 machines -- an unfortunate decision on Microsoft's part because
most of won't be able to utilize it.
4: Save time with jump lists
Jump lists are one of my favorite features. You pin applications and files you use often to the Taskbar. It doesn't
matter where you actually store the file. Once it's pinned, you have quick access to it. To add a program, do the
following:
1.
Click the Start menu.
2.
Find the application and right-click it.
3.
Choose Pin To Taskbar, as shown in Figure B. Windows 7 adds an icon, shown in Figure C, to the Taskbar.
Figure B
Figure C
Page 2
Copyright © 2011 CNET Networks, Inc., a CBS Company. All rights reserved. TechRepublic is a registered trademark of CNET Networks, Inc
For more downloads and a free TechRepublic membership, please visit http://techrepublic.com.com/2001-6240-0.html
Five tips for efficient file management in Windows 7
You can pin individual files to their respective
application's list. With the file open, right-click its
program icon on the Taskbar. In the resulting list, rightclick the file, as shown in Figure D. Once you've pinned a
file, you can quickly open it. Simply right-click the
program icon and choose the file from the Pinned
section. You'll also see the most recently used files, but
that list will change as you open and use new files. The
Pinned list doesn't change unless you add or remove
items.
5: Work efficiently with two instances of
Windows Explorer
It's easy to work with two instances of Windows Explorer
open at the same time, thanks to Windows 7's new snap
behavior. First, open Explorer as you normally would by
clicking the Explorer icon in the Taskbar. (That's a nice
feature in itself.) Drag the window's title bar to the left
Figure D
until Windows 7 displays an outline around the left half
of the screen. Release the window and Windows 7 will
snap the window to the left half of your screen. To open a second instance, hold down the [Shift] key and click
the Explorer icon on the Taskbar again. Repeat the process above, but drag the second instance to the right and
release. You end up with two windows, side by side. Moving and copying files is a snap with two instances of the
Explorer open.
Now, here's a useful tip for the keyboard users. After opening the first instance of Explorer, hold down the
[Windows] key and press the left arrow key. Doing so will automatically align the window to the left side of the
screen. Open the second instance, hold down [Windows] and press the right arrow key.
Additional resources
The 10 most useful Windows 7 keyboard shortcuts
Top 10 Windows 7 desktop gadgets
How do I get the Quick Launch Bar back in Windows 7?
How do I customize the Windows 7 Start Menu?
Take advantage of Sticky Notes in Windows 7
Page 3
Copyright © 2011 CNET Networks, Inc., a CBS Company. All rights reserved. TechRepublic is a registered trademark of CNET Networks, Inc
For more downloads and a free TechRepublic membership, please visit http://techrepublic.com.com/2001-6240-0.html

