RI-01S - Marine Gouge
advertisement
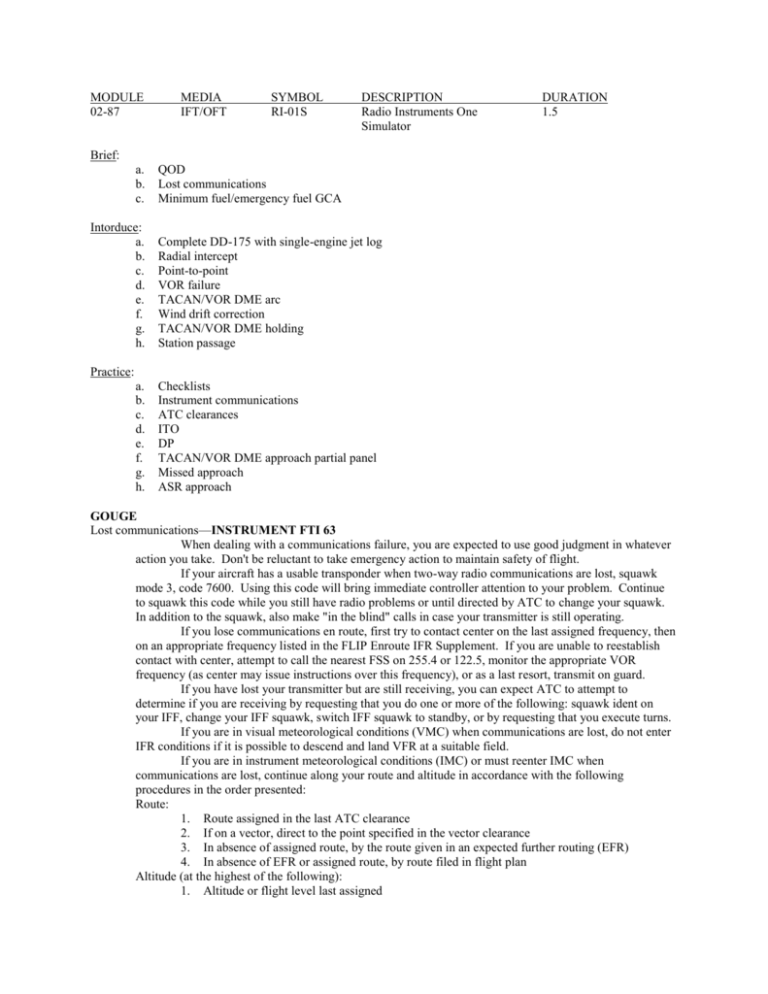
MODULE 02-87 MEDIA IFT/OFT SYMBOL RI-01S DESCRIPTION Radio Instruments One Simulator DURATION 1.5 Brief: a. b. c. Intorduce: a. b. c. d. e. f. g. h. QOD Lost communications Minimum fuel/emergency fuel GCA Complete DD-175 with single-engine jet log Radial intercept Point-to-point VOR failure TACAN/VOR DME arc Wind drift correction TACAN/VOR DME holding Station passage Practice: a. b. c. d. e. f. g. h. Checklists Instrument communications ATC clearances ITO DP TACAN/VOR DME approach partial panel Missed approach ASR approach GOUGE Lost communications—INSTRUMENT FTI 63 When dealing with a communications failure, you are expected to use good judgment in whatever action you take. Don't be reluctant to take emergency action to maintain safety of flight. If your aircraft has a usable transponder when two-way radio communications are lost, squawk mode 3, code 7600. Using this code will bring immediate controller attention to your problem. Continue to squawk this code while you still have radio problems or until directed by ATC to change your squawk. In addition to the squawk, also make "in the blind" calls in case your transmitter is still operating. If you lose communications en route, first try to contact center on the last assigned frequency, then on an appropriate frequency listed in the FLIP Enroute IFR Supplement. If you are unable to reestablish contact with center, attempt to call the nearest FSS on 255.4 or 122.5, monitor the appropriate VOR frequency (as center may issue instructions over this frequency), or as a last resort, transmit on guard. If you have lost your transmitter but are still receiving, you can expect ATC to attempt to determine if you are receiving by requesting that you do one or more of the following: squawk ident on your IFF, change your IFF squawk, switch IFF squawk to standby, or by requesting that you execute turns. If you are in visual meteorological conditions (VMC) when communications are lost, do not enter IFR conditions if it is possible to descend and land VFR at a suitable field. If you are in instrument meteorological conditions (IMC) or must reenter IMC when communications are lost, continue along your route and altitude in accordance with the following procedures in the order presented: Route: 1. Route assigned in the last ATC clearance 2. If on a vector, direct to the point specified in the vector clearance 3. In absence of assigned route, by the route given in an expected further routing (EFR) 4. In absence of EFR or assigned route, by route filed in flight plan Altitude (at the highest of the following): 1. Altitude or flight level last assigned 2. Minimum enroute altitude/flight level for the segment being flown 3. Altitude ATC says you may expect in a further clearance As previously mentioned, if a climb is required, commence it as necessary to comply with the minimum altitude as required in one through three above. If you lose communications while on a vector off your planned route with no expected further routing, return to your filed route. If at all possible, do not accept a clearance off your filed route without an expected further routing. Minimum fuel/emergency fuel GCA—INSTRUMENT FTI 106 Simulated Minimum Fuel Approaches On vectors for ILS or in the GCA box, remain in the clean configuration until 30 seconds before glidepath intercept. Select gear down, flaps to half and speed brakes in while adjusting attitude and power to maintain required VSI and optimum AOA. Initially, a significant forward stick pressure will be required to counter the ballooning effect and start the VSI down. Simulated Minimum Fuel GCA When a minimum fuel GCA is requested, ATC will give normal GCA box pattern vectors (intercept glidepath at approximately six miles from the end of the runway) and expect 200 KIAS until final. ATC should also provide a 30-second gear warning. The call "Perform landing checks" is a required USN/ USMC advisory call on base leg and does not mean to dirty up or reduce airspeed. When a minimum fuel GCA is requested, ATC will give normal GCA box pattern vectors (intercept glidepath at approximately six miles from the end of the runway) and expect 200 KIAS until final. ATC should also provide a 30second gear warning. The call "Perform landing checks" is a required USN/ USMC advisory call on base leg and does not mean to dirty up or reduce airspeed. Simulated Emergency Fuel GCA This GCA is designed to get you from altitude to the deck without any undue delay and is actually a practice procedure for dealing with emergency fuel situations. The controller will vector you direct to final approach with a glidepath intercept much closer to the runway than a normal GCA with a continuous turn from downwind to final. The controller will vector you to intercept a final at approximately four miles from the end of the runway at 800 ft AGL. The controller may ask how much fuel you have remaining in minutes and will attempt to get you on the deck prior to simulated fuel exhaustion. Request a 30-second prior to glidepath intercept call from the controller. You will remain in a clean configuration until the 30second call is heard. Then select gear down, flaps to half, and speed brakes in while adjusting attitude and power to maintain required VSI and optimum AOA. Initially, a significant forward stick pressure will be required to counter the ballooning effect and start the VSI down. Closer to the runway, the "on glidepath" cross section is much smaller. Therefore, it is important to set the appropriate VSI expeditiously once established on glidepath. Radial intercepts—INSTRUMENT FTI 65 Inbound intercepts 30º Method course→head→30º beyond Double Angle Off the Bow course→head→same number of degrees beyond Outbound intercepts 45º Method tail→course→45º beyond Point-to-point—INSTRUMENT FTI 76 A. Tune and Identify the station B. Visualize compass card as compass rose with station at center C. Picture fix having greater distance from station on its radial at outside edge of compass card D. Visualize second fix with lesser distance (determined by the previous step) as proportional distance from center of compass card on its radial E. Connect two fixes with an imaginary line or with the aid of a straight edge F. Move line to center of compass card parallel to original line and read course to the fix off the outside edge of the compass rose G Turn to new course (plus wind correction); top of imaginary line where it crosses compass card. H. Update course and make correction to PTto-PT fix periodically enroute VOR failure—INSTRUMENT FTI 122 Indicated by loss of aural identification and blanking of the VOR digital VOR bearing. If VOR steering is selected, the VOR bearing pointer and inner bar of the CDI are blanked. The VOR signal may dissapear at low altitude. Procedure: 1. Check that you have navigation control in your cockpit 2. Cycle the frequency selector 3. Check with ATC to see if the station is in operation or select another station 4. Use TACAN (if available), waypoint, or request radar vectors TACAN/VOR DME arc—INSTRUMENT FTI 72 Intercepting an Arc from a Radial The key to intercepting an arc precisely at the desired DME lies in performing an accurate lead point calculation (LPC) to determine the correct lead point DME to initiate the interception turn. For radial to arc intercepts, you will determine the lead point in miles (DME) instead of radials, which are used in arcto-radial intercept calculations discussed later in this chapter. The turn to intercept an arc from a radial will normally be at approximately 90 degrees (Figure 21). When intercepting an arc, you have to calculate the lead point at which you initiate the turn in order to intercept it at the correct distance. To determine the lead point, use 1 percent of your ground speed. For example, whether flying inbound or outbound at a ground speed of 250 kts, your lead point will be 2.5 DME prior to the desired arc. When inbound to the arc, add the 1 percent to the arc DME and when outbound, subtract 1 percent from the arc DME when calculating the lead point. When you reach the lead point, initiate a 1/2 SRT turn in the proper direction and maintain it until the bearing pointer nears the 90-degree benchmark on the HSI display. You may have to modify your turn rate/AOB somewhat in order to arrive on the arc at the proper DME. When intercepting an arc from a radial that is significantly more or less than a 90-degree turn, adjust the lead point by applying the following: For turns of approximately 45 degrees, use 1/3 of the distance calculated for a 90-degree turn. For turns of approximately 60 degrees, use 2/3 of the distance calculated for a 90-degree turn. Turns of 30 degrees or less require very little lead. Maintaining an Arc Around a Station Two ways of maintaining an arc around a station are the chord method and the angle of bank method. Either procedure (or a combination of the two) will work at any distance from a station. However, the chord method is generally more practical when you're flying a distant arc (usually more than 12 DME from a station), while the angle of bank method usually works better when you're flying an arc close in (12 DME or less). The chord method consists of a series of short straight legs, connected by turns. The angle of bank method is flown as a shallow turn with variable AOB to maintain a constant arc. Chord Method (Normally used for arcs of greater than 12 DME) To maintain an arc using the chord method, fly a series of short, straight legs connected by small turns that take you slightly inside and outside the actual arc. To use the chord method: first, ensure that the station is tuned and identified; then determine direction of turn and calculate lead point. initiate the turn at the lead point (when DME equals radius of arc, plus or minus the LPC) using a 1/2 SRT. Roll out from your interception turn when the bearing pointer is 5-10 degrees ahead of the 90-degree benchmark at the correct DME. Maintain your heading until the bearing pointer has moved to 5-10 degrees behind the 90-degree benchmark and then turn until the bearing pointer is once again positioned 5-10 degrees ahead of the 90-degree benchmark. Repeat this procedure as long as you are flying on the arc. The length of the legs will decrease as you fly arcs closer to a station until you reach a point where this method loses its advantage over the angle of bank method described below. If a crosswind makes holding your DME difficult, you may need to increase or decrease the number of degrees you place the bearing pointer ahead of the 90-degree benchmark or the number of degrees that you allow it to move behind the 90-degree benchmark to avoid having to make heading changes too frequently to maintain the arc. Angle of Bank Method To maintain an arc using the angle of bank method, first ensure the station is tuned and identified. Next, determine direction to turn and lead point. At the lead point, turn and position the bearing pointer on the 90degree benchmark and keep it there by holding the aircraft in a shallow turn. The closer you are to a station, the greater your bank angle will be. The angle of bank method is normally used inside of 12 DME. Outside of 12 DME, the bank angle required to maintain an arc will probably be too small to hold accurately. Adjustments to the position of the head of the bearing pointer relative to the 90-degree benchmark will have to be made to compensate for the position of the wind relative to the aircraft on the aircraft as it moves around the arc. Wind drift correction—INSTRUMENT FTI 65 Determining wind-corrected heading (WCH) is the technique you will use to compensate for crosswinds when maintaining a course on a radial. To compensate for wind, use a WCH that stops drift from your course. The difference between WCH and desired course is called "crab angle" The difference between the lubber line and the ground track marker is your "crab angle." To compensate for crosswinds using the ground track marker, first establish the aircraft on a radial tracking on course, course line centered, inbound or outbound from a station. Check the position of the ground track marker for an indication of drift. If the ground track marker indicates a drift, turn the aircraft to place the ground track marker under the bearing pointer. Maintain the heading under the lubber line. Continuously monitor the course line to ensure that you are maintaining the desired course. Adjust your heading to maintain a centered course line. The amount of crab angle required will vary with wind strength and direction and may change while the course is being tracked. 2º heading change for each 10 kts effective crosswind. TACAN/VOR DME holding—INSTRUMENT FTI 82 When you are instructed to hold in relation to a TACAN or VOR DME station, the radial, DME of the holding fix, and DME limits of the pattern will be published (as on an approach plate) or will be assigned to you by the controller. TACAN/VOR DME holding clearance will consist of the following instructions (if published holding instructions are not available): 1. Direction of holding from the fix (e.g., W, NE, East) 2. Radial and DME of the holding fix 3. Outbound leg length or the outer limit of the pattern in nm (applicable DME) 4. Altitude 5. Direction of turns (if nonstandard, pilot request, or controller considers information necessary) 6. Expected further clearance (EFC) time General Holding Procedures The basic procedures for flying a holding pattern are as follows: First, begin slowing to holding airspeed no sooner than 3 minutes from the holding fix. Next, from your holding clearance, or published holding procedure, determine the type of holding to be used. From your heading, determine the appropriate entry procedure. Upon arrival at the holding fix, note the time and initiate the entry procedure. If timing is used for the pattern vice DME, note the time wings level or abeam the holding fix, whichever occurs last on the entry procedure heading outbound and on subsequent outbound orbits. Set inbound holding course on the HSI display or the DEP. Turn inbound when the appropriate time outbound has elapsed for the holding altitude and begin timing inbound wings level. All turns in holding are made at 3 degrees per second (standard rate) but do not exceed 30 degrees AOB. Communicate entering holding, if required, once established in the pattern. On subsequent orbits, adjust heading and or timing as required for winds to maintain a holding pattern track and time. Communication Procedures For Holding For a normal holding pattern with a charted destination, the controller will not necessarily provide instructions unless they are requested by the pilot or the controller deems it necessary. If the destination is not charted, the controller will provide fix, direction from fix, radial or bearing, leg length if DME, altitude if different than present assigned, and an EFC time or expected further routing (EFR). The controller will only indicate turn direction if holding is nonstandard by stating, "Left Turns," in the clearance at the pilot's request or if the controller considers it necessary. The pilot is required to report the time and altitude or flight level upon reaching a holding fix to which cleared and to report leaving the holding fix. However, these reports may be omitted by pilots involved in instrument training at military facilities when radar service is being provided. If the holding fix is the clearance limit (EFC assigned, and not cleared for approach), then the fix is a compulsory reporting point. EXAMPLE: "KATO TWO ZERO ONE, BIGFOOT, FLIGHT LEVEL TWO ONE ZERO, TIME ONE THREE FIVE ZERO ZULU." Once cleared for the approach, penetrate upon arrival at the IAF (you need not make a complete turn in holding). Holding Airspeeds If you have been cleared to a holding fix or have not received further clearance while en route, begin slowing to holding airspeed no sooner than three minutes prior to a holding fix. Since holding is a delaying or loitering maneuver until further clearance is received, it is flown at an airspeed approximating maximum endurance. Maximum holding airspeed for this aircraft as published by the FAA is 230 kts. Maximum endurance airspeed in the T-45C is 14 units; for simplicity, procedural holding airspeed for the T-45C is 200 KIAS regardless of altitude, not to exceed 14 units AOA. If turbulence is encountered, hold at 250 KIAS per NATOPS and notify ATC. The T-45C NATOPS recommended turbulence penetration airspeed is 250 KIAS. When higher speeds are no longer necessary, return to normal holding airspeed and notify ATC. Entry Procedures To enter holding, use one of three possible procedures, depending on your heading relative to the holding pattern when you arrive over the fix. (The discussions of entry procedures on the following pages assume a standard [right-hand] pattern; reverse the turns for a nonstandard [left-hand] pattern.) In each procedure, you cross the fix and turn outbound on the appropriate heading. At holding fixes that are not over NAVAIDs, an outbound offset should be determined prior to the entry (Figure 31). Turn inbound to intercept the holding course at the appropriate DME or time. No-Wind VOR/TACAN DME Entry Offset Prior to reaching the holding fix on a teardrop or direct entry, based on the T-45C turn radius for 180 degrees at holding airspeed, the pilot should calculate the approximate offset required so, at the inbound turn point, an SRT or 30-degree AOB turn for 180 degrees will place the aircraft on the holding course inbound. The actual offset required will vary with wind, true airspeed, altitude and turn radius. For 200 KIAS at 15,000 ft, the T-45C turn radius is approximately 2 nm, or 4 nm for 180 degrees of turn. The quickest and most accurate method of determining which type of entry to perform is to use the HSI display compass rose as a plotting board. For a standard holding pattern, locate the holding radial on the compass rose. If the holding radial is located within an area of 70 degrees to the right of aircraft heading at the holding fix, perform a teardrop entry. If the holding radial is located within an area of 110 degrees to the left of aircraft heading, perform a parallel entry. If the holding radial is located outside an area of 110 degrees to the left and 70 degrees to the right of aircraft heading, perform a direct entry. For a nonstandard pattern (left turns), reverse the 70- and 110-degree lines. Additionally, most approach plates include a holding entry diagram to aid you in determining which type of entry to perform. NOTE: If the holding radial is within +/- 5 degrees of the entry plot quadrant division points, either entry procedure associated with the point may be used. The most appropriate entry is determined by consideration of known wind, holding airspace, etc. 1. Parallel Procedure: When approaching the holding fix from anywhere in sector (A), the parallel entry procedure would be to turn to a heading to parallel the holding course/radial outbound on the nonholding side. Wings level (VOR only) time for one or one and one half minutes (depending on the altitude), at end of timing (VOR) or outbound DME (TACAN) turn in the direction of the holding pattern through more than 180 degrees, and return to the holding fix or intercept the holding course inbound. 2. Teardrop Procedure: When approaching the holding fix from anywhere in sector (B), the teardrop entry procedure would be to fly to the fix, turn outbound with a heading change of 30 degrees more than the outbound holding course/radial for a nonstandard holding pattern or 30 degrees less than the outbound holding course/radial for standard holding pattern to initiate the teardrop entry within the pattern (on the holding side). Wings level outbound (VOR only), time for a period of one or one and one-half minutes (depending on the altitude). Turn to parallel holding radial at desired offset. At end of timing (VOR) or pattern outbound DME (TACAN), turn in the direction of the holding pattern to intercept the inbound holding course or proceed directly back to the fix. 3. Direct Entry Procedure: When approaching the holding fix from anywhere in sector (C), the direct entry procedure would be to fly directly to the fix and turn outbound to follow the holding pattern. Initial timing (VOR only) would begin wings level or abeam, whichever occurs last. Time for a period of one or one and one-half minutes (depending on the altitude). At end of timing (VOR) or pattern outbound DME (TACAN), turn in the direction of the holding pattern to intercept the inbound holding course or proceed directly back to the fix. Wind Drift Correction Techniques You may have to compensate for two different wind effects while flying a correct holding pattern-head winds or tailwinds, and crosswinds. Head winds or tailwinds will only be a factor on non-DME patterns, for which you will have to adjust the outbound leg for a correct inbound time. Compensate for crosswinds in order to arrive at an outbound position from which a turn inbound will place the aircraft on the holding course. This is normally accomplished by utilizing a larger (approximately two to three times) drift correction on the outbound leg. Lost Communication If communication is lost and the pilot has received EFC time, and the holding fix and initial approach fix (IAF) are the same, then leave the fix at EFC time. If, however, the holding fix and IAF are not the same, leave the holding fix at EFC time and proceed to initial approach fix. When EFC has not been received, continue on assigned route and do not hold. Station passage—INSTRUMENT FTI 65 When flying VOR or VOR DME, station passage is indicated when the bearing pointer falls below the 90º benchmark (or disappears) TACAn station passage is indicated when minimum DME is reached. Checklists—AMMENDED CHECKLIST AND PCL Instrument communications—INSTRUMENT FTI Reports made at all times: 1. When vacating any assigned altitude or flight level for a new altitude or level 2. When an altitude change will be made if operating “VFR ON TOP” 3. When unable to descend or climb at 500 fpm 4. When an approach has been missed 5. Change in the average true airspeed when it varies by 5% or 10 kts, whichever is greater 6. 7. 8. 9. 10. Time and altitude arriving at a holding fix or point which cleared When leaving any assigned holding fix or point Any loss of navigation capability such as VOR, TACAN, ADF, INS or loss of any ILS capability Any information relating to safety of flight Encountering weather conditions which have not been forecast or hazardous conditions that have been forecast 11. Beginning and end of a direct route off airway between two navaids when operating “VFR ON TOP” 12. When unable to comply with an ATC clearance as given Radar Environment On initial contact, precede altitude with “level,” “climbing,” or “descending” and provide vacating altitude and final altitude. When not on published routes, pilots should include present navigational position. Non-Radar Environment 1. Initial contact not at a fix: “ATC name, identification, estimating time to next reporting point, descending, climbing, maintaining altitude. 2. Initial contact at a fix: ATC name, identification, and position. 3. Position reports: position, time altitude, next position, time, next reporting point (P.T.A.P.T.P) 4. When leaving FAF inbound or outer marker inbound 5. Corrected ETA anytime it is apparent that a previous estimation is more than 3 minutes in error. IFR clearance—INSTRUMENT FTI On initial contact with clearance delivery, state your aircraft identification, location, type of operation (VFR or IFR), point of first intended landing, and request. Your clearance will contain the following information in order: Aircraft identification Clearance limit Departure instructions or SID Route of flight Altitude Any special information (including departure frequency and IFF code) Do not accept a clearance if it has a clearance limit short of your destination, an altitude no in the filed route structure, or an altitude that would not allow sufficient fuel reserves unless you receive an expected further clearance time, or expected higher altitude. ITO—INSTRUMENT FTI Simulates a takeoff in instrument conditions. The instructor will maintain directional control to 80 kts, then hand over the controls. Line up runway centerline and advance to MRT. Perform checks. AT 120 kts, rotate to 10º nose up and expect lift-off between 126-130kts. Gear at 100ft AGL, Flaps at 300ft and 140 kts. Maintain nose attitude to intercept climb speed, then approximately 15-20º nose up. Throttle: MRT Nose wheel steering: Maintain directional control Rotation: 5 kts prior to lift off, 10-12 degrees nose up (do not exceed 17 units) Lift-off: See NATOPS for chart Gear: Positive climb on VSI and altitude display, and when safely airborne, 100 ft AGL minimum Flaps/slats: After gear, minimum of 300 ft AGL and 140 kts, wings level DP—APPROACH PLATES/IN-FLIGHT GUIDE TACAN/VOR DME approach—INSTRUMENT FTI 99 TACAN approach—Similar to VOR, but expect an arc. Turn to arc at 2.5 DME prior (250 KIAS) In general, if the penetration is performed on a VOR, transition to landing configuration and on-speed after the penetration turn with speed brakes retracted. If the penetration is performed on a TACAN or VOR/DME, slow to 200 KIAS 5-7 DME prior to the FAF and transition to landing configuration 3-5 DME from the FAF. Missed approach—INSTRUMENT FTI Advance throttle MRT, retract speed brakes, and rotate optimum AOA to 10-12º nose up. At 100ft AGL, call gear. At 125 KIAS and 300ft AGL, flaps 1/s. At 140 KIAS flaps full. Backstick will be required to prevent rapid acceleration through 200 kts. Lead level off by 1000 ft and level at 200 KIAS for GCA box, 250 KIAS otherwise. Throttle: MRT if required Speed brakes: Retract Pitch: Maintain optimum AOA and rotate to approximately 10-12º noseup (do not exceed optimum AOA) Climb: Confirm on altitude display and VSI Gear: Raise with positive rate of climb (100 ft minimum) Flaps/slats: Up at 140 KIAS minimum (half at 125 KIAS minimum) Missed approach call: Make (may be made simultaneously with power addition) Airspeed (if remaining in pattern): 200 KIAS Airspeed (if leaving pattern): 250 KIAS ASR Approach—INSTRUMENT FTI 97 Procedures are the same as a PAR, but the final controller will not provide glideslope information. Altitudes should be slightly lower than the altitudes recommended with a 500-70 fpm decent. Level off at the MDA and execute missed approach at the MAP.

