CD Case Tutorial
advertisement
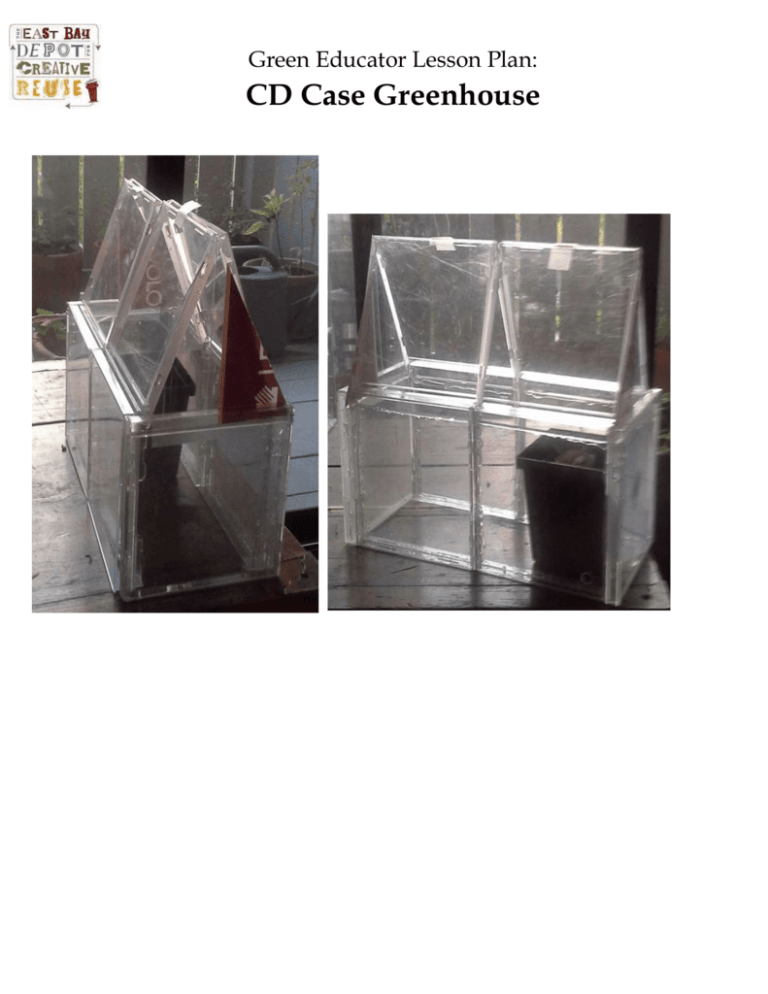
Green Educator Lesson Plan: CD Case Greenhouse Green Educator Lesson Plan: CD Case Greenhouse Materials (per student or group) 10 plastic CD cases (or more)* glue gun 2 glue gun sticks 10 Popsicle sticks Time: Age Level: Supervision required: About 60 minutes All Yes, while using the hot glue gun Can be used in Biology, botany, conjunction with reuse, gardening, curricula about: building/architecture, design, physics scissors tape leftover clear plastic packaging * *Before you begin: Ask your students to bring in CD cases, popsicle sticks, newspaper and/or rigid plastic packaging from home, newspaper * Provide your students with a design challenge: create a greenhouse out of 10 plastic CD cases, 10 popsicle sticks, and leftover rigid clear plastic packaging. Allow them to use a strong adhesive (hot glue guns work), scissors, tape, and rubber bands. Below are two designs to try out. Students can use these designs or try their own unique ones. Design A: flat roofed greenhouse made of 8 CDs. INSTRUCTIONS: 1. Plug in the hot glue gun to heat up. * Green Educator Lesson Plan: CD Case Greenhouse *Any strong plastics glue or packing tape may be used instead of the hot glue gun if supplies or supervision are limited. 2. Remove the paper booklets from all of the CDs. Then, gently remove the circular plastic insert inside the case by lifting up at the seam. 3. Take two of the CD cases and place them face down on the newspaper with the hinge at the top 4. Apply glue along the border between the two CD cases and press together firmly. 5. Repeat steps #3 and #4. These coupled CDs will make up the long walls of the greenhouse. 6. Take one of the coupled CD walls. Then, stack a two more CD cases on top of the first two, with the hinges facing up. Glue the top cd case to the bottom case, so that the case can still be hinged into the open position. Leave the top CD case open for the next steps. * if you want to create a peaked roof greenhouse read the instructions for Design B at the end of this tutorial now.* Green Educator Lesson Plan: CD Case Greenhouse 7. Your final two CD cases will become the side walls. Place the glued wall set that you just worked with in step #6 flat on the newspaper with the hinges at the top, and the open case facing you. Then, take one of the remaining single cases and stand it up perpendicular to the wall on one end, so that an “L” is formed. Glue the first side. Repeat on the other end of the wall. 8. Now, you can stand the structure up so that the hinges are towards the ceiling. Take the second side of coupled CD cases and fit it to the structure with the cases opening inwards, so that a rectangular box is formed. The case doors will become the peaked roof of the greenhouse, be sure that they are fully opened before gluing. 9. Glue the final side into place to form a rectangular box. Position the open case so that it forms the roof of the structure. Green Educator Lesson Plan: CD Case Greenhouse 10. Now, reinforce all the junctions between the CD cases with popsicle sticks. Tape the plastic packaging on anywhere there are gaps around the roof. *Design B: Peaked Roof greenhouse made of 10 CDs. To make a peaked roof CD case greenhouse, follow the directions through step #6. But, instead of double stacking only one side wall, repeat this step with the other side wall. Keep all 4 of these CD cases open when gluing for steps 7, 8, and 9. Then, position all 4 of the open case flaps so that they form peaks. Use the tape to hold the peaks in place and and fill in the empty triangles on the side with the plastic packaging cut to size. Extra Credit: Start your plants in half-dozen egg cartons inside your CD greenhouse Customize and innovate: create new greenhouse shapes and sizes Take a picture and send it to greenteachers@creativereuse.org
