Proximal Humerus Site Identification (Adult)
advertisement
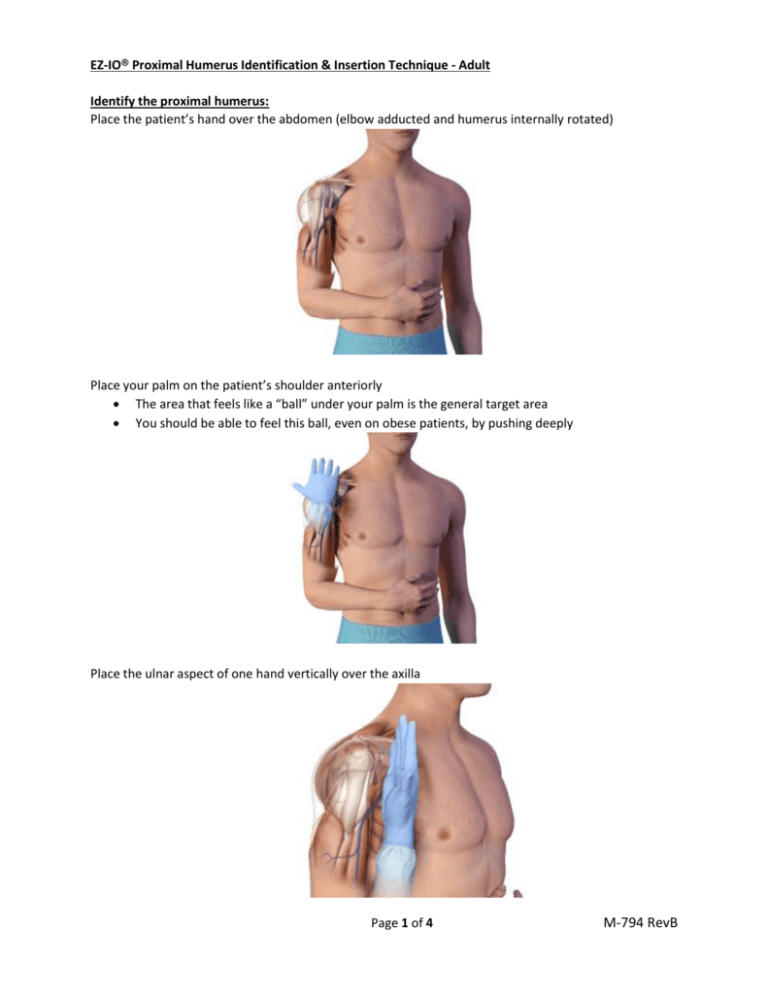
EZ-IO® Proximal Humerus Identification & Insertion Technique - Adult Identify the proximal humerus: Place the patient’s hand over the abdomen (elbow adducted and humerus internally rotated) Place your palm on the patient’s shoulder anteriorly The area that feels like a “ball” under your palm is the general target area You should be able to feel this ball, even on obese patients, by pushing deeply Place the ulnar aspect of one hand vertically over the axilla Page 1 of 4 M-794 RevB Place the ulnar aspect of the opposite hand along the midline of the upper arm laterally. Place your thumbs together over the arm. This identifies the vertical line of insertion on the proximal humerus Palpate deeply as you climb up the humerus to the surgical neck. It will feel like a golf ball on a tee – the spot where the “ball” meets the “tee” is the surgical neck Page 2 of 4 M-794 RevB The insertion site is on the most prominent aspect of the greater tubercle, 1 to 2 cm above the surgical neck Insertion: Prepare the site by using antiseptic solution of your choice Use a clean, “no touch” technique Remove the needle cap Point the needle set tip at a 45-degree angle to the anterior plane and posteromedial Push the needle tip through the skin until the tip rests against the bone The 5mm mark must be visible above the skin for confirmation of adequate needle length Gently drill into the humerus 2cm or until the hub reaches the skin in an adult. o The hub of the needle set should be perpendicular to the skin Page 3 of 4 M-794 RevB Hold the hub in place and pull the driver straight off Continue to hold the hub while twisting the stylet off the hub with counter clockwise rotations o The needle should feel firmly seated in the bone (1st confirmation of placement) Place the stylet in a sharps container Place the EZ-StabilizerTM dressing over the hub Attach a primed EZ-Connect® extension set to the hub, firmly secure by twisting clockwise Pull the tabs off the EZ-Stabilizer dressing to expose the adhesive, apply to the skin Aspirate for blood/bone marrow (2nd confirmation of placement) Secure the arm in place across the abdomen Page 4 of 4 M-794 RevB
