Wood Security Hanger Installation Instructions
advertisement

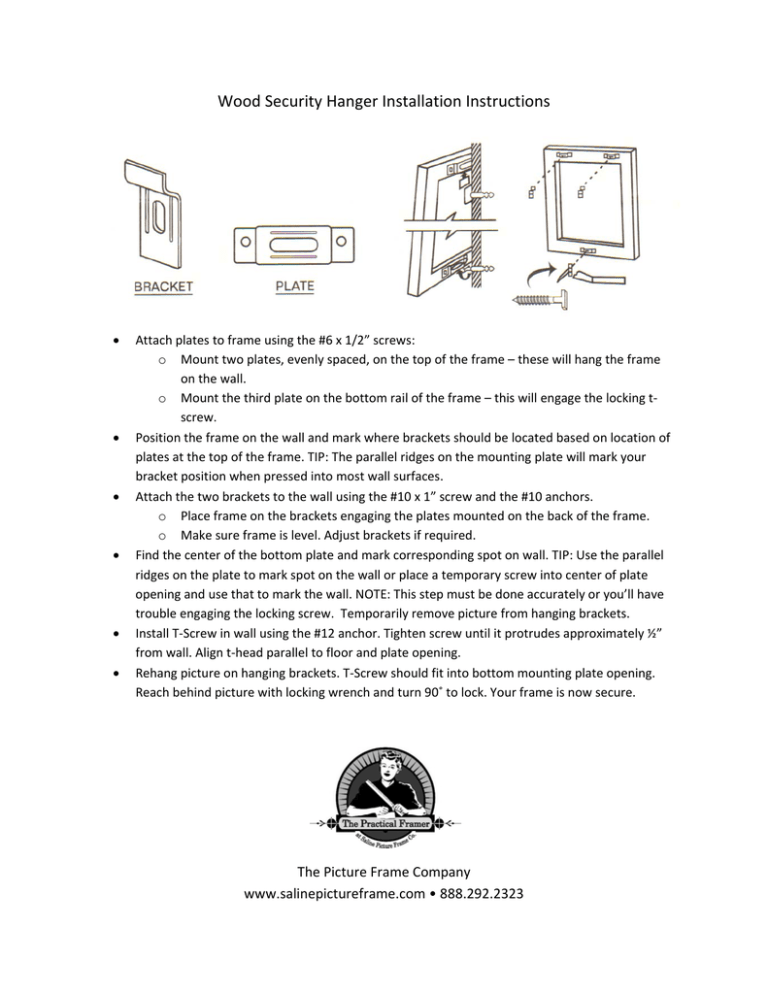
Wood Security Hanger Installation Instructions Attach plates to frame using the #6 x 1/2” screws: o Mount two plates, evenly spaced, on the top of the frame – these will hang the frame on the wall. o Mount the third plate on the bottom rail of the frame – this will engage the locking t‐ screw. Position the frame on the wall and mark where brackets should be located based on location of plates at the top of the frame. TIP: The parallel ridges on the mounting plate will mark your bracket position when pressed into most wall surfaces. Attach the two brackets to the wall using the #10 x 1” screw and the #10 anchors. o Place frame on the brackets engaging the plates mounted on the back of the frame. o Make sure frame is level. Adjust brackets if required. Find the center of the bottom plate and mark corresponding spot on wall. TIP: Use the parallel ridges on the plate to mark spot on the wall or place a temporary screw into center of plate opening and use that to mark the wall. NOTE: This step must be done accurately or you’ll have trouble engaging the locking screw. Temporarily remove picture from hanging brackets. Install T‐Screw in wall using the #12 anchor. Tighten screw until it protrudes approximately ½” from wall. Align t‐head parallel to floor and plate opening. Rehang picture on hanging brackets. T‐Screw should fit into bottom mounting plate opening. Reach behind picture with locking wrench and turn 90˚ to lock. Your frame is now secure. The Picture Frame Company www.salinepictureframe.com • 888.292.2323 Metal Security Hanger Installation Instructions Position the frame on the wall. Mark where brackets should be located so they are evenly spaced along the top aluminum extrusion of the frame. Attach the two brackets to the wall using the #10 x 1” screw and the #10 anchors. o Place frame on the brackets engaging top aluminum extrusion. o Make sure frame is level. Adjust brackets if required. Find the center of the bottom of the frame and mark a corresponding spot on wall that it exactly the center of the length and width of the bottom frame extrusion. NOTE: This step must be done accurately or you’ll have trouble engaging the locking screw. Temporarily remove picture from hanging brackets. Install T‐Screw in wall using the #12 anchor. Tighten screw until it protrudes approximately ½” from wall. Align t‐head parallel to floor and bottom frame extrusion. Rehang picture on hanging brackets. T‐Screw should fit into bottom frame extrusion. Reach behind picture with locking wrench and turn 90˚ to lock. Your frame is now secure. The Picture Frame Company www.salinepictureframe.com • 888.292.2323


