Microfarm Manual Experience indoor gardening at your
advertisement
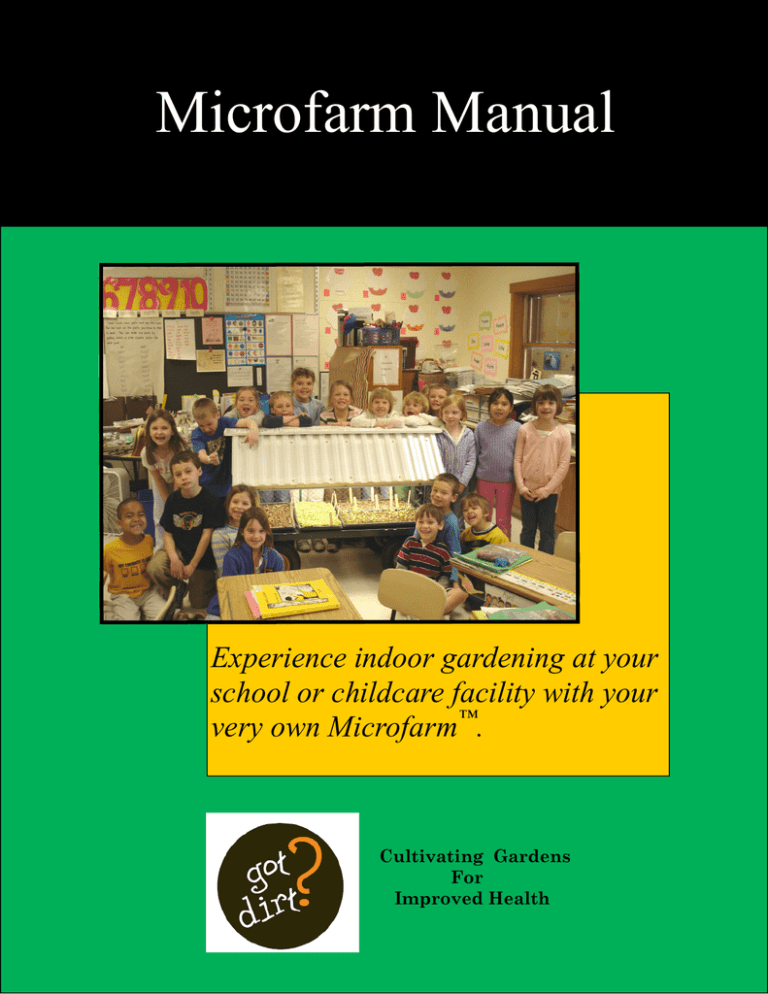
Microfarm Manual Experience indoor gardening at your school or childcare facility with your very own Microfarm™. Cultivating Gardens For Improved Health INTRODUCTION Incorporating gardening into the classroom provides multiple learning opportunities for the student and teacher. Gardening can easily be connected to various subjects including math, science, English composition and nutrition, and allows children the opportunity to experience planting seeds, caring for plants, harvesting, and tasting the results of their efforts. Gardening can also teach children: ♦ ♦ ♦ ♦ ♦ ♦ Respect for the Earth and its resources Responsibility Nurturing skills Pride in their accomplishments Knowledge of where their food comes from Healthy eating Indoor gardening offers a dynamic setting in which to observe, study and taste the natural world around us. Microfarms™ require very little time to manage and occupy little space in the classroom. Time spent growing microgreens can be as short as two to three weeks. Nutrition and gardening concepts can easily be incorporated into the curriculum. Since your garden is in the classroom, space for an outdoor garden and related equipment is not necessary. What is a Microfarm™? How is the Microfarm™ used? The Microfarm™ is a simple way to provide enough light to grow vegetables indoors. The Microfarm™ can be built to be used on top of a table or can be mounted on a wagon and pulled from classroom to classroom. Students grow microgreens, immature plants that have been harvested for their tender leaves and stems, by planting quick-growing seeds in trays filled with a soilless potting medium. The trays are placed under the lights and students water and care for the plants over the next few weeks. The students then use scissors to harvest the “tops” of the plants to create a tasty salad. Students are often amazed that the young “shoots” of a pea plant actually taste like peas. Volunteers can help to cut and assemble the parts. Once built, the Microfarm™ can be used year after year and the only additional costs are seeds and potting medium. 2 WHAT TO PLANT What will we be able to grow in our Microfarm™? A wide variety of plants can be used as microgreens. When harvested, the plants have four or more delicate leaves and are two to four inches tall. The plants are vibrantly colored and often offer an intense burst of flavor. The young, tender microgreens are packed with nutrition, too. Peas, radishes, chard and mustard greens are good choices for first-time gardeners. They are easy to grow and the seeds are large and easy to handle. The following lists provide a sample of the types of plants that are ready to harvest in either two to three weeks or three to four weeks. Be sure to choose varieties with similar growing times (fast versus slow). It is best to use untreated seeds when growing microgreens. Examples of “fast” growing plants that are ready to harvest in two to three weeks: Cabbage, O.P. Red: dark green leaves with purple veins and leaf margins Chinese Cabbage, Kogane: bright green leaves Choy Sum: dark green leaves Curly Cress “Cressida”: fancy, spicy three-lobed leaves Kale, Red Russian: dark green leaves with a pink outline Kohlrabi, O.P. purple: bulky seeds with purple stems Mizuna,Early: similar to Kyona with narrower leaves Mizuna, Kyona: fancy toothed leaves Mustard, Golden Frill: bright green, intricately serrated leaves Mustard, Ruby Streaks: excellent dark green and maroon color Mustard, Suehlihung No. 2: green wave-type with serrated leaves Pac Choi, Kinkoh: lime green leaves Pac Choi, Red Choi: versatile Pac Choi adds a touch red Radish, Daikon: crisp and spicy with white stems and green leaves Radish, Hong Vit: pink-stemmed leaf radish Radish, Purple Radish: mix of mostly purple and about 25% green leaves Tatsoi: small, dark, spoon-shaped, black-green leaves Examples of “slow” growing plants that are ready to harvest in three to four weeks: Amaranth, Garden Red: stunning fuchsia color Arugula: sharp, spicy flavor Basil, Dark Opal: an economical purple basil for micro mix Beet, Bull’s Blood: green leaves with pink undersides Beet, Early Wonder Tall Top: earliest beets and greens Beet, Yellow: vigorous light green leaves with yellow veins and stems Carrot, O.P.: ferny leaves with a mild carrot flavor Celery, Cutting: hefty, bright green leaves Chard, Ruby Red: best chard for micro mix; green leaves with pink stems Chervil, Vertissimo: attractive leaf with bright green color Chicory, Red Rib: bright red stem and midvein, dark green leaves Cilantro, Santo: classic Mexican herb Fennel, Magnafena: high yields of sweet, feathery leaves Komatsuna, O.P.: upright rounded green leaves Komatsuna, Red: dark maroon leaves with bright green undersides Mustard, Red Giant: spicy green leaves with red veins Orach, Oracle: deep crimson-purple leaves Peas, Dwarf Grey Sugar: bright green leaves Red Purslane “Gruner”: fleshy green leaves Salad Burnet: unique leaf shape Shiso, Britton: eye-catching green leaves with red undersides Shungiku: attractive, aromatic, toothed leaves Sorrel: oval, lemon-flavored leaves 3 SUPPLIES & PLANTING THE SEEDS What supplies will I need to garden with a Microfarm™ and where can I obtain those items? Supplies needed: • • • • • • Untreated seeds Soilless potting medium Watering can Plastic domes for germination Flat or seed tray with a solid bottom Timer to control lights All of these supplies should be available at your local garden center or from numerous vendors on the internet. How will I plant the seeds? After gathering all of the necessary materials, follow the steps listed below: • • • • • 4 Fill the flats with potting medium to about half an inch from the rim. Moisten the mix by adding about a quart of warm water to the flat. Scatter seeds liberally across the entire surface of the potting medium. Lightly cover small seeds with medium. Push larger seeds, like peas, down into the mix about 3/4 of an inch. Label each tray. Cover the flat with the plastic dome. Place the flat(s) under the lights. Set the timer so the lights will be on for 16 hours and off for 8 hours. CARING FOR THE MICROFARM™ How will I care for the Microfarm™? Germination times of microgreens will vary from variety to variety. Remove the dome when the seeds in a flat begin to germinate (this will help to eliminate any fungal problems). Check the potting mix periodically by poking a finger down into the mix about one inch. If the mix is dry, add about two cups of water. Watering frequency will depend upon the temperature and humidity of the room. How will the microgreens be harvested? Materials needed: • • • Clean scissors Bowls or bags to hold the microgreens Colander or bowl for rinsing greens How to harvest microgreens: • • • • • Using clean scissors, hold a section of the microgreens and cut just above the potting mix. Try to avoid having any of the mix in with the cut greens. Place the cut greens in a colander and rinse well under cold water. Use a salad spinner to dry the greens or pat them gently between paper towels. Taste each kind of plant separately and then toss together to make a mixed salad. Enjoy! Can the flats and other materials be reused? The potting medium should be discarded after each harvest. The flats can be reused if they are not cracked. To reuse the flats discard potting medium and wash the flats with warm water and soap. Rinse the flats with a solution containing 90% water and 10% bleach (follow the directions on the container for safely handling the bleach). Stack the flats to air-dry. The clear plastic domes should also be washed and air dried. 5 THE MICROFARM™ AS A TEACHING TOOL Since the Microfarm™ will be in your classroom for approximately three weeks, it can be used as a teaching tool in a variety of subjects. Here are a few suggestions that you can adjust depending on the grade level involved. Math • • • • • Calculate the number of hours of light the plants will receive in a week. Measure the plants periodically and make comparisons using bar graphs. Calculate the amount of growing area in square feet or square inches. Weigh the microgreens harvested and determine amount of production per square foot. Have students estimate the amount of plants that could be grown in a larger area. History and social studies • • • Research and report on cultural/ethnic differences in food consumption or gardening practices. Research local agriculture to determine what crops are grown locally. Interview a local gardener to determine what they grow and why they garden. Language arts • • • • • Put together a class book with gardening information and advice. Write a letter to parents or a friend describing the garden or explaining some aspect such as how to plant seeds. Have students keep journals. Write creative stories in the first person from the point of view of a particular plant. The possibilities are endless! 6 ACQUIRING A MICROFARM™ FOR YOUR SCHOOL A Microfarm™ can be as simple as a light mounted to a wooden frame, or as elaborate as a unit constructed on a wagon complete with a roof. Many seed and grower supply companies also sell “grow light systems” which can be used in the same manner as a Microfarm™. The type of unit you choose will be dependent upon how many classes will be sharing the unit, the amount of money you want to invest, and the skill level of the individual(s) building the Microfram™. Here is one suggestion for a simple tabletop Microfarm™. This unit is simple to build and the materials are readily available at most home improvement stores. Portable Microfram™ mounted on wagon. Materials needed for a tabletop Microfarm™ Two 2x4’s, 8 feet long Two 2x2’s, 8 feet long Two fluorescent two-tube shop lights* Four threaded hooks for hanging the lights One box of 2½” wood screws (#8 or #10) One power strip One heavy-duty timer *Depending on manufacturer, shop lights are sold with or without chain to hang the lights. Check to see if chain is supplied. If not, chain will need to be purchased. Tabletop Microfarm™ 7 MICROFARM™ ASSEMBLY Instructions 1. From each 2x4, cut one (1) 54” piece (crossbeam) and one (1) 24” piece (foot). 2. From the 2x2’s, cut eight (8) pieces 19” in length (legs). 3. Pre-drill holes as indicated with a 3/16” drill. This will ease assembly and prevent splitting. Holes can also be countersunk if desired. Centerline 1” Foot (2) 1” 3” 4½” 4½” 3” 4. Note: The holes on the inside and outside legs are at different locations in order to prevent one screw from hitting another. Be sure to have legs at proper location during assembly. Inside Leg (4) 1½” 1” Outside Leg (4) 1½” 8 1½” MICROFARM™ ASSEMBLY 5. The underside of the crossbeam will need to be pre-drilled to accept the threaded hooks for the light’s chain. The location of these holes will be determined by the location of the chains on top of the light fixture. 6. With the aid of an assistant, fasten the foot to four of the legs (two inside and two outside). Use a square to assure that all legs are square (90°) to the foot. Repeat for other end. 7. Insert threaded hooks into crossbeams. Threaded hooks 8. With the aid of an assistant, and once again aligning everything with a square, fasten the crossbeam between each pair of legs. 9. Hang lights from threaded hooks using chains. Adjust the height of the light by changing the link used. 10. Plug lights into power strip and plug power strip into timer. 11. Adjust timer so that the lights will be on for 16 hours each day and off for 8 hours each night and plug into receptacle. Your tabletop Microfarm™ is ready to use. Step 6. Foot fastened to four legs. Step 8: Legs fastened to crossbeam Step 9. Threaded hook with chain for light. Timer plugged into outlet. 9 OTHER IDEAS If you are handy with tools, you can construct a unit complete with roof. Russ Parker’s detailed drawings can be downloaded at www.gotdirtwisconsin.org. Close up of foot bolted to wagon frame. 10 By mounting the feet on the outside of the frame, the Microfarm™ frame can be mounted on a 24”x48” wagon. This will give the unit increased portability. QUESTIONS & ANSWERS Q Will I need to purchase a special type of light bulb? ? A: No. Regular 32W or 40W “cool white” fluorescent bulbs will do an excellent job. Q The local stores do not stock seeds during the late fall and winter. Where can I obtain seeds during this time? ? A: Most on-line garden catalogs will ship seeds to you year-round. ? Q Why can’t I fill the flats with topsoil? A: Topsoil can carry diseases such as damping off. Q I can’t find the clear plastic domes. Is there something else I could use? ? A: A heavy-duty plastic film such as Saran™ wrap could be used. Be sure the film covers the entire flat. Q Can I use the Microfarm™ to start tomato or pepper seeds to transplant to our outdoor garden? ? A: Yes. Just be sure to raise the pots or flats so the seedlings are close to the light source. Q We mounted our Microfarm™ on a wagon, but the wagon’s “tongue” keeps falling down, creating a tripping hazard. Any suggestions? ? A: Yes. Replace the tongue with a piece of rope. The rope can be coiled and placed under the wagon when not in use. 11 The Microfarm™ Manual was made possible by the following collaborators Author Bill Wright Photography Bill Wright Reviewers Becky Gutzman Kevin Schoessow Layout & Design Linda Blondin For more information about the Got Dirt? Garden Initiative contact: Bill Wright, Brown County UW-Extension 1150 Bellevue Street, Green Bay, WI 54302-2259 Phone: (920) 391-4658; Fax: (920) 391-4617 Email: wright_wp@co.brown.wi.us Website: http://www.gotdirtwisconsin.org Amy Meinen, Wisconsin Department of Health Services Nutrition, Physical Activity & Obesity Program 1 West Wilson Street, Room 243, Madison, WI 53701-2659 Phone: (608) 267-9194 Email: amy.meinen@wisconsin.gov Website: http://dhs.wisconsin.gov/health/physicalactivity/index.htm Cultivating Gardens for Improved Health The Got Dirt? Garden Initiative is funded by the UW-School of Medicine and Public Health’s Wisconsin Partnership Program. Wisconsin Department of Health Services UW-Extension provides equal opportunities in employment and programming, including Title IX and ADA.

