in Word - Catholic Lane
advertisement
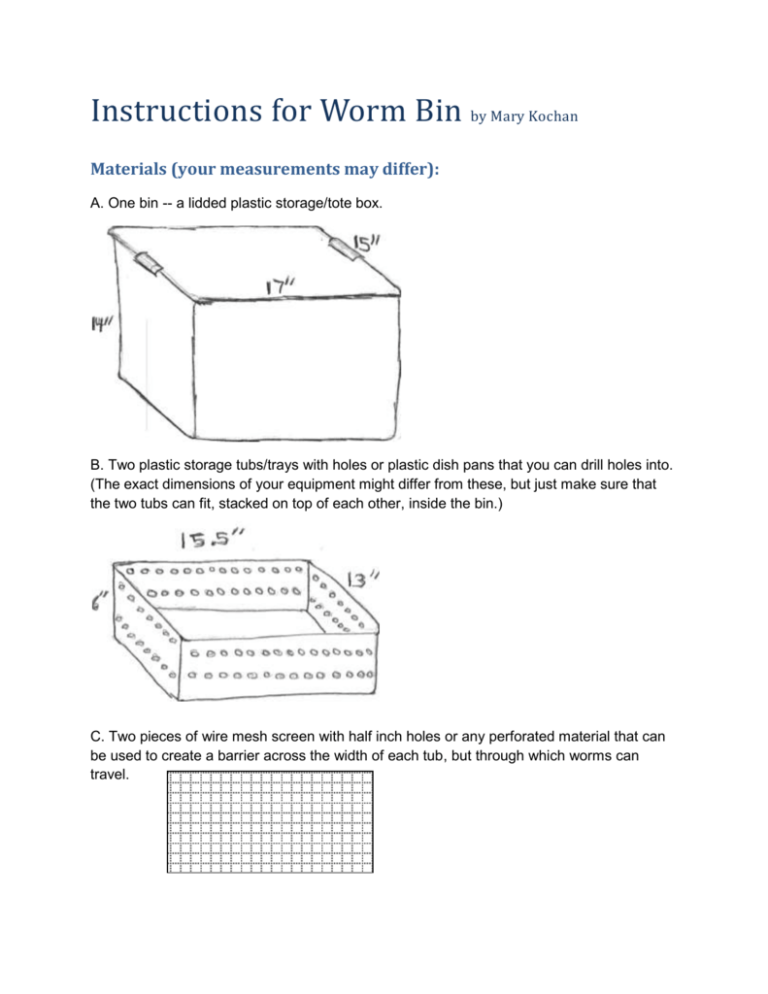
Instructions for Worm Bin by Mary Kochan Materials (your measurements may differ): A. One bin -- a lidded plastic storage/tote box. B. Two plastic storage tubs/trays with holes or plastic dish pans that you can drill holes into. (The exact dimensions of your equipment might differ from these, but just make sure that the two tubs can fit, stacked on top of each other, inside the bin.) C. Two pieces of wire mesh screen with half inch holes or any perforated material that can be used to create a barrier across the width of each tub, but through which worms can travel. D. A support system to hold the top tub above the bottom tub when they are both inside the bin. If both of the tubs fitted snugly enough inside so that you can simply stack them, that is fine. However once they are filled they will be quite heavy, so if the top one tends to shift and fall into the bottom one, some kind of support system is needed. An old cookie sheet might work or several dowels of the right length, or cans stuck into the corners of the bottom bin. Cut away showing how tubs have to fit into bin. E. Enough bedding material (compost, or a combination of peat moss, shredded paper, leaves and dirt) to fill -- or nearly fill -- one half of each tub, using screen C to separate the two halves of each tub. F. Food in the form of compostable kitchen scraps chopped fine or blended. Assembly Step 1. Using ⅜ bit, drill holes in long sides of outside bin. Drill one row of holes an inch or two from the top spaced about every inch apart, another row like it an inch or two from the bottom, and a third row spaced 3 inches apart at the middle. Here is a side view of the bin showing the configuration of the holes. Step 2. If needed, drill holes in all sides of the tubs using the same size bit drill at least two role rows of holes about 1 inch apart. Step 3. Add the bedding material/compost to each tub and place the divider in the middle as illustrated. Step 4. (Skip this step if you are going to be making a smoothie from the warm food.) Dampen the bedding until it is as moist as a wrung out sponge. Step 5. Add the worms to the bedding dividing your worm supply evenly between the two tubs. Step 6. Feed the worms kitchen compostables by pulling back the top layer of the bedding adding the food and then covering it up again. If you are using a worm smoothie, make sure there is enough rainwater in it to properly moisten the bedding. You may need to add some additional water. Step 7. Place the bottom tub into the bin. Step 8. If using, place the supports for the top tub on top of the bottom tub and then set the top tub in its place. See illustration under Materials: D above. How to Maintain the Worm Bin Every couple of days stir/aerate the bedding, turning it by hand or with a trowel -- try to get the worms from the bottom of the bedding up to the top. (You will have to remove the top tub from the bin in order to get to the bottom tub.) If bedding starts to dry out, add additional rainwater as needed. Once a week remove the bottom tub from the bin to check for worms on the floor of the bin and to pour off moisture that has collected at the bottom. Once the compost/bedding begins to look dark and crumbly and somewhat broken down, put new bedding in the other side of the tub and add food to it. After 3 to 10 days nearly all the worms will have migrated to the new bedding. When you observe that the worms have migrated, remove contents from the finished side and refill it with new bedding. Continue the process, regularly harvesting the worm poop fertilizer and adding new bedding. For more details and photographs of this system click here: http://catholiclane.com/theabsolute-easiest-worm-bin-instructions-on-the-entire-internet/. (© 2013 Mary Kochan)
