ASIX – M01 Implantació de Sistemes Operatius UF1 – NF5
advertisement
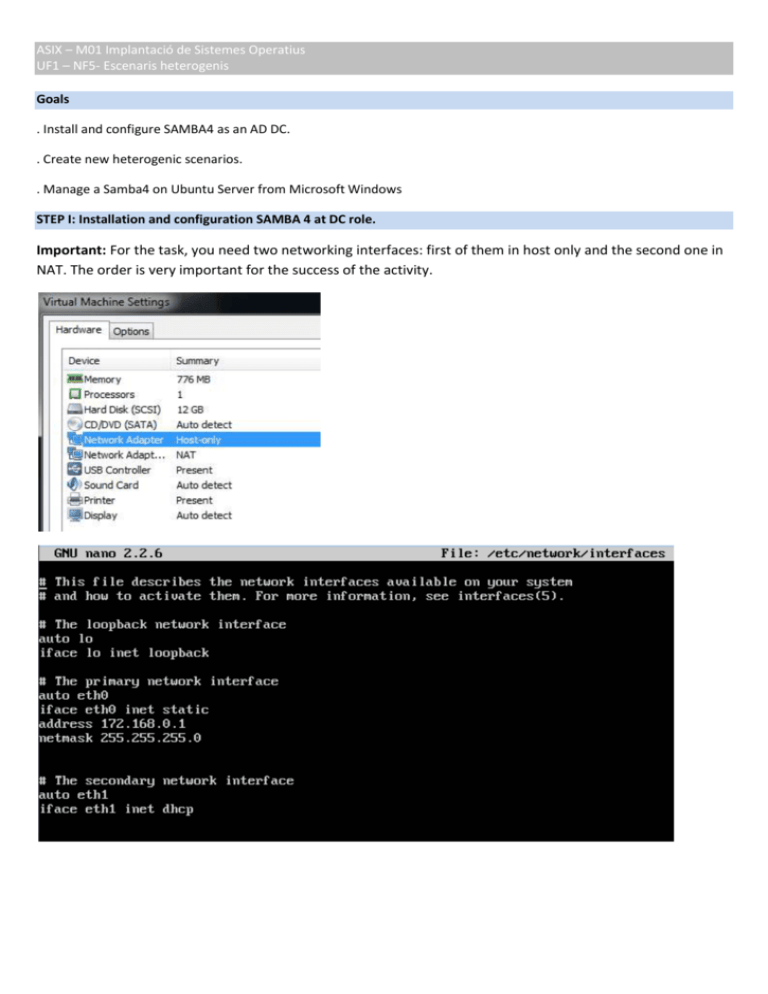
ASIX – M01 Implantació de Sistemes Operatius UF1 – NF5- Escenaris heterogenis Goals . Install and configure SAMBA4 as an AD DC. . Create new heterogenic scenarios. . Manage a Samba4 on Ubuntu Server from Microsoft Windows STEP I: Installation and configuration SAMBA 4 at DC role. Important: For the task, you need two networking interfaces: first of them in host only and the second one in NAT. The order is very important for the success of the activity. ASIX – M01 Implantació de Sistemes Operatius UF1 – NF5- Escenaris heterogenis ASIX – M01 Implantació de Sistemes Operatius UF1 – NF5- Escenaris heterogenis Update Ubuntu To The Latest Remember update Ubuntu for fix bugs and add newer features: sudo apt-get update sudo apt-get dist-upgrade Show the result above: Write with your own words what is SAMBA4 and how this can work as a Windows Server Active Directory. We will be building an AD DC with the next values: ASIX – M01 Implantació de Sistemes Operatius UF1 – NF5- Escenaris heterogenis AD DC Hostname:eq-surname AD DNS Domanin Name: hostname.surname.ad Kerberos Realm: hostname.surname.ad Server: hostname Admin Server: hostname Domain name/Net Bios name: surname IP Address: 172.168.0.1 Forwarder DNS Server: 172.168.0.1 Gateway: 172.168.0.1 Subnet Mask: 255.255.255.0 Server Role: DC Function Level: 2008_R2 Domain Admin Password: Admin1234 Backend DNS: BIND9 DLZ OS Requirements We need a functioning DNS server. AlsoKerberos requires that all systems have the same time, you will therefore need a functioning NTP server. Installation and configuration: NTP Server The NTP Server lets you to synchronize all machines of your network. Sudo apt-get install ntp You can add the next servers for synchronization in the file /etc/ntp.conf server 0.es.pool.ntp.org server 1.es.pool.ntp.org server 2.es.pool.ntp.org ASIX – M01 Implantació de Sistemes Operatius UF1 – NF5- Escenaris heterogenis , and test it. watch -n30 ntpq -cpe -cas Install all this packages: sambasmbclient bind9 build-essential libacl1-dev libattr1-dev libblkid-dev libgnutls-devlibreadline-dev python-dev libpam0g-dev python-dnspythongdbpkg-config ASIX – M01 Implantació de Sistemes Operatius UF1 – NF5- Escenaris heterogenis libpopt-dev libldap2-dev dnsutilslibbsd-devattr krb5-user docbook-xsl libcups2-dev acl python-xattrncurses-devlibpam-smbpasslibssl-devlibssl-doc Show the result. It’s all right? Move the original samba directory: move /etc/samba /etc/samba.old Run the samba-tool for domain provision: samba-tool domain provision --host-name=YOURHOSTNAME --realm=YOURCOMPLETEDOMAIN \ --domain=YOURNETBIOSDOMAIN --server-role='dc' --function-level=2008_R2 --use-rfc2307 Show all the result of the command. --adminpass=yourPassword --dns-backend=BIND9_DLZ \ ASIX – M01 Implantació de Sistemes Operatius UF1 – NF5- Escenaris heterogenis co If anything is wrong delete /etc/samba and /var/lib/samba/private and try it another time. Now, turn off password expiration and complexity: samba-tool domain passwordsettings set --complexity=off --min-pwd-length=6 --max-pwd-age=0 ASIX – M01 Implantació de Sistemes Operatius UF1 – NF5- Escenaris heterogenis We’ll link the new krb5 file: mv /etc/krb5.conf /etc/krb5.conf.old ln –sf /var/lib/samba/private/krb5.conf /etc/krb5.conf Check what versión of Bind we are running: named –V We have to change /var/lib/samba/private/named.conf to reflect the Bind version in /var/lib samba/private/named.conf For example: ASIX – M01 Implantació de Sistemes Operatius UF1 – NF5- Escenaris heterogenis Now let’s edit Bind installation. First the options file: /etc/bind/named.conf.options ASIX – M01 Implantació de Sistemes Operatius UF1 – NF5- Escenaris heterogenis Change group and permissions: chgrp bind /var/lib/samba/private/dns.keytab chmodg+r /var/lib/samba/private/dns.keytab Now add the appropriate zone definitions to named.conf.local /etc/bind/named.conf.local ASIX – M01 Implantació de Sistemes Operatius UF1 – NF5- Escenaris heterogenis We also have to add some rules to /etc/apparmor.d/usr.sbin.named And then, restart the service: serviceapparmor restart Check the resolv.conf file in /etc/resolv.conf which should get: nameserver 127.0.0.1 search SURNAME.AD ASIX – M01 Implantació de Sistemes Operatius UF1 – NF5- Escenaris heterogenis Restart all the system. Testing Check that the service records are being provided by Bind. Try: host –t SRV _ldap._tcp.surname.dc. host –t SRV _kerberos._udp.surname.dc. host –t A hostname.surname.dc. Show the correct result: Test the SAMBA server run the following: smbclient –L localhost –U% Show the result: Finally, try to connect to the “netlogon” share, using the Domain Administrator account: ASIX – M01 Implantació de Sistemes Operatius UF1 – NF5- Escenaris heterogenis smbclient //localhost/netlogon –Uadministrator –c ‘ls’ STEP II Add a W7 client to our domain Configure W7 networking interface in host-only with correct ip’s. Show your configuration: ASIX – M01 Implantació de Sistemes Operatius UF1 – NF5- Escenaris heterogenis Show ping between server and client in both directions. It is better to do ping directly to domain name because we can prove if dns server works correctly. If is necessary, configure client’s firewall. Add the W7 client to SAMBA domain with administrator account. Show the “welcome to domain” STEP IIIRemote management with RSAT ASIX – M01 Implantació de Sistemes Operatius UF1 – NF5- Escenaris heterogenis RSAT is a Remote Server Administration Tools that allow to administrators to manage roles and features that are installed on computer that are running Windows Server 2008 R2 as Active Directory. We can use RSAT tool to manage SAMBA4 as same as Windows Server. This is very useful because we could manage SAMBA4 with a power console like Users and Groups of Active Directory. First of all, we need to download RSAT from: http://www.microsoft.com/en-us/download/details.aspx?id=7887 Install the package and select necessary tools: Using RSAT add some ou, users and groups for your server SAMBA4 Show all objects created. Finally, create a Roaming Profile. You can use the next guide: http://www.golinuxhub.com/2012/08/create-roaming-profiles-in-samba4.html STEP IVGPO application In this section, we try to use some group policies and scripts. Create a new share in SAMBA4 through the console creating a new folder to share and add it in /etc/samba/smb.conf as a new public share. In a new GPO: ASIX – M01 Implantació de Sistemes Operatius UF1 – NF5- Escenaris heterogenis 1. Create a new script from Windows 7 and add them with RSAT console. Use notepad for write it. The script has to do the following: Script for add in user logon: - Connect with a net share and assign a new letter, by example x: - Create a message with echo that shows the name of the client and the time now. The file logssurname.txt should content all the messages from de clients. - Add to the file the name of the user that does logon. Script for add in user logoff: - Create a message with echo that shows the name of the client and the time now. The file logssurname.txt should content all the messages from de clients. - Add to the file the name of the user that does logoff and a write a message to inform end of session. - Disconnect net share unit. Test the new GPO from a W7 client. STEP I and STEP II <=5 STEP III < =7,5 STEP IV <=10


