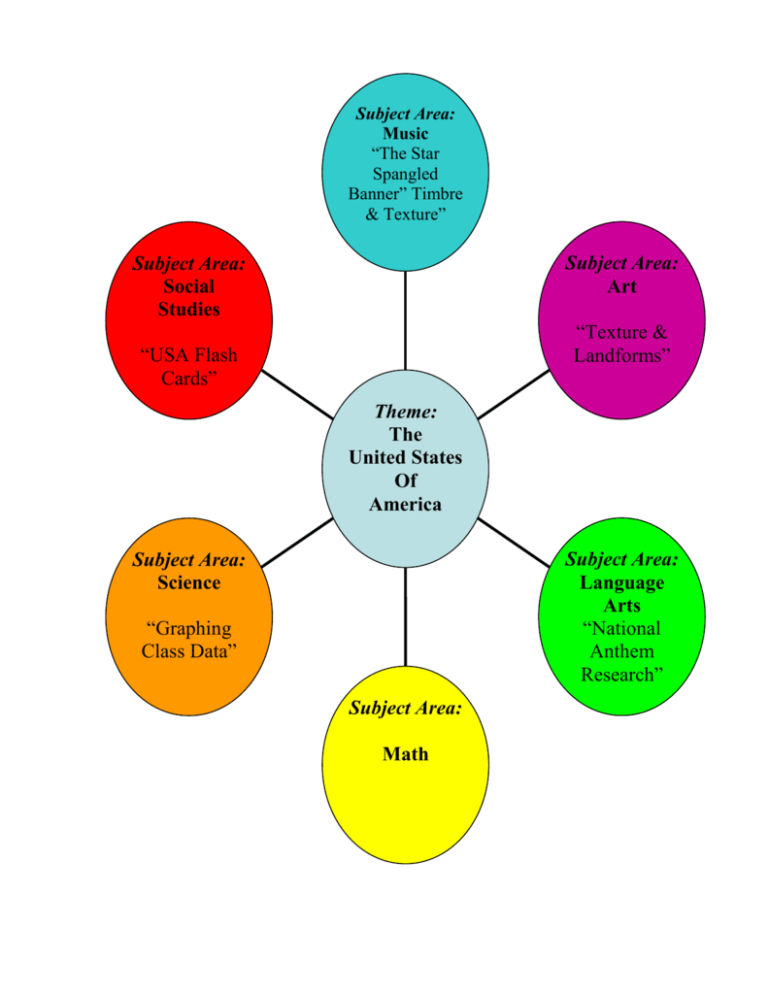
Subject Area:
Music
“The Star
Spangled
Banner” Timbre
& Texture”
Subject Area:
Art
Subject Area:
Social
Studies
“Texture &
Landforms”
“USA Flash
Cards”
Theme:
The
United States
Of
America
Subject Area:
Language
Arts
“National
Anthem
Research”
Subject Area:
Science
“Graphing
Class Data”
Subject Area:
Math
Theme:
America and the “Star Spangled Banner”
Content Area: Music
Grade:
4th Grade
Time needed: 30 minutes
Lesson Outcome/Objectives:
Students will:
1. Compare and contrast the similarities and differences in timbre and texture of two different
versions of the “Star Spangled Banner.”
Materials:
CD with “Star Spangled Banner” by the US Marine Corps Band
CD with “Star Spangled Banner” by Jimi Hendrix.
CD player.
Procedures and Strategies:
Today we will be listening comparing and contrasting two different versions of a song I know
all of you are familiar with, our national anthem, the “Star Spangled Banner.” First a brief
history about the song: Francis Scott Key wrote the lyrics to the song (which were actually
originally a poem) after seeing the bombardment of Fort McHenry in Baltimore, Maryland by
British ships during the War of 1812. The poem was later put to the music of “To Anacreon in
Heaven” which was written by John Stafford Smith.
Before we start listening to the song, let’s review some musical terms that we learned earlier in
the year. Does anyone remember what timbre is and can give me an example or definition of
timbre? That’s right every instrument has its own different timbre, so a tuba would have a
different timbre than a piano, and different people’s singing voices even have different timbres.
Timbre can also be referred to as tone color or quality in which an instrument’s notes can sound
warm or harsh.
Another musical term we will be listening for is called texture. Does anyone remember what
the three different kinds of musical texture are? That’s right, they are monophonic, when one
instrument plays alone without accompaniment, polyphonic, when two or more independent
melodies are played simultaneously, and homophonic, when a melody is accompanied by a less
predominant harmony part.
The first version of the “Star Spangled Banner” we are going to listen to is by the U.S. Marine
Band, also known as “The President’s Own” because they are known for providing music for
the President of the U.S. on certain occasions. The first time we listen to this song, listen for
the different timbres and try to identify the instruments that are used in the song. Also write
your ideas down while you are listening for an activity we will do later on. [play song] What
are the different timbres everyone heard? (Instruments used: trumpet, cymbal, trombone, tuba,
snare drum, bass drum, flute, clarinet, violin, viola, cello, bass.)
Now the second time we listen to this song, listen for the kind of texture that is used in the
song, remember the three different kinds are monophonic, polyphonic, and homophonic. [play
song] What kind of texture did we hear in this version of the song? (Homophonic, because of
all instruments harmonizing with the melody being played by the wind instruments.)
The second version of the “Star Spangled Banner” we are going to listen to is a version not as
many of you may be as familiar with. This version is done by Jimi Hendrix. Jimi Hendrix was
a talented guitar player from the late 1960’s. Some music critics consider him to be the greatest
guitar player ever. The song that we are going to listen to was performed at Woodstock in
1969. The first time we listen to this song, listen for the different timbres and again identify the
instruments that are used in the song. Also think about how these timbres are different and/or
similar than the timbres used by the U.S. Marine Band. [play song] What instruments were
used in this song? (Guitar, snare drum, cymbal.) What were the similarities and/or differences
between the timbres of the two songs?
We are going to listen to this song a second time, but again we are going to listen to the texture
that is used in the song, so it can be monophonic, polyphonic, or homophonic. [play song]
What kind of texture did you hear in this version of the song? (Homophonic, because the guitar
plays the melody through most of the song. However, an argument could be made for
polyphonic with the drummer sometimes almost overpowering the sound of the guitar at some
points in the song.
Now we are going to listen to each song one more time, and this time we are going to listen to
each song back to back. Only this time you are going to write down anything you can think of
that is similar or different between the two songs. It doesn’t have to be just timbre or texture,
you can use any other musical themes that we have learned or even talk about what emotions
each song gives you. [play songs] What are some of the similarities and/or differences you
came up with? (Have students share). I hope you wrote a lot of your good similarities and
differences down because now we will be comparing and contrasting the two songs by filling
out some Venn diagrams.
Assessment:
Students will be assessed informally assess students by how actively they are listening and
participating in discussion. Students will also be assessed on the quality of comparing and contrasting
the two songs on their Venn diagram.
Closure:
To conclude the lesson students will share their Venn diagrams with the class and discuss the
similarities and differences between the two songs.
Theme: The United States of America
Content Area: Art
Concept: Texture/ Landforms
Grade: 4th
Time needed: 45 minutes
Lesson Outcomes/Objectives:
Students will:
1. Analyze a topographical map of the United States of America,
2. Represent various landforms using craft dough and paint,
3. Create a map key to show what the various colors represent.
Non-Cook Play Dough
Materials:
Topographical globe with raised features
Examples of maps that show texture
Map of the United States of America, use link:
http://worldatlas.com/webimage/countrys/usanewe.htm
Blank USA maps (30 copies)
Craft dough, recipe to follow
Watercolor paints
1 1/4 cups flour
1/4 cup salt (4 tablespoons)
1/2 cup water
1-2 tablespoons flour (if needed)
In a bowl, add 1 1/4 cups flour and
salt. Mix. Add the water. Mix. Place
in the flour mixture. Mix together with
a spoon (or your hands). If it is too
sticky, add more flour. Store in
covered container or a sealable plastic
bag in the refrigerator.
Procedures and Strategies:
(Copyright © 2003 Barbara Pratt. All
rights reserved.)
Show a globe that has raised features. Have students feel it. Tell them to notice the
different texture. Ask, “What parts of the globe are bumpier? Where on the globe is it
smoother?” Lead students to the conclusion that the globe is bumpy where there are
mountains, etc. and smooth where the land is flat.
After having the students feel texture on a globe, show them topographical maps that show
texture not by raised features, but by different colors and symbols. Lead the students
through a guided discovery of what sorts of colors and symbols do these maps use to show
different textures in the land.
Discuss that maps use keys to identify the meaning of various colors and symbols used on
the maps.
Tell students that they will be using the dough to create texture on maps. Tell them that
they will also be painting the texture and creating a key to identify what their colors and
symbols mean.
Show the class a pre-made texture map. Point out the varying heights to denote the
landforms, mountains, plains, etc. Also, point out the key. Show how the different colored
regions on the map mean different things.
Go through the steps of making the dough. After the dough is made, model how to spread
it over the large outline of the USA. Show how to add texture to their maps with the dough,
how to make mountainous regions, etc.
Have students work in small groups (3-4 people). Each group will be given the ingredients
for the dough. Each group will make the dough and get it spread out onto their maps.
When dry, students will paint over the dried and hardened dough.
Assessment:
Students will have shown an understanding of texture and landforms by creating a
topographical map of the United States of America using the craft dough to create the effect of
landforms.
Theme: The United States of America
Content Area: Language Arts
Grade: 4th
Time needed: 45 minutes
Minnesota Academic Standard/Benchmarks Addressed:
II.D.1. Locate information in various reference materials including dictionaries, online dictionaries,
glossaries, encyclopedias, and the Internet.
III.A.3. Give oral presentations to different audiences for different purposes.
Lesson Outcomes/Objectives:
Students will:
1. Students will be able to find information about the National Anthem from a variety of
sources.
2. Students will be able to give a presentation of the importance/meaning of the national
anthem to a pre-determined audience.
Materials:
Note cards
Computers
Dictionaries
Encyclopedias
Resource books
Pencils
Timer
Procedures and Strategies
Students will listen to a couple variations of the national anthem.
Students will break into groups of 3-4. Each group will be expected to give a 3-4 minute
presentation on the importance and/or meaning of the Star - Spangled Banner.
Students will find their information in dictionaries, encyclopedias, the Internet, as well as
other resource books in the classroom.
As a class we will discuss how to give a presentation to different audiences. For example,
how should a person speak differently to the elderly as opposed to elementary school
children? Each group of students will draw a note-card that has a target audience written on
it. The group will be expected to give a presentation appropriate for the age indicated on
the note-card.
Students will give their presentation to the rest of the class.
Assessment:
Students will be assessed by their group participation and cooperation, students will be assessed
by their group presentation, and the accuracy of the information retrieved and presented.
Theme: The United States of America
Content Area: Social Studies
Grade: 4th
Time needed: 30- 45 minutes
Minnesota Academic Standard/Benchmarks Addressed:
4th Grade V. A. 1. The student will identify and locate major physical and cultural features that played
an important role in the history of the United States.
Benchmark #1: Students will locate and name all 50 states, territories, mountain ranges, major river
valleys, state capitals and cities, as studied.
Lesson Outcomes/Objectives:
Students will:
1. Create their own flash cards of states, capitals, and cities in the United States so that they can
use them to study from to take “Uncle Sam’s Quiz of the USA,” which is a cumulative
quiz of all states, capitals, and cities that students are learning about.
Materials:
Index Cards (150/ each pair)
Markers, Scissors
Glue
Worksheets
CD Player
CD
Procedures and Strategies:
Have students listen to Ray Charles’ 50 Nifty United States to introduce them to the unit.
After listening to the song see if the students can brainstorm all the states that are in the United
States. As they are generating the states on the board see if students can come up with the state
capitals too. This may be a challenge, but it is good transition to what comes next. (8-10
minutes)
After doing this divide the class into pairs to work on creating their own set of flash cards for
state and capital identification.
Hand out state capital list worksheet and state shape worksheets.
State Capitals & State Abbreviations:
After pairing up students and introducing them to the states hand out a list of state capitals and
important cities on a worksheet to each pair. Have one student create a group of flash cards
where one side has the capital/city and the other has the state on them. (Ex: Wisconsin (front
side) Madison (back side)).
While one student works on this, the other student can work on cutting out the states on the
map and pasting them to an index card. (Ex: Picture of Minnesota with abbreviation MN- other
side just has MN). Students should be able to use the abbreviations to determine which state it
is. (20-30 minutes)
After students have finished making all the flash cards for their pair have them clean up their
areas and start quizzing each other on the flash cards they have made.
Review/Closure:
After the groups have gotten together and made their flash cards get together as a group again.
Brainstorm again the fifty states and their capitols. See how their knowledge has changed in
only a short period of time. If they get stuck on a state or capitol have them use their flash
cards as a way to help them find the answer. This is a great way to model how these cards can
be used to benefit their own learning. The flash cards serve as a constant review of the material
they are learning. They can be used as a great time killer in the classroom when there is
downtime from one activity to the next. (5-7 minutes)
Assessment:
Students will be assessed by taking “Uncle Sam’s Quiz of the USA.” It is a cumulative quiz of
states, capitols, and abbreviations. This assessment will not be taken until much later (probably a
few weeks after). Informal assessments will be made to make sure students are on task, working
hard, and understanding the basic concepts of states, capitols, and abbreviations by their
participation in discussions.
Theme:
America and the “Star Spangled Banner”
Content Area: Science
Grade:
4th Grade
Time needed: 30 minutes
Minnesota Academic Standard/Benchmarks Addressed:
III. Earth and Space Science. A. Earth Structure and Process. The student will investigate the impact
humans have on the environment. B.1. The student will identify and investigate environmental issues
and potential solutions
Key concepts/skills/values:
The purpose of this lesson is to encourage the students to recognize that human activity can
lead to the production of wastes, and identify alternatives for the responsible use and disposal of
materials.
Lesson Outcome/Objectives:
Students will:
1. Identify ways in which humans effect the environment.
2. Identify the four R’s: Reduce, Reuse, Refuse, and Recycle.
Materials:
• All sorts of garbage
• Two big bins and 10 small bins
• Colored tokens (lots)
Anticipatory Set:
Review the previous activities from this unit. What we learned about product packaging, our
“garbage free lunch, littering issues, and our trip to the dump the previous day. On the whiteboard
write four very large R’s. (3 minutes)
Frame:
Ask the students to turn to their neighbor and talk about what they think the R’s may stand for.
Review the four R’s concept with your students: First, we want to Refuse certain items, like excess
packaging, then Reduce, by consuming less, then Reuse, by using plastic containers in our lunches, and
finally Recycle or compost everything possible. Discuss why it is important for our environment to
think about issues such as waste. How does it affect our neighborhoods, our cities, and our country?
Point out that the United States leads the world in municipal waste production. Discuss. (10 minutes)
Procedures and Strategies:
Activity: Four R’s Relay Game (taken from Environmentally Tuned to the Biggest Classroom
of Them All) 20 minutes. This activity is to familiarize students to proper categorization of garbage
according to the four R’s: Reduce, Reuse, Refuse, and Recycle, as well as what can be used for
compost. Students will be divided into groups and will be expected to participate in a game that will
require them to select a manner of disposal of waste that will be the least harmful to our environment.
Once the game is completed encourage students to apply what they learn here to habits in their
everyday lives to help protect our environment from excessive waste issues.
Assessments:
Objective 1 will be assessed informally through class discussion.
Objective 2 will be assessed informally through the students’ participation in the 4 R’s Relay game
categorization and discussion.
Team Project # 6
Thematic Unit: The United States of America
Group # 4
Kyle Kreuser, Marc Wegner, Danielle Olson,
Celeste Avery, Anne Peterson, & Andrea Mihalo


