Kinematic Viscosity ASTM D2170
advertisement
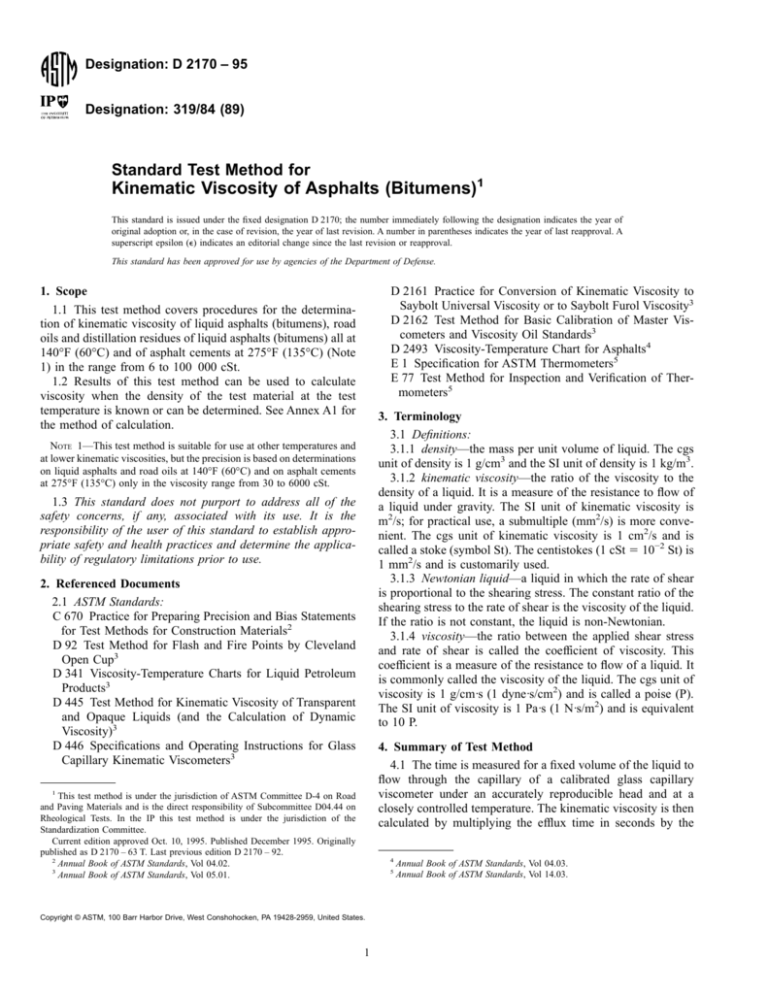
Designation: D 2170 – 95 Designation: 319/84 (89) Standard Test Method for Kinematic Viscosity of Asphalts (Bitumens)1 This standard is issued under the fixed designation D 2170; the number immediately following the designation indicates the year of original adoption or, in the case of revision, the year of last revision. A number in parentheses indicates the year of last reapproval. A superscript epsilon (e) indicates an editorial change since the last revision or reapproval. This standard has been approved for use by agencies of the Department of Defense. 1. Scope 1.1 This test method covers procedures for the determination of kinematic viscosity of liquid asphalts (bitumens), road oils and distillation residues of liquid asphalts (bitumens) all at 140°F (60°C) and of asphalt cements at 275°F (135°C) (Note 1) in the range from 6 to 100 000 cSt. 1.2 Results of this test method can be used to calculate viscosity when the density of the test material at the test temperature is known or can be determined. See Annex A1 for the method of calculation. D 2161 Practice for Conversion of Kinematic Viscosity to Saybolt Universal Viscosity or to Saybolt Furol Viscosity3 D 2162 Test Method for Basic Calibration of Master Viscometers and Viscosity Oil Standards3 D 2493 Viscosity-Temperature Chart for Asphalts4 E 1 Specification for ASTM Thermometers5 E 77 Test Method for Inspection and Verification of Thermometers5 3. Terminology 3.1 Definitions: 3.1.1 density—the mass per unit volume of liquid. The cgs unit of density is 1 g/cm3 and the SI unit of density is 1 kg/m3. 3.1.2 kinematic viscosity—the ratio of the viscosity to the density of a liquid. It is a measure of the resistance to flow of a liquid under gravity. The SI unit of kinematic viscosity is m2/s; for practical use, a submultiple (mm2/s) is more convenient. The cgs unit of kinematic viscosity is 1 cm2/s and is called a stoke (symbol St). The centistokes (1 cSt 5 10−2 St) is 1 mm2/s and is customarily used. 3.1.3 Newtonian liquid—a liquid in which the rate of shear is proportional to the shearing stress. The constant ratio of the shearing stress to the rate of shear is the viscosity of the liquid. If the ratio is not constant, the liquid is non-Newtonian. 3.1.4 viscosity—the ratio between the applied shear stress and rate of shear is called the coefficient of viscosity. This coefficient is a measure of the resistance to flow of a liquid. It is commonly called the viscosity of the liquid. The cgs unit of viscosity is 1 g/cm·s (1 dyne·s/cm2) and is called a poise (P). The SI unit of viscosity is 1 Pa·s (1 N·s/m2) and is equivalent to 10 P. NOTE 1—This test method is suitable for use at other temperatures and at lower kinematic viscosities, but the precision is based on determinations on liquid asphalts and road oils at 140°F (60°C) and on asphalt cements at 275°F (135°C) only in the viscosity range from 30 to 6000 cSt. 1.3 This standard does not purport to address all of the safety concerns, if any, associated with its use. It is the responsibility of the user of this standard to establish appropriate safety and health practices and determine the applicability of regulatory limitations prior to use. 2. Referenced Documents 2.1 ASTM Standards: C 670 Practice for Preparing Precision and Bias Statements for Test Methods for Construction Materials2 D 92 Test Method for Flash and Fire Points by Cleveland Open Cup3 D 341 Viscosity-Temperature Charts for Liquid Petroleum Products3 D 445 Test Method for Kinematic Viscosity of Transparent and Opaque Liquids (and the Calculation of Dynamic Viscosity)3 D 446 Specifications and Operating Instructions for Glass Capillary Kinematic Viscometers3 4. Summary of Test Method 4.1 The time is measured for a fixed volume of the liquid to flow through the capillary of a calibrated glass capillary viscometer under an accurately reproducible head and at a closely controlled temperature. The kinematic viscosity is then calculated by multiplying the efflux time in seconds by the 1 This test method is under the jurisdiction of ASTM Committee D-4 on Road and Paving Materials and is the direct responsibility of Subcommittee D04.44 on Rheological Tests. In the IP this test method is under the jurisdiction of the Standardization Committee. Current edition approved Oct. 10, 1995. Published December 1995. Originally published as D 2170 – 63 T. Last previous edition D 2170 – 92. 2 Annual Book of ASTM Standards, Vol 04.02. 3 Annual Book of ASTM Standards, Vol 05.01. 4 5 Copyright © ASTM, 100 Barr Harbor Drive, West Conshohocken, PA 19428-2959, United States. 1 Annual Book of ASTM Standards, Vol 04.03. Annual Book of ASTM Standards, Vol 14.03. D 2170 viscometer calibration factor. 6.5 Timer—A stop watch or other spring-activated timing device graduated in divisions of 0.1 s or less and accurate to within 0.05 % when tested over intervals of not less than 15 min. 6.6 Electrical Timing Devices may be used only on electrical circuits the frequencies of which are controlled to an accuracy of 0.05 % or better. 6.6.1 Alternating currents, the frequencies of which are intermittently and not continuously controlled, as provided by some public power systems, can cause large errors, particularly over short timing intervals, when used to actuate electrical timing devices. 5. Significance and Use 5.1 The kinematic viscosity characterizes flow behavior. The method is used to determine the consistency of bitumen as one element in establishing the uniformity of shipments or sources of supply. The specifications are usually at temperatures of 60 and 135°C. 6. Apparatus 6.1 Viscometers, capillary-type, made of borosilicate glass, annealed, suitable for this test are described in Annex A2 and include the following: 6.1.1 Cannon-Fenske viscometer for opaque liquids, 6.1.2 Zeitfuchs cross-arm viscometer, 6.1.3 Lantz-Zeitfuchs viscometer, 6.1.4 BS U-Tube modified reverse flow viscometer. 6.2 Calibrated viscometers are available from commercial suppliers. Details regarding calibration of viscometers are given in Annex A3. 6.3 Thermometers— Calibrated liquid-in-glass thermometers of an accuracy after correction of 0.04°F (0.02°C) can be used or any other thermometric device of equal accuracy. ASTM Kinematic Viscosity Thermometers 47F and 47C and IP 35F and 35C are suitable for use at 140°F (60°C) and ASTM Kinematic Viscosity Thermometers 110F and 110C are suitable for use at 275°F (135°C). 6.3.1 The specified thermometers are standardized at “total immersion,” which means immersion to the top of the mercury column with the remainder of the stem and the expansion chamber at the top of the thermometer exposed to room temperature. The practice of completely submerging the thermometer is not recommended. When thermometers are completely submerged, corrections for each individual thermometer based on calibration under conditions of complete submergence must be determined and applied. If the thermometer is completely submerged in the bath during use, the pressure of the gas in the expansion chamber will be higher or lower than during standardization, and may cause high or low readings on the thermometer. 6.3.2 It is essential that liquid-in-glass thermometers be calibrated periodically using the technique given in Test Method E 77 (see Appendix X1). 6.4 Bath—A bath suitable for immersion of the viscometer so that the liquid reservoir or the top of the capillary, whichever is uppermost, is at least 20 mm below the upper bath level, and with provisions for visibility of the viscometer and the thermometer. Firm supports for the viscometer shall be provided, or the viscometer may be an integral part of the bath. The efficiency of the stirring and the balance between heat losses and heat input must be such that the temperature of the bath medium does not vary by more than 60.05°F (60.03°C) over the length of the viscometer, or from viscometer to viscometer in the various bath positions at 140°F (60°C). The variation at 275°F (135°C) must not exceed 60.05°F (60.03°C). 7. Preparation of Sample 7.1 To minimize loss of volatile constituents and to obtain reproducible results, proceed as follows: 7.1.1 Procedure for Liquid Asphalt (Bitumen) and Road Oil: 7.1.1.1 Allow sealed samples, as received, to reach room temperature. 7.1.1.2 Open the sample container and mix the sample thoroughly by stirring for 30 s taking care to avoid the entrapment of air. If the sample is too viscous for such stirring, place the sample in the tightly sealed container in a bath or oven maintained at 145 6 5°F (636 3°C) until it becomes sufficiently liquid for stirring. 7.1.1.3 Immediately charge the viscometer, or, if the test is to be made at a later time, pour approximately 20 mL into one or more clean, dry containers having a capacity of approximately 30 mL and immediately seal with an airtight closure. 7.1.1.4 For materials with kinematic viscosities at 140°F (60°C) above 800 cSt, heat the 20-mL sample in the sealed container in an oven or bath maintained at 145 6 5°F (63 6 3°C) until it is sufficiently liquid for a convenient transfer into the viscometer. Such heating should not exceed 30 min. 7.1.2 Procedure for Asphalt Cement: TABLE 1 Acceptability of Test Results for Kinematic Viscosity NOTE 1—The values given in column 2 are the coefficients of variation that have been found to be appropriate for the materials and conditions of test described in column 1. The values given in column 3 are the limits that should not be exceeded by the difference between the results of two properly conducted tests. Material and Type Index Single-operator precision: Asphalt cements at 275°F (135°C) Liquid asphalts at 140°F (60°C): below 3000 cSt 3000 to 6000 cSt 6000 cSt and above Multilaboratory precision: Asphalt cements at 275°F (135°C) Liquid asphalts at 140°F (60°C): below 3000 cSt 3000 to 6000 cStB above 6000 cStB NOTE 2—Distilled water is a suitable bath liquid for determinations at 140°F (60°C). USP White Oil with a flash point above 420°F (215°C) has been found suitable for determinations at 275°F (135°C). The flash point is determined in accordance with Test Method D 92. Coefficient of Variation (% of mean)A Acceptable Range of Two Results (% of mean)A 0.64 1.8 0.53 0.71 3.2 1.5 2.0 8.9 3.1 8.8 1.06 3.11 3.6 3.0 9.0 10.0 A These numbers represent, respectively, the (1s %) and (d2s %) limits as described in Practice C 670. B Based on less than 30 degrees of freedom. 2 D 2170 with a strong acid cleaning solution to remove organic deposits, rinse thoroughly with distilled water and residue-free acetone, and dry with filtered dry air. 8.8.1 Chromic acid cleaning solution may be prepared by adding, with the usual precautions, 800 mL of concentrated sulphuric acid to a solution of 92 g of sodium dichromate in 458 mL of water. The use of similar commercially available sulphuric acid cleaning solutions is acceptable. Nonchromiumcontaining, strongly oxidizing acid cleaning solutions6 may be substituted so as to avoid the disposal problems of chromiumcontaining solutions. 8.8.2 Use of alkaline glass cleaning solutions may result in a change of viscometer calibration, and is not recommended. 7.1.2.1 Heat the sample with care to prevent local overheating until it has become sufficiently fluid to pour, occasionally stirring the sample to aid heat transfer and to assure uniformity. 7.1.2.2 Transfer a minimum of 20 mL into a suitable container and heat to 275 6 10°F (135 6 5.5°C), stirring occasionally to prevent local overheating and taking care to avoid the entrapment of air. 8. Procedure 8.1 The specific details of operation vary somewhat for the various types of viscometers. See the detailed descriptions of viscometers in Annex A2 for instructions for using the type viscometer selected. In all cases, however, follow the general procedure described in 8.2 to 8.8. 8.2 Maintain the bath at the test temperature within6 0.02°F (60.01°C) for test temperature of 140°F (60°C) and within6 0.05°F (60.03°C) for test temperature of 275°F (135°C). Apply the necessary corrections, if any, to all thermometer readings. 8.3 Select a clean, dry viscometer which will give an efflux time greater than 60 s and preheat to test temperature. 8.4 Charge the viscometer in the manner dictated by the design of the instrument, as prescribed in Annex A2. 8.5 Allow the charged viscometer to remain in the bath long enough to reach the test temperature, as prescribed in Annex A2. 8.6 Start the flow of asphalt in the viscometer as prescribed in Annex A2. 8.7 Measure to within 0.1 s, the time required for the leading edge of the meniscus to pass from the first timing mark to the second. If this efflux time is less than 60 s, select a viscometer of smaller capillary diameter and repeat the operation. 8.8 Upon completion of the test, clean the viscometer thoroughly by several rinsings with an appropriate solvent completely miscible with the sample, followed by a completely volatile solvent. Dry the tube by passing a slow stream of filtered dried air through the capillary for 2 min, or until the last trace of solvent is removed. Periodically clean the instrument 9. Calculation 9.1 Calculate the kinematic viscosity to three significant figures using the following equation: Kinematic viscosity, cSt 5 Ct (1) where: C 5 calibration constant of the viscometer, cSt/s, and t 5 efflux time, s. NOTE 3—Other ASTM publications on viscosity that may be used in conjunction with results determined in accordance with this test method are Test Method D 445, Practice D 2161, Standards D 341 and D 2493, and Specifications D 446. 10. Report 10.1 Always report the test temperature with the result, for example: Kinematic viscosity at 140°F 5 75.6 cSt (2) 11. Precision 11.1 Criteria for judging the acceptability of viscosity test results obtained by this method are given in Table 1. 6 A commercial source for nonchromium-containing cleaning solution is Godax Laboratories, Inc., 480 Canal St., New York, NY 10013. 3 D 2170 ANNEXES (Mandatory Information) A1. CALCULATION OF VISCOSITY OF A NEWTONIAN LIQUID A1.3 When the specific gravity of the asphalt is not known, a satisfactory determination of the viscosity at 275°F (135°C) can be obtained by multiplying the kinematic viscosity at 275°F (135°C) by an assumed density of 0.948 g/cm3. This density value is equivalent to a specific gravity of 1.015 at 77/77°F (25/25°C). Tests on a large number of asphalts indicate that the error introduced by this assumed density will not exceed 63 %. A1.1 The viscosity of a Newtonian liquid is calculated from its kinematic viscosity by multiplying the kinematic viscosity by the density of the liquid at the test temperature. A1.2 For paving grade asphalts, density at 275°F (135°C) can be conveniently determined from specific gravity at 77/77°F (25/25°C) by multiplying by a factor of 0.934 g/cm3; or from the specific gravity at 60/60°F (15.5/15.5°C) by multiplying by a factor of 0.931 g/cm3. These factors are based on an average coefficient of expansion for asphalt cement of 0.00034/°F (0.00061/°C). A2. REVERSE-FLOW VISCOMETERS A2.1 Scope A2.1.1 The reverse-flow viscometers for transparent and opaque liquids include the Cannon-Fenske Opaque,7 Zeitfuchs Cross-Arm,8 BS/IP/RF, and Lantz-Zeitfuchs viscometers. Unlike the modified Ostwald and suspended-level viscometers, the sample of liquid flows into a timing bulb not previously wet by sample, thus allowing the timing of liquids whose thin films are opaque. Reverse-flow viscometers are used for the measurement of kinematic viscosities of opaque and transparent liquids up to 100 000 cSt. A2.3.2 Select a clean, dry viscometer that will give a flow time greater than 60 s. A2.3.3 Charge the viscometer in the manner dictated by the design of the instrument, this operation being in conformity with that employed when the instrument was calibrated. If the sample may contain lint, solid particles, etc., filter as prescribed in Test Method D 445. A2.3.3.1 To charge the Cannon-Fenske Opaque viscometer, invert the viscometer and apply suction to the tube L, immersing tube N in the liquid sample. Draw liquid through tube N, filling bulb D to fill mark G. Wipe excess sample off tube N and invert the viscometer to its normal position. Mount the viscometer in the constant-temperature bath, keeping tube L vertical. A2.3.3.2 Mount the Zeitfuchs Cross-Arm viscometer in the constant-temperature bath, keeping tube N vertical. Introduce sample through tube N taking care not to wet the sides of tube N, into the cross-arm D until the leading edge stands within 0.5 mm of fill mark G on the siphon tube. A2.3.3.3 Mount the Lantz-Zeitfuchs viscometer in the constant-temperature bath keeping tube N vertical. Introduce sufficient sample through tube N to completely fill bulb D, overflowing slightly into overflow bulb K. If the sample is poured at a temperature above test temperature, wait 15 min for the sample in the viscometer to attain bath temperature and add more sample to overflow slightly into bulb K. A2.3.3.4 Mount the BS/IP/RF viscometer in the constanttemperature bath keeping tube L vertical. Pour sample through tube N to a point just above filling mark G; allow the sample to flow freely through capillary R, taking care that the liquid column remains unbroken, until the lower meniscus is about 5 mm below the filling mark H and then arrest its flow by closing the timing tube with a cork or rubber stopper in tube L. Add more liquid if necessary to bring the upper meniscus slightly above mark G. After allowing the sample to attain bath temperature (see A2.3.4) and any air bubbles to rise to the A2.2 Apparatus A2.2.1 For the reverse-flow viscometers, detailed drawings of the size designations, approximate constants, kinematic viscosity range, capillary diameter, and bulb volumes for each viscometer are shown in Figs. A2.1-A2.4. The kinematic viscosity range is based on a 60-s minimum flow-time in this method; the same viscometers are also described in Specifications D 446 with a different viscosity range based on a 200-s minimum flow-time as prescribed in Test Method D 445. The lengths of the upper tubes K, L, M and N in Figs. A2.1-A2.4 may be increased (or decreased) to conform to the immersion requirements of 6.4. A2.3 Operating Instructions A2.3.1 A standard operating procedure is contained in Section 7. Additional operating instructions for the reverseflow viscometers are outlined in A2.3.2-A2.3.8 with emphasis on procedures that are specific to a particular instrument or this group of instruments. 7 Cannon, M. R., and Fenske, M. R., “Viscosity Measurement—Opaque Liquids,” Industrial and Engineering Chemistry, Analytical Edition, Vol 13, 1941, p. 2910. 8 Zeitfuchs, E. H., “Kinematic Viscometer for Opaque and Very Viscous Liquids,” Oil and Gas Journal, Vol 44, No. 36, 1946, p. 98. 4 D 2170 NOTE 1—All dimensions are in millimetres. Dimensions and Kinematic Viscosity Ranges Size No. Approximate Constant, cSt/s 200 300 350 400 450 500 600 0.1 0.25 0.5 1.2 2.5 8 20 Kinematic Viscosity Range, cSt 6 15 30 72 150 480 1200 to to to to to to to Inside Diameter of Tube, R, mm (62 %) Inside Diameter of Tube N and G Tubes E, F, and I, mm (65 %) Volume Bulbs A, C, and J, mL (65 %) Volume Bulb D, mL (65 %) 1.02 1.26 1.48 1.88 2.20 3.10 4.00 3.2 3.4 3.4 3.4 3.7 4.0 4.7 2.1 2.1 2.1 2.1 2.1 2.1 2.1 11 11 11 11 11 11 13 100 200 500 1200 2500 8000 20 000 FIG. A2.1 Cannon-Fenske Opaque Viscometer for Opaque and Transparent Liquids surface, gently loosen the stopper allowing the sample to flow to the lower filling mark H and again arrest flow. Remove the excess sample above filling mark G by inserting the special pipet until its cork rests on top of tube N; apply gentle suction until air is drawn through. The upper meniscus shall coincide with mark G. A2.3.4 Allow the viscometer to remain in the constanttemperature bath a sufficient time to ensure that the sample reaches temperature equilibrium (10 min minimum, 30 min maximum). A2.3.5 For the Cannon-Fenske Opaque and BS/IP/RF viscometers, remove the stopper in tubes N and L, respectively, and allow the sample to flow by gravity. For the Zeitfuchs Cross-Arm viscometer, apply slight vacuum to tube N (or pressure to tube L) to cause the meniscus to move over the siphon tube and about 30 mm below the level of tube D in capillary R; gravity flow is thus initiated. For the LantzZeitfuchs viscometer, apply slight vacuum to tube M (or pressure to tube N with tube K closed) until the lower meniscus is opposite the lower timing mark E; allow the sample to flow by gravity. A2.3.6 Measure to the nearest 0.1 s the time required for the leading edge of the meniscus to pass from timing mark E to timing mark F as prescribed in Section 6 of this method. A2.3.7 Calculate the viscosity as prescribed in Section 7 of this method. A2.3.8 Clean the viscometer thoroughly by several rinsings with an appropriate solvent completely miscible with the 5 D 2170 NOTE 1—All dimensions are in millimeters. Dimensions and Kinematic Viscosity Ranges Size Approximate Constant, cSt/s 4 5 6 7 8 9 10 0.10 0.3 1.0 3.0 10.0 30.0 100.0 Kinematic Viscosity Range, cSt 6 18 60 180 600 1800 6000 to to to to to to to Inside Diameter of Tube R, mm (62 %) Length of Tube R, mm Lower Bulb Volume, mL (65 %) Horizontal Tube Diameter, mm (65 %) 0.64 0.84 1.15 1.42 1.93 2.52 3.06 210 210 210 210 165 165 165 0.3 0.3 0.3 0.3 0.25 0.25 0.25 3.9 3.9 4.3 4.3 4.3 4.3 4.3 100 300 1000 3000 10 000 30 000 100 000 FIG. A2.2 Zeitfuchs Cross-Arm Viscometer for Transparent and Opaque Liquids sample, followed by a completely volatile solvent. Dry the viscometer by passing a slow stream of filtered, dry air through the viscometer for 2 min, or until the last trace of solvent is removed. 6 D 2170 NOTE 1—All dimensions are in millimetres. Dimensions and Kinematic Viscosity Ranges Size No. Approximate Constant, cSt/s 5 6 7 8 9 10 0.3 1.0 3.0 10.0 30.0 100.0 Kinematic Viscosity Range, cSt 18 60 180 600 1800 6000 to to to to to to 300 1000 3000 10 000 30 000 100 000 Inside Diameter of Tube R, mm (62 %) Length of Tube R, mm Volume, Bulb C, mL (65 %) 1.65 2.25 3.00 4.10 5.20 5.20 490 490 490 490 490 490 2.7 2.7 2.7 2.7 2.7 0.85 FIG. A2.3 Lantz-Zeitfuchs Type Reverse Flow Viscometer for Opaque Liquids 7 D 2170 NOTE 1—All dimensions are in millimetres. Dimensions and Kinematic Viscosity Ranges Size No. Approximate Constant, cSt/s 4 5 6 7 8 9 10 11 0.1 0.3 1.0 3.0 10 30 100 300 Kinematic Viscosity Range, cSt 6 18 60 180 600 1800 6000 18 000 to to to to to to to to 100 300 1000 3000 10 000 30 000 100 000 300 000 Inside Diameter of Tube R, mm (62 %) Length of Tube R, mm Inside Diameter at E, F, and G, mm Volume Bulb C, mL (65 %) 1.26 1.64 2.24 2.93 4.00 5.5 7.70 10.00 185 185 185 185 185 185 210 210 3.0 to 3.3 3.0 to 3.3 3.0 to 3.3 3.3 to 3.6 4.4 to 4.8 6.0 to 6.7 7.70 10.00 4.0 4.0 4.0 4.0 4.0 4.0 4.0 4.0 FIG. A2.4 BS/IP/RF U-Tube Reverse Flow Viscometer for Opaque Liquids A3. CALIBRATION OF VISCOMETERS cosity oil standards9 having the approximate kinematic viscosities shown in Table A3.1. Certified kinematic viscosity values established are supplied with each sample. A3.1 Scope A3.1.1 This annex describes the materials and procedures used for calibrating or checking the calibration of viscometers used in this method. 9 The viscosity oil standards are available in 1-pt containers. Purchase orders should be addressed to the Cannon Instrument Co., P. O. Box 16, State College, Pa. 16801. Additionally the Cannon Instrument Co. has available viscosity standards N600, N2000, and N8000, which have viscosities at 140°F (60°C) of 180 cSt, 500 cSt, and 1700 cSt, respectively; standards N600 and N2000 have viscosities at 275°F (135°C) of 12 and 25 cSt respectively. Shipment will be made as specified or by best means. A3.2 Reference Materials A3.2.1 Viscosity Oil Standards conforming to ASTM vis- 8 D 2170 TABLE A3.1 Viscosity Oil Standards Viscosity Oil Standards Conforming to ASTM Standards S S S S S S where: v d 5 volume of charge, cm3, 5 average diameter, cm, of the meniscus in the upper reservoir, h 5 average driving head, cm, a 5 coefficient of thermal expansion of the test sample between the fill temperature and the test temperature, p 5 density, g/cm3, and t, f subscripts 5 as defined in A3.3.3. A3.3.5 If the viscometer is used at a location other than the calibrating laboratory, the C constant should be corrected for the difference in the acceleration of gravity, g, at the two locations as follows: Approximate Kinematic Viscosity, cSt 60 200 600 2000 8000 30 000 At 100°F (37.8°C) At 122°F (50°C) At 210°F (99°C) 60 200 600 2000 8000 27 000 ... ... 280 ... ... 11 000 ... ... 32 ... ... ... A3.3 Calibration C2 5 ~g 2/g1! 3 C1 A3.3.1 Calibration of Routine Viscometer by Means of Liquid Viscosity Standards—Select from Table 1 a liquid standard having a minimum efflux time of 200 s at the calibration temperature (preferably 100°F (37.8°C)). Determine the efflux time to the nearest 0.1 s by the procedure described in Section 7, and calculate the viscometer constant, C, as follows: C 5 v/t where: C2 5 the calibration constant in the testing laboratory, C 1 5 the calibration constant in the calibrating laboratory, 5 the acceleration of gravity at the testing laboratory, g2 and 5 the acceleration of gravity at the calibrating laborag1 tory. Certificates for viscometers should state the value of g at the location of the calibrating laboratory. Failure to correct for gravity can result in errors of 0.2 %. A3.3.6 Calibration of Routine Viscometer by Means of Standard Viscometer—Select any pertroleum oil having an efflux time of at least 200 s. Select also a standard viscometer of known C constant. This viscometer may be a master viscometer which has been calibrated by the “step-up” procedure using viscometers of successively larger diameters starting with distilled water at the basic viscosity standard (see Test Method D 2162) or a routine viscometer of the same type that has been calibrated by comparison with a master viscometer. Calibrated viscometers are available from a number of commercial suppliers. A3.3.6.1 Mount the standard viscometer together with the viscometer to be calibrated in the same bath and determine the efflux times of the oil by the procedure described in Section 7. A3.3.6.2 Calculate the C constant as follows (Note 9 ): (A3.1) where: v 5 viscosity for the standard liquid, cSt and t 5 efflux time, s. A3.3.2 The viscometer constant is independent of temperature for the Zeitfuchs Cross-Arm, Lantz-Zeitfuchs and BS/ IP/RF U-Tube viscometers. A3.3.3 The Cannon-Fenske Opaque viscometer has a fixed volume of sample charged at the fill temperature. If the test temperature differs from the fill temperature, the viscometer constant is calculated as follows: Viscometer constant, Ct 5 Co @1 1 F~T t 2 Tf!# (A3.2) where: Co 5 viscometer constant when filled and tested at the same temperature, T 5 temperature, F 5 temperature dependence factor (see A3.3.4), and t, f subscripts 5 values at the test temperature and at the fill temperature, respectively. A3.3.4 Calculate the temperature dependence constant by means of the following equation: Factor, F 5 4aV/pd2h 5 @4V ~pf 2 pt!#/@pd2hp t ~Tt 2 Tf!# (A3.4) C1 5 ~t 2 3 C2!/t1 where: C1 5 5 t1 C2 5 5 t2 (A3.3) 9 C constant of efflux time to C constant of efflux time to (A3.5) routine viscometer, nearest 0.1 s in routine viscometer, standard viscometer, and nearest 0.1 s in standard viscometer. D 2170 APPENDIX (Nonmandatory Information) X1. ICE POINT DETERMINATION AND RECALIBRATION OF KINEMATIC VISCOSITY THERMOMETERS X1.1 To achieve an accuracy of 60.02°C for calibrated kinematic viscosity thermometers, it is required that a check at the ice point be made and the corrections altered for the change seen in the ice point. It is recommended that the interval of checking be every six months; for a new thermometer, check monthly for the first six months. least 1 min apart should agree within one tenth of a division. X1.2.4 Record the ice point reading and compare it with the previous reading. If the reading is found to be higher or lower than the reading corresponding to a previous calibration, readings at all other temperatures will be correspondingly increased or decreased. X1.2.5 The ice point procedure given in X1.1-X1.2.4 is used for the recalibration of kinematic viscosity thermometers, and a complete new calibration of the thermometer is not necessary in order to meet the accuracy ascribed to this design thermometer. X1.2 A detailed procedure for the measurement of the ice point and recalibration of thermometers is described in 6.5 of Test Method E 77. The suggestions in the following sections of this appendix are given specifically for the mercury-in-glass kinematic viscosity thermometers and may not apply to other thermometers. X1.2.1 The ice point reading of kinematic viscosity thermometers shall be taken within 60 min after being at the test temperature for not less than 3 min. The ice point reading shall be expressed to the nearest 0.01°C or 0.02°F. X1.2.2 Select clear pieces of ice, preferably made from distilled or pure water. Discard any cloudy or unsound portions. Rinse the ice with distilled water and shave or crush into small pieces, avoiding direct contact with the hands or any chemically unclean objects. Fill the Dewar vessel with the crushed ice and add sufficient distilled and preferably precooled water to form a slush, but not enough to float the ice. As the ice melts, drain off some of the water and add more crushed ice. Insert the thermometer packing the ice gently about the stem, to a depth approximately one scale division below the 0°C (32°F) graduation. It may be necessary to repack the ice around the thermometer because of melting. X1.2.3 After at least 3 min have elapsed, tap the stem gently, and observe the reading. Successive readings taken at X1.3 It is recommended that these kinematic viscosity thermometers be stored vertically when not in use so as to avoid the separation of the mercury column. X1.4 It is recommended that these kinematic viscosity thermometers be read to the nearest 1⁄5 of a division using appropriate magnification. Since these thermometers are typically in a kinematic viscosity bath (which has vision through the front), the thermometer is read by lowering the thermometer such that the top of the mercury column is 5 to 15 mm below the surface of the bath liquid. Be careful to ensure that the expansion chamber at the top of the thermometer is above the lid of the constant temperature bath. If the expansion chamber is at elevated or lowered temperatures from ambient temperatures, a significant error can occur. This error can be as much as one or two thermometer divisions. A reading glass such as used for reading books may be useful to ensure reading the scale to 1⁄5of a division. The American Society for Testing and Materials takes no position respecting the validity of any patent rights asserted in connection with any item mentioned in this standard. Users of this standard are expressly advised that determination of the validity of any such patent rights, and the risk of infringement of such rights, are entirely their own responsibility. This standard is subject to revision at any time by the responsible technical committee and must be reviewed every five years and if not revised, either reapproved or withdrawn. Your comments are invited either for revision of this standard or for additional standards and should be addressed to ASTM Headquarters. Your comments will receive careful consideration at a meeting of the responsible technical committee, which you may attend. If you feel that your comments have not received a fair hearing you should make your views known to the ASTM Committee on Standards, at the address shown below. This standard is copyrighted by ASTM, 100 Barr Harbor Drive, PO Box C700, West Conshohocken, PA 19428-2959, United States. Individual reprints (single or multiple copies) of this standard may be obtained by contacting ASTM at the above address or at 610-832-9585 (phone), 610-832-9555 (fax), or service@astm.org (e-mail); or through the ASTM website (www.astm.org). 10
