Scantron Handbook
advertisement
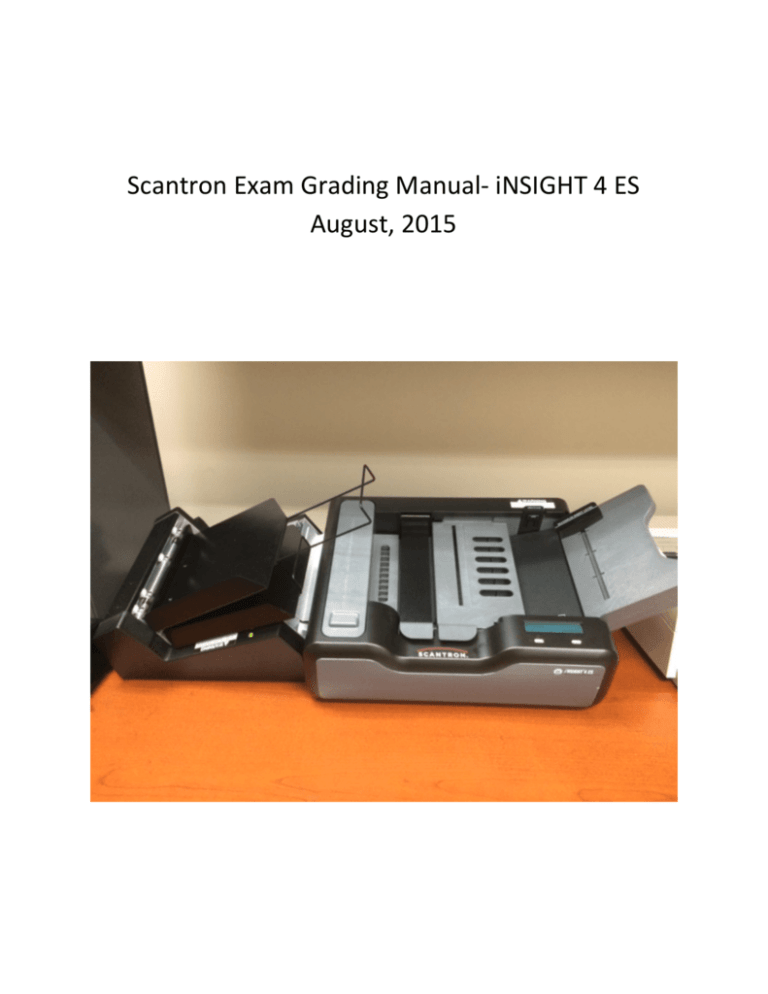
Scantron Exam Grading Manual- iNSIGHT 4 ES August, 2015 Page 2 of 17 Scantron Exam Grading Instructions- Table of Contents 1. Before you Begin ...................................................................................................................3 2. Answer Key Options (IMPORTANT).........................................................................................3 3. Preparing the Scantron Machine and Scantrons ......................................................................5 4. Setting up the Scoring Session ................................................................................................6 5. Scanning the Forms ................................................................................................................8 Errors that may occur while scanning the forms ............................................................................. 8 What to do in the case of a paper jam ............................................................................................ 8 6. Editing the Answer Keys and Test Properties ..........................................................................9 Using Multiple Answer Keys (6.1) .................................................................................................... 9 Using a Single Answer Key (6.2) ..................................................................................................... 10 7. Remark Quick Stats and Exporting Score Reports .................................................................. 12 The Report Tab............................................................................................................................... 12 The Data Tab .................................................................................................................................. 13 8. Saving the Session and Turning off the machine.................................................................... 14 9. Appendix of Report Options ................................................................................................. 15 Page 3 of 17 1. Before you begin 1.1. This machine only reads Scantron Form F-288 (red, 200 questions, 2 sided) 1.1.1 This form has two required fields and two optional fields. - Students are required to fill out their ID number and their first and last names (on the front of the scantron form only) - Students have the option to fill out their phone number (on the front) and the Test Form (on the back) if the teacher would like them to 1.2 There is no internet or printer connected to this computer. This computer is only intended for scoring Scantron forms; once processed you can print, review, and post the reports/scores using the SE I or SBSG computer labs. 1.3 You will need to bring a USB flash drive with you to save the scoring session/report. Do not save any files on the computer connected to the Scantron Machine. Save all results/reports and scoring sessions on your USB drive and bring it with you. This is your only record of the scores so save it and guard it. 1.4 The Answer Key can be entered in any of four ways (see section 2 for more details BEFORE you begin scanning): A. Answer Key scanned as the first scantron (with all student scantrons; 2A) B. Answer Key scanned WITH student scantrons (not necessarily first; 2B) C. Answer Key scanned AFTER all student scantrons have been scanned (2C) D. Answer Key entered manually AFTER student scantrons have been scanned (2D) 1.5 The Scantron iNSIGHT 4 ES machine reads both sides of the scantron. It also has the ability to scan each scantron and save the scan as an image. This uses lots of space, so if you decide to save images of the scantrons be sure your USB drive has lots of room. 1.6 The Remark Classic OMR program does not store “default” options. Therefore when you load the program, it will automatically load the options selected from the previous scanning session. This handbook provides the recommended default selections. Be sure to pay careful attention to these recommended defaults in order to avoid selecting options that may not be applicable to your test. Page 4 of 17 2. Answer Key Options (IMPORTANT) There are FOUR different methods (A, B, C, or D below) you can use to enter the answers to your test. It is important to decide which method you will use BEFORE you begin scanning student scantrons. First, be aware of whether your test has multiple versions or just one. If it has multiple versions and you plan on scoring all versions in one session, in step 4 you should NOT use “Quick Grade” and you should NOT use the “print” option! Instead use “Advanced Grade” when you have multiple versions. A. Answer Key scanned as the FIRST scantron- You can choose to scan your answer key at the top of pile, along with all the other student scantrons. (More info in section 6.4.1) - If you decide on this option and have a SINGLE ANSWER KEY… o In step 4, you can choose to scan using “Quick Grade” instead of “Advanced Grade”. This will allow you to streamline the grading process and use the settings that were last used on the program. Important: The Remark Classic OMR program saves the options from the previous scanning session, not necessarily the defaults we recommend. If you use “Quick Grade”, you may be using someone else’s complicated options which may not be applicable to your test. o You will be able to “print” student scores directly onto the scantron. More about printing is explained in section 4.7. - If you decide on this option and have MULTIPLE ANSWER KEYS… o In step 4, you should choose to use “Advanced Grade”. o You should not select “print” options in step 4.7, as you will be printing incorrect scores onto your students’ scantrons o You will be able to designate which scantron scanned was the key (see section 6.4.1) B. C. - Answer key scanned WITH student scantrons (not necessarily first)- You can shuffle your answer key in with all the student scantrons (not recommended) and LATER designate which scantron is the key. (More info in section 6.4.1) You SHOULD choose to use “Advanced Grade” instead of “Quick Grade” in step 4. If you decide on this option you SHOULD NOT select print options in step 4.7. Answer Key scanned AFTER all student scantrons have been scanned- You can first scan your student scantrons into the system. Then, as explained in section 6.4.2, you can scan in your answer key separately. (More info in section 6.4.2) You SHOULD choose to use “Advanced Grade” instead of “Quick Grade” in step 4. If you decide on this option you SHOULD NOT select print options in step 4.7. D. Answer Key entered manually AFTER student scantrons have been scanned (More info in section 6.4.3) - You SHOULD choose to use “Advanced Grade” instead of “Quick Grade” in step 4. - If you decide on this option you SHOULD NOT select print options in step 4.7. Page 5 of 17 3. Preparing the Scantron Machine and Scantrons 3.1 If you have multiple test versions, all versions can be loaded together. There is no need to separate versions as long as the Test Form bubble is filled out by the student. - Note: After scanning scantron forms, if you use “Quick Grade” instead of “Advanced Survey” the software will automatically assume that the first scantron scanned is the answer key (even if this is not the case). Using “Quick Grade” will only allow you to use one version of an answer key. More on “Quick Survey” and “Advanced Survey” is presented in Section 5. 3.2 Turn the scanner on by pushing the left button below the scantron’s display window 3.3 Push tray down by pushing the black tab that says “press to load” down. While holding the press to load button down, press the “lock” button as well to lock the loading tray. 3.4 Load the scantrons; only load about 20-30 scantrons in the tray at a time. Anything more than this may cause a jam. Make sure all scantrons are facing the same direction. 3.5 Push the “press to load” button AGAIN so it unlocks and raises the scantron tray. Page 6 of 17 4. Setting up the Scoring Session on the Computer 4.1 Make sure computer is logged on to user “Scantron” (no password needed). 4.2 Connect your USB to the computer and note its folder location. 4.2 Click “Remark Classic OMR” icon on desktop. 4.3. There are three tabs that appear above the blue toolbar on the left of the window: Templates, Data, and Analysis. 4.4 Under the Templates tab, select the template “Form288.rst” - You can select this form under “Recent” - Or by clicking “File” “Open Form Template” “Form F288.rst” - Or by clicking “Open Other Templates” “Form F288.rst” 4.4 The window will now shift to the Data tab. You can either select the “Quick Grade” option on the top toolbar, or you can scan the scantrons using the option “Read…”, which will give you more specific options for your scoring session. 4.5 If you’d like to print onto your scantron, enable imaging, or review data while the scantrons are being graded, select “Read…” under “Data Options” - The “Classic Read” box will pop up. Page 7 of 17 4.6 Under Scanner Source, “iNSIGHT 4 (IMAGE)” should be visible. - If it is not, select “Scanner Properties…” - Under Scanner Configuration, choose “iNSIGHT 4 (IMAGE)” as the Model and “USB” as the port - Once these are selected, press “Ok” 4.7 Note the box “Enable imaging” - Checking this box will allow you to scan each scantron and save as an image file. This can be used to document the physical scantron form without having to save the paper version. Note that this will result in a very large data file, so be sure to have lots of space on your USB drive. 4.8 Print Options (on the right side of the Classic Read Box, see image on page 6) will allow you to “print” a score or other information on the physical scantron form. - **Print on scantron ONLY if you are scanning the test key FIRST and ONLY if you have a SINGLE version of the test answer key. Otherwise the grade printed on each student’s scantron will be compared to another student (not the answer key) or the wrong version of the test. - If you have more than one answer key OR you haven’t scanned your answer key as the first scantron, use the default print settings (see the right side of the Classic Read box on pg. 6). - Click the dropdown menu and select what you wish to be printed on each scantron form. You can select the percentage a student got correct or the raw score among other options. - You can select multiple items to be printed on the form. Items won’t be separated by a space, comma, or other symbol. Instead items will be printed one after the other. - Click Insert to add the item to be printed - There should be a green box that says “Scanner Printing is Activated” if your selection is correct. 4.9 Click Next. The Clean Your Data Option will be next. Click “Enable Review Exceptions”. - This allows you to check mistakes on the scantron form as they are being scanned (e.g., multiple responses to a single question, empty ID section). - To the right are the default selections for this operation. Use these default selections for the best results. Otherwise the program may pause for your approval after EACH scantron. Now you are ready to begin scanning the forms. Page 8 of 17 5. Scanning the forms (Step 3.5) Be sure you have pushed the “press to load” button a second time so it unlocks and raises the scantron tray. If this has not been done, you may get a warning that says “scanner not ready”. 5.1 Return to the scanner and click the right button below the display screen marked “Start”. 5.2 On the computer screen, click “Read” in the Classic Read box to begin scanning the scantrons. This box should pop up on the screen, indicating that the scantrons are now scanning: 5.3 Once a batch of scantrons has been read, re-load the machine with another batch. Press “Resume Scan” on the computer to start scanning the next batch. 5.4 Once you have finished scanning all scantrons, select “End Scan” on the computer screen. 5.5 There are a number of messages and errors that may pop up, described below. - Clear paper path: This message appears when a sheet remains in an area of the scanner too long, resulting in a jam. Clear all sheets from the scanner and place the sheets not scanned successful back in the input tray. Press “Start” to resume scanning. - Double Sheet: This message appears when the scanner detected more than one paper entering the paper path. Remove all sheets from the transport bed and place back in the input tray. - End of Batch: Appears when you have finished scanning a batch of scantrons. - Feed Form: Appears when the scanner received a “Read” command from the computer, indicating it is ready to read a form. Either press “Start” to scan forms, or “End” if you are finished scanning. - Processing Sheet: Appears when the scanner is scanning a sheet and transmitting data to the computer. - Scanner not Ready: Appears when the scantron tray has not be “unlocked”. Push the “press to load” button on the scanner to raise the scantron tray to the reading level. - Sheet did not feed: The scanner cannot detect a sheet to be read. Try pushing the tray down fully with the scantrons slid all the way forward. - Sheet skewed: Appears when a scantron is fed at an angle. Make sure it is laying straight. 5.6 If a jam occurs, there are three plastic scanner covers that can be lifted to clear the jam. Please use care in opening these. Be sure they are replaced completely; otherwise the machine may not run. Page 9 of 17 6. Editing the Answer Keys and Test Properties There are two grading options. The first is “Quick Grade” and the Second is “Advanced Grade”. - Quick Grade- Choosing Quick Grade from the upper toolbar will bring you directly to the grade reports, called Remark Quick Stats. o Note: If you use this grading option, the software automatically assumes that the first form scanned was the answer key. The remaining scantrons will be graded against that first form. o If you did not scan the answer key as the first scantron, or you have more than one test key, you will need to use Advanced Grade instead. - Advanced Grade- Choosing Advanced Grade from the upper toolbar will allow you to add or change answer keys as well as other test parameters before reviewing the grade reports. The remainder of this section describes Advanced Grade options. MULTIPLE ANSWER KEYS 6.1 If you are using MULTIPLE ANSWER KEYS, first push “Advanced Grade” and then select the “Test Versions” option. - Check the box “Define multiple test versions” - Choose: “Standard (Multiple Keys)” if you have more than one answer key - Select “Test Form” as the answer that identifies the test version (there is a box on the scantron itself that students should fill in) - Click “Create Version” - Continue on to step 6.4 Page 10 of 17 SINGLE ANSWER KEY 6.2 If you are using a SINGLE ANSWER KEY and choose to push “Advanced Grade”, first select the “Answer Key” option. Follow the instructions in step 5.4. If you choose to use Quick Grade, the first scantron scanned will be designated as the key. If this is correct, go on to section 7. 6.3 The Answer Key(s) can either be scanned with the student scantrons (option A), after the student scantrons have been scanned (option B), or can be entered manually after the scantrons have been scanned (option C). A. If the Answer Key was already scanned WITH THE STUDENT SCANTRONS, select “Data Set (Grid) Row” in the “Import answer key from” dropdown menu. Choose which data row you’d like to use as your Answer Key. - You MUST designate which scantrons are your keys. - In the image to the right (a view of the Data tab), you can see we scanned Answer Key A as the 5th scantron. Therefore we should select “5” as the “Data Set (Grid) Row” from which to import the test answers. - Click “Import Key” - If you have MULTIPLE ANSWER KEY versions, press “Create Version” again and enter the row of the next Answer Key (e.g., Row 1 is Answer Key B, so you should choose “1” for Answer Key B) o Press “Import Key” after each key has been selected. B. If you have an answer key BUT HAVEN’T YET SCANNED IT IN, select “Read (scan)” from the “Import answer key from” dropdown menu. - Click “Import Key” - Load key into the scantron machine as instructed in section 2 and press the “Start” button below the scantron display window. If you have multiple keys you may load all at the same time, but the scanner will only read one at a time. - The Classic Read box will pop up on the computer screen. Set up the scanning properties as instructed in section 3. Once scantrons are loaded, press “Read”. - If you have multiple Answer key versions, press “Create Version” again. Select “Import Key” again and scan the next Answer key. C. To enter your key BY HAND simply enter each question’s answer one at a time. To enter multiple answer keys click “Create Version”. Be sure to mark the Version ID at the top. Page 11 of 17 6.4 EXTRA OPTIONS: Test Options & Question Properties - Test Options: This section allows you to import a previously saved Advanced Grading session along with previously saved answer keys. It also allows you to edit the scale of the test as well as set the headers that are printed at the top of the reports. - Question Properties: This section allows you to set the properties of each question. The default of this section is to use the ID number to identify the student, identifies each question as multiple-choice, and leaves the question text blank. You will typically not have to use this section unless you want to mark multiple possible answers to a certain question, you want to weight a question so it may be worth more or less points than the others, or you want to enter the text of the question into your report 6.5 You can save your settings by clicking the save button on the bottom. Save to your USB drive. If you lose your USB drive, however, whoever finds it will have access to the exam Answer Key. 6.6 Once you have imported/entered your Answer Key(s) and selected all your desired grading options, you may select “Grade” at the bottom of the window. 6.7 A box may appear asking you whether you want to save the answer key if you haven’t already. If you do save your key, be sure to save it to your USB and NOT to the default: the desktop. The Remark Quick Stats Window will then pop up to display your score reports. Page 12 of 17 7. Remark Quick Stats and Exporting Score Reports 7.1 Once you have chosen to grade the scantrons (either by clicking “Quick Grade” or by clicking “Grade” in the “Advanced Grade” option) you will be led to the Remark Quick Stats window. This window includes two tabs: Reports and Data. 7.2 THE REPORT TAB: Reports include information about the test and each student’s performance. Many of these reports are rather redundant and give you very similar information. A quick description of each report option is given in the appendix. Below are reports that will usually be sufficient for TA purposes. “100- Test Analysis” “101- Student Statistics” “105- Student Response” “206- Condensed Test” “310- Test Statistics” 7.3 Once you have decided which test reports you’d like to save, you will need to “Export” them to your USB drive. - Have the Report you’d like to save open in the Remark Quick Stats window - Press the “Export Report” button in the window’s upper toolbar o Alternatively, this button can be found on the left of the window near the bottom of the blue toolbar. - You can then choose the format of the report, how many pages of the report, and the image quality of the report. Once you have specified these, click “Export”. Page 13 of 17 - - Choose your USB drive as the location for the file to be exported. You may name the report whatever you’d like here (e.g., Psych Fundamentals Midterm, 2015- Test Analysis Report). Click Save. Repeat this process for each report you’d like to save. 7.4 THE DATA TAB: The Data tab is basically a spreadsheet with each student’s ID number, name, test form, and responses to each test question. 7.5 You will also want to “Export” your gradebook. This is a file with the final score for each student. You can do this directly from the Data tab of the Remark Quick Stats window. In the blue toolbox on the left side of the window you will find 7 options under “Export Options”. You will have the option to include the answer key as the first row in the gradebook. - Although there are many options here, we recommend choosing to “Export Textual Data and Grade Results”. This option will give you each student’s response in the format of A, B, C, D, or E rather than numeric format of 1, 2, 3, 4, or 5. - You should choose the Gradebook format to be “Standard”. 7.6 Press “Export,” choose the destination of export (your USB drive), the type of file (we recommend using Excel; if you plan on sharing with older versions of office, we recommend Excel 97-2003), and save your gradebook file. - If you save your file as an excel sheet it will ask you to specify the name of the sheet in excel. Name this whatever you would like. - Push “Ok” to save. 7.7 Click the Red X in the upper-right corner of the window to exit the Remark Quick Stats Page 14 of 17 8. Saving the session and turning off the machine 8.1 Select the Data tab if it is not already selected. 8.2 Select “Save Data As” and save your session in your USB file. It will save as “remark.ext”. 8.3 Double check your USB drive to see that your session and your chosen reports were saved. The session can now be loaded back to the computer from your USB at any time. - Be sure to GUARD your USB DRIVE!!! If your USB drive is lost, it will contain answer keys to the test and student grades. In someone else’s hands this could be extremely damaging. 8.4 Select the Templates tab 8.5 You will see that your newly saved session is listed in the “Recent” templates section 8.6 Right-click your session and click “Remove File from Recent List”. Once the session is deleted, it cannot be recovered. Therefore step 8.3 is extremely important. - It is necessary to delete your session from the “Recent List” in order to protect your test answers and student grades. If you do not delete this, anyone may be able to walk in and load your scoring session along with the answer key and student grades. 8.7 Eject your USB drive from the computer and remove it once the computer says it is safe. 8.8 Close the Remark Program and log out of the computer. 8.9 On the scantron machine, press the left button below the display window to turn off the scanner. Page 15 of 17 8. Appendix Class and Student Reports 100- Test Analysis gives you the average, high, and low scores for the scantrons that you scanned, along with test and item statistics. 101- Student Statistics gives you each student’s grade, total score, and percentage on the test (identified by ID number). - If ID number is missing for any student, the student will be identified by the row of that student’s data 102- Comparative Grade allows you to run comparisons between different groups of students (based on test version, ID number, phone number, etc.) - This will typically not be necessary for the sort of information students provide on their scantron forms - One useful comparison would be between Test Forms to assess whether one version of the test was more difficult than another 103- Class Frequency Distribution gives the distribution of the classes’ grades Page 16 of 17 105- Student Response gives a document with the answers each student gave to each question. The report is organized by ID number and separated by test version. - This report is very useful if students wish to see what answer they selected to a given question, especially if you do not have the physical scantron forms available for the students during office hours 107- Demographic Grade is similar to Comparative Grade 112- Student Achievement is similar to student statistics, but displays how far above or below the class mean each student performed on the test 150- Student Grade Report is a larger and more detailed version of the Student Response report. This option will report a page for each student giving their response, the correct answer, as well as the student’s overall score. 160- Student Response Similarities analyzes whether any two students have 90% or more identical responses on the test. - If no two students have 90% or more identical responses on the test, a box will appear reporting “No Matching Records”. Item Analysis Reports 201- Detailed Item Analysis gives the frequency, percent, and point biserial of each response for each test question. 203- Item Analysis Graph gives a bar graph for each question with the frequencies of each response 204- Condensed Item Analysis Report gives the frequency and percent of each response to each question along with other information about the response rate to each question. Page 17 of 17 206- Condensed Test is similar to the Condensed Item Analysis report but nicely organizes the response frequencies to each question of the test 220- Integrated Item Analysis gives information about each test question, but also allows you to include student information on the report (such as ID, name, phone number). Test and Item Statistic Reports 310- Test Statistics Report gives a nice summary of the test 320- Test Item Statistics gives another summary of each question on the test including number of correct responses, incorrect responses, and the percentage of students who got the answer correct 330- Comparative item allows you to look at whether each student got each question correct or incorrect. Changed Answer Reports allow you to examine whether students changed their answer and whether they changed to the correct or incorrect answer
