For the first 3-4 weeks, we will be studying the fertilization and early
advertisement
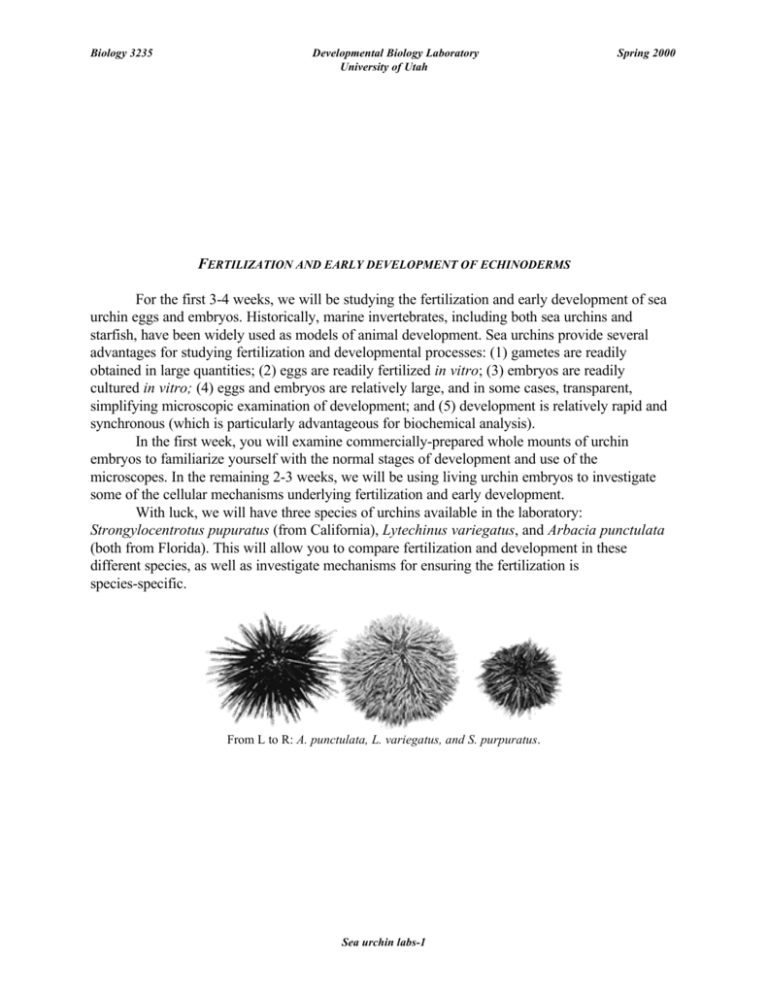
Biology 3235 Developmental Biology Laboratory University of Utah Spring 2000 FERTILIZATION AND EARLY DEVELOPMENT OF ECHINODERMS For the first 3-4 weeks, we will be studying the fertilization and early development of sea urchin eggs and embryos. Historically, marine invertebrates, including both sea urchins and starfish, have been widely used as models of animal development. Sea urchins provide several advantages for studying fertilization and developmental processes: (1) gametes are readily obtained in large quantities; (2) eggs are readily fertilized in vitro; (3) embryos are readily cultured in vitro; (4) eggs and embryos are relatively large, and in some cases, transparent, simplifying microscopic examination of development; and (5) development is relatively rapid and synchronous (which is particularly advantageous for biochemical analysis). In the first week, you will examine commercially-prepared whole mounts of urchin embryos to familiarize yourself with the normal stages of development and use of the microscopes. In the remaining 2-3 weeks, we will be using living urchin embryos to investigate some of the cellular mechanisms underlying fertilization and early development. With luck, we will have three species of urchins available in the laboratory: Strongylocentrotus pupuratus (from California), Lytechinus variegatus, and Arbacia punctulata (both from Florida). This will allow you to compare fertilization and development in these different species, as well as investigate mechanisms for ensuring the fertilization is species-specific. From L to R: A. punctulata, L. variegatus, and S. purpuratus. Sea urchin labs-1 Biology 3235 Developmental Biology Laboratory University of Utah Spring 2000 I. ECHINODERM EMBRYOLOGY EXERCISE AND “MINI-“ REPORT. The purpose of this assignment, which is to be completed during the first 2-3 lab periods, is to (1) familiarize you with the use of the upright microscopes and CCD cameras; and (2) introduce you to the basic embryology of echinoderms (sea urchins and starfish) in preparation for the “live” labs that follow. Your assignment: A. Use phase- and/or DIC microscopy to examine prepared slides of both sea urchin and starfish embryos (for instructions on setting up and using microscopes, see the “Microscopes” pages). Learn to recognize the main stages of echinoderm development, as illustrated on the “Normal stages” page. Note: slides contain mixed stages, so you will need to hunt around for the different stages of development. Some embryos might be damaged during fixation and preparation, so find examples that look “normal,” based on the illustrations provided. B. Document with figures (and captions) each of the following important milestones in echinoderm development: (a) early cleavage and the formation of the micromeres (collect images before and after formation of the micromeres); (b) formation of the blastocoel (earliest stages) (c) ingression of the primary mesenchyme; (d) invagination of the archenteron; (e) ingression of the secondary mesenchyme, and interactions of the archenteron with the oral surface; (f) formation of the spicules; (g) a pluteus larva; and (h) anything else that looks neat! C. Document several stages of starfish development that differ from that of sea urchins. The sea urchin “mini-report” is due before class on 13 January. Sea urchin labs-2 Biology 3235 Developmental Biology Laboratory University of Utah Spring 2000 II. NORMAL STAGES OF SEA URCHIN DEVELOPMENT (Lytechinus variegatus). Fertilization: The cell cycle of unfertilized sea urchin eggs is arrested following completion of the second meiotic division. Fertilized eggs can be recognized by their fertilization envelopes, which are raised by the rapid exocytosis of the cortical granules within seconds of sperm entry. Figure 2 Fertilized sea urchin egg. Cleavage: First cleavage begins 60-120 minutes after fertilization (depending on species and temperature), and the subsequent cleavages occur at ~60 minute intervals. The first two divisions are meridional, occurring along the animalvegetal axis (a four-cell embryo is shown). The third division is equatorial, dividing the embryo into two tiers (animal and vegetal) of four cells each. Figure 3 4-cell sea urchin embryo. At the fourth division, each of the blastomeres in the animal tier divides equally along a meridian to form eight mesomeres. Cells of the vegetal tier divide asymmetrically, giving rise to four large macromeres and four smaller micromeres at the vegetal pole (arrow). Figure 4 16-cell with micromeres. Figure 4a Early blastula. Figure 4b Midblastula. Blastula: By the 16-cell stage, the blastocoel (Bl) can be discerned (a 32-64-cell embryo is shown in panel 1). Embryos hatch during the blastulastage of development. During the late blastulastage of some species, the vegetal pole, forming the vegetal plate (VP). Figure 4c Late blastula. Gastrulation begins with the ingression of the primary mesenchyme cells (5a, arrow). Shortly after, the archenteron begins to invaginate (5b, arrow) and elongate (5c). Figure 5a Ingression of IE mesenchyme. Figure 5b Invaginating Figure 5c Elongating archenteron. archenteron. Formation of the skeletal rods (by the primary mesenchyme cells, 6a) begins to shape the embryo into the characteristic shape of the pluteus larva (6b). Figure 6a Formation of skeletal rods. Figure 6b Pluteus. From Wray, in “Embryology: constructing the organism” by Gilbert. Sea urchin labs-3 Biology 3235 Developmental Biology Laboratory University of Utah Spring 2000 III. BASIC TECHNIQUES FOR FERTILIZING AND CULTURING SEA URCHIN EMBRYOS. A. Collecting sea urchin gametes. The instructors will demonstrate how to obtain gametes, fertilize, and culture sea urchin embryos. Briefly, the steps are as follows: 1. Sea urchins can be induced to release their gametes by injecting 0.5 M KCl into the body cavity through the soft membrane surrounding the mouth (“Aristotle´s lantern”). Gametes will “ooze” from pores on the upper surface of the urchin. 2. The sex of the urchins can be determined by the color of gametes. Sperm is white or cream-colored, and eggs are yellow orange (Strongylocentrotus), red (Arbacia), or translucent (Lytechinus). 3. Collect eggs by inverting female urchins over a dish or beaker of artificial sea water (ASW) with the upper surface in the water. Eggs fall in streams to the bottom. Wash once or twice by carefully decanting and replacing the ASW, or by transferring a dense suspension of eggs to a new dish of ASW with a Pasteur pipette. Never handle unfertilized eggs with a pipette that might have been used with sperm!! Eggs can be stored for a day or two on ice or in the refrigerator. 4. Collect sperm “neat” by blotting away fluid on the surface of male urchins, and inverting each over a clean petri dish. Use a clean pipet to collect the sperm into screw cap centrifuge tubes (label tubes with species and date!). Sperm can be stored refrigerated for several days if it is not allowed to dry out. Once diluted in ASW, sperm is active for <60'. B. Fertilizing sea urchin eggs. 1. Transfer eggs into fresh sea water in a small dish. 2. In a separate dish, dilute a small drop of "neat" sperm into a small amount of sea water, making a cloudy suspension. Diluted sperm must be used within a few minutes. 3. Add a few drops of the diluted sperm to the eggs and stir immediately. 4. Fertilization success can be monitored by elevation of the fertilization envelope. Transfer a drop of the sperm-egg mixture to a microscope slide, gently cover with a coverslip, and examine by phase or bright field microscopy for the presence of a raised fertilization envelope. Sea urchin labs-4 Biology 3235 Developmental Biology Laboratory University of Utah Spring 2000 Figure A shows an unfertilized egg (just prior to fertilization). Note the sperm (arrows) bound to the egg surface. Figure B shows a fertilized egg in the process of raising the vitelline envelope (VE). Note the many sperm bound to the VE surface as it elevates. Figure C shows a fertilized egg after complete elevation of the vitelline envelope, now referred to as the “fertilization envelope (FE).” Note the lack of sperm bound to the FE surface. Poor fertilization success may result from too few sperm. In this case, additional sperm can be added. However, adding too many sperm may result in “polyspermy.” C. Concentrating eggs or embryos (for washing or sampling). Eggs or early embryos can be concentrated in the center of a culture dish by gently swirling the disk, and then abruptly stopping. As the ASW continues to swirl, the embryos will be carried to the center of the disk by the fluid motion. Concentrating in this way allows you to sample larger numbers in a smaller volume. Eggs and embryos can also be concentrated and collected by gently spinning them in a handcranked centrifuge for a few seconds. This technique is also successful for concentrating or washing swimming blastulae, although you will have to sample the embryos or decant the ASW quickly, before the blastulae have a chance to disperse again. D. Caring for sea urchin embryos. 1. To culture embryos, allow the fertilized eggs to settle to the bottom of the dish, and wash the them by carefully decanting the sea water, and refilling with fresh seawater (alternatively, remove the seawater with a transfer pipet). It also is possible to concentrate most of the eggs into a small volume and transfer them to a new dish containing fresh seawater. 2. Incubate at the correct temperature: 13-15E for Strongylocentrotus, 15-17E for Arbacia, room temperature for Lytechinus. 3. Once they have “hatched,” blastulae actively swim using cilia on their surface, and it is no longer possible to decant solution without losing embryo. Thus, we do not routinely change the sea water. Keep cultures covered to cut down evaporation. You can mark the original fluid level and replace evaporation losses with distilled water. E. Fixing embryos for microscopy. Sea urchin eggs or embryos can be fixed for microscopy in either 100% methanol (for DNA staining) or in 3.7% formaldehyde in ASW (for other staining procedures, including phalloidinstaining of F-actin and immunofluorescence microscopy of MTs). 1. Prepare a microcentrifuge with ~ 1 ml of the desired fixative. 2. Carefully transfer eggs or embryos to the fix in a minimal volume of ASW. Sea urchin labs-5 Biology 3235 3. Developmental Biology Laboratory University of Utah Fix at room temperature for 30-60 minutes. Follow additional instructions as per individual experimental protocols. Sea urchin labs-6 Spring 2000
