Exam Scheduling for Instructors
advertisement
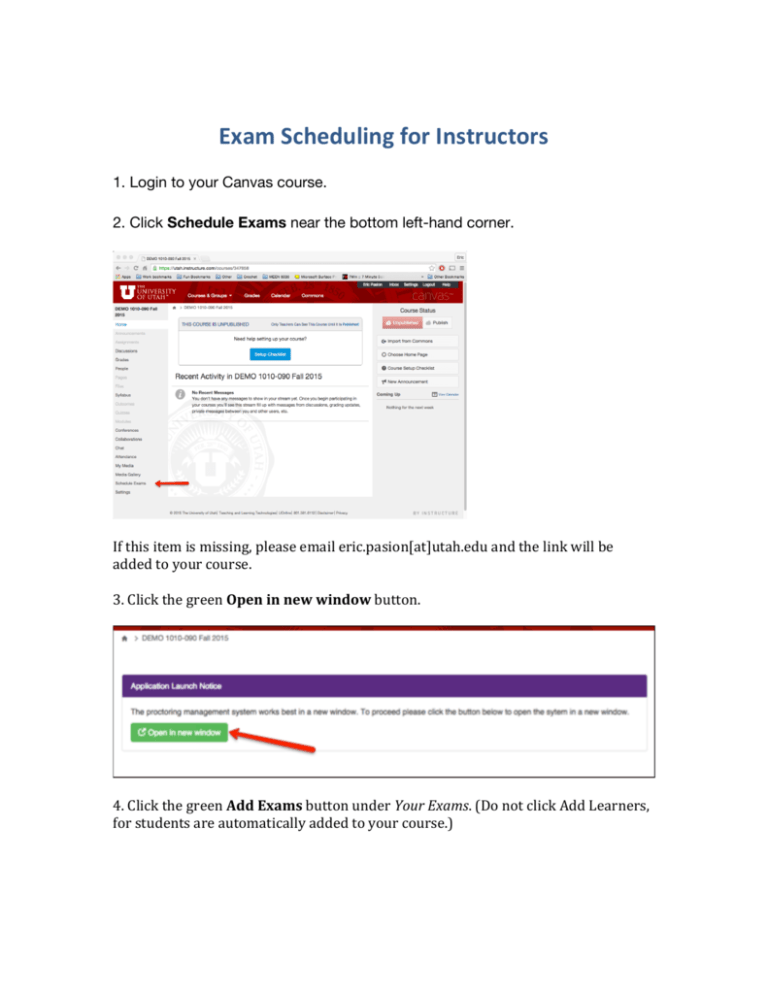
Exam Scheduling for Instructors 1. Login to your Canvas course. 2. Click Schedule Exams near the bottom left-hand corner. If this item is missing, please email eric.pasion[at]utah.edu and the link will be added to your course. 3. Click the green Open in new window button. 4. Click the green Add Exams button under Your Exams. (Do not click Add Learners, for students are automatically added to your course.) 5. Click on the LMS Exams drop-down and select one of the following: • • • Exam outside LMS: select this option if your students will be taking a paper-based exam. Future LMS Exam: select this option if your students will be taking an exam in Canvas. This is also for an exam you have not yet created in Canvas. If you have already created the exam in Canvas, select it from the dropdown. The words Canvas Run appear in front of the exam name. Please make sure you have completed all fields in Settings for your Canvas exam. Entering Exam Details • If you selected Future LMS Exam, follow step 6, skip step 7, and follow step 8. • If you selected either Exam Outside LMS or Canvas Run, followed by the name of the exam title, skip step 7 and complete step 8. 6. If you selected Future LMS Exam, complete the fields on the Update Exam page and skip steps 7 and 8. 7. If you selected Exam Outside LMS, which is a paper-based exam, complete the fields on the Exam Details page and skip step 8. 8. If you selected a Canvas exam that has already been created, most fields will automatically be filled in. Complete any remaining fields. 9. Click Submit to accept the information entered in the fields. If you see a Notify Students page, you have successfully setup your exam. 10. Click the green Notify button on the Notify Students page if you would your students to receive information displayed on this page. Exam Detail Fields Step 6 Exam Detail Fields Exam Details • Exam Title – Put down what the exam might be titled in Canvas. You can change this later. Anticipated Exam Details • Exam Open Date – Enter first day the exam will be available. • Duration – Enter the time limit of the exam. Step 7 Exam Detail Fields Important Note: field names that appear in bold below are for computerbased exams only. Below is the list of fields: • • • • • • • Exam Title Exam Description Display After: Enter the first day students are allowed to take the exam. Display Until: Enter last day students are allowed to take the exam. Duration: Enter the time limit of the exam Due Date: Enter the last day students are allowed to take the exam. Password: This is for computer-based exams only. If you entered the • • • password in the Canvas exam, it will automatically appear. Do not share the password with students. Proctors will enter password for students so they can take the exam. Exam URL: This field is not required. If you want student your students to quickly access the exam, copy the URL and paste it in this field. Mobile Exam URL: Leave this field blank Consecutive Attempts Allowed: Enter the number of times students are allowed to take the exam. The default is set to allow students to take it once. Permitted Items • Notes – Allow notes of any type, Yes/No • Open Textbook – allow textbook, Yes/No • Calculator – Allow any calculator, Yes/No. If you wish to restrict the calculator type, say yes here and list the permitted calculator type under the “Other Permitted Items”. • Earplugs – Allow students to wear earplugs, Yes/No • Formula Sheet – Allow a prewritten formula sheet, Yes/No • Dictionary – Allow a dictionary, Yes/No • Websites – Allow student to have access to the internet during the exam, Yes/No • Blank Paper – Allow blank scratch paper, Yes/No • Bathroom break – Allow the student to leave the room mid-exam to use the bathroom, Yes/No • Ebook Reader – Allow a device similar to a Amazon Kindle. Yes/No • Other Permitted Items – If you allow any other items, or wish to clarify on another listed item, do so here. Exam Notes • Student notes – Notes you want the students to read before they take their exam. • Proctor notes – Notes for the proctor to read (students not see these notes.) Exam Materials • Exam Requires Mailed Materials – The instructor wants items mailed back, Yes/No • Return Instructions for Proctor – Specify what items should be mailed • back, and where to mail them to. Schedule Lead Days - The number of days before an exam date that out of area students are allowed to signup for their exams. When entering the number of days, consider the approximate number of days it takes for materials to be mailed to proctors. (e.g. If a student schedules on Monday and you set 4 Lead Days, the student must schedule the appointment for Friday or later) Return Items – What items should be returned, if any. • • • • Scratch Paper – Yes/No Exam Materials – Yes/No Other – Yes/no Exam Attachments – If the exam is paper-based, indicate whether or not you want the proctor to email an attached PDF copy of the completed exam to the Uonline Center. Proctor Settings • • • • Require approval – The teacher now approves proctors. All proctors have been pre-screened by Smarter Proctoring. If you select No, all proctors will be auto-approved, but you can cancel it at any time. Proctor Selection Date – All proctors must be chosen by date. Proctor Types – A list of what types of proctors are accepted. Required Software – Respondus Lock-down Browser, leave this item unchecked; we do not own a license for this software. Technology Required • Select technology required for the student to take the Exam. (All items will likely be selected as no). Student Exceptions • This Student Exceptions field relates to special arrangements for individual students. You select one student, and then you will go through all the previously listed options when the exam was setup originally.
