Payment Authorization Form Instructions
advertisement

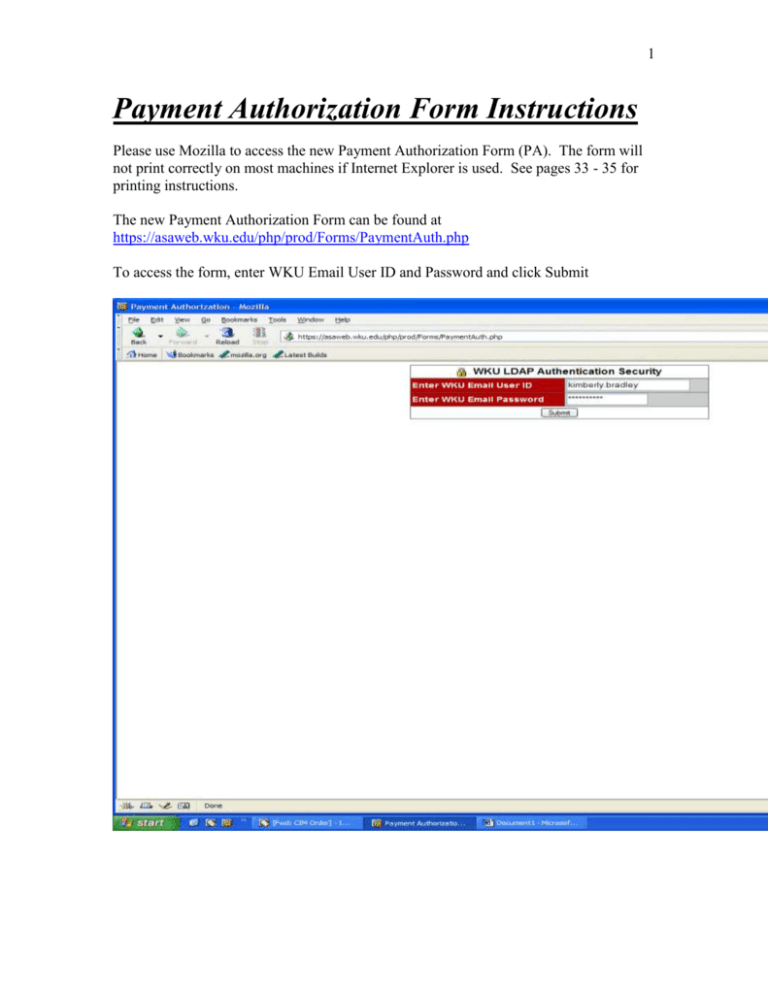
1 Payment Authorization Form Instructions Please use Mozilla to access the new Payment Authorization Form (PA). The form will not print correctly on most machines if Internet Explorer is used. See pages 33 - 35 for printing instructions. The new Payment Authorization Form can be found at https://asaweb.wku.edu/php/prod/Forms/PaymentAuth.php To access the form, enter WKU Email User ID and Password and click Submit 2 Using a WKU 800 Number The first box, marked with a #1 is for the WKU 800#, this will need to be entered first. If the payment is for an existing payee, the 800# can be found using Banner screen FTIIDEN and FTMVEND– please see pages 23-32 of these instructions on how to use Banner screen search to locate the 800#. #1 3 Enter the 800# in box #1 4 Press the Validate Button located at the bottom of the form to fill in the name and address of the payee 5 Now the form should appear as below: The boxes highlighted in red require entry before you print the form and submit for payment – these items are also noted under “Please Correct the Following” 6 For this example, lets say we know that payment is suppose to go to a different address: 110 Main Street, Bowling Green KY 42101 To make sure the payment goes to the correct address, please select the make changes to the payee address box and type in the correct address 7 Now press the Validate button, click yes to remember the values you filled in 8 Note that there is now a message that states the Address has been changed > 9 Now select Index or Fund for the payment source by clicking the appropriate radio button and Commodity Code or Account Code by clicking the appropriate radio button. If you select Commodity Code and click on the drop down box you will get a list of Commodity Codes (there are in numerical order), to select just double click on the Commodity Code of choice 10 Next fill in the Amount Cell 11 Go down to the Description, Date, Invoice Number, and Credit Memo and enter a description of the expense, the date the expense occurred, and the invoice number or credit memo. Then enter the quantity, unit- use the drop down box to select the correct unit of measure, and enter unit price 12 Press the Validate Form Button 13 The Top and Bottom Totals do agree and they always should agree 14 Lets go back to the top of our form and see if we have anything left to complete before we print out the form: Under Please Correct the Following note, “Prepared by (WKUID) is required, so scroll down to the bottom of the form and enter your 800# 15 After entering your 800#, Press the Validate Form Button 16 Prepared by Values will auto populate once the Validate Form button is pushed 17 Check to see if there are any “Please Correct The Following” Messages at the top of the form, if not print out three copies of the form, retain one for your departmental copy and submit two to Accounts Payable along with back up documentation and the appropriate signatures. One of the signatures must be the department head or person responsible for the Index or Fund listed. (* if a Grant index is used, there will be an additional signature line for Grants Accounting, if Citizenship value of N or NR is generated, there will be an additional signature line for Tax Compliance , if Commodity Code 647000 is used, there will be an additional signature line for Controller, all tuition reimbursements should also be sent to the Controller’s office for approval) ****Use the Reset Form button located at the bottom of the form to start on a new PA – it is very important that you do this so a new PA#### will be assigned 18 Using a SSN or Tax Payer Number Enter the SSN (Social Security Number) or TIN (Tax Payer Identification Number) in Box 2 of the form #2 19 Press the Validate Form Button at the bottom of the form. To add Payee Name and Address: Click on the Make Changes to The Payee Name Box Click on the Make Changes to The Payee Address Box 20 Type in the Name and Address of the Payee and Click on the Validate Button 21 Please follow instructions on pages 9 through 17 for entry of all other information and remember to click Validate Form to see if anything else is needed before printing. If you have a new vendor and are using a SSN or TIN, please include the W9 as part of the backup documentation sent to Accounts Payable 22 In this example I have used a grant index and the commodity code 647000- see how the additional signature lines are created for Grants Accounting and The Controller 23 Using Banner Search for the 800#: Type FTIIDEN in the GO TO Box in Banner and press Enter 24 Once in FTIIDEN, , click the Vendor Box (1) to uncheck it, click on the All Box (2) to Check it, Go to the Last Name Box and enter either %BusinessName% or %Lastname% and F8 to complete query. In the example below we will use a Business Name, Ikon 1 2 25 Once you are sitting on the 800# you think is the correct one, go to Edit, Copy in order to copy the 800# to FTMVEND, click on the black X to exit this screen 26 Now, Type FTMVEND in the GO TO box, press enter 27 You are now in the FTMVEND Screen. Go To Edit, Paste to paste the 800# found in FTIIDEN 28 Screen should now appear as below: go to the address tab to see if the payee address you have is listed in Banner, if not then check the new address box on the PA form and type the updated address on the form. 29 An example of an individual in Banner: Once in FTIIDEN, tab to Last Name Column and type %Last Name%, in example %Smith% (always capitalized the first letter of the search criteria), then tab to First Name Column and type %First ;Name% or %First Letter%, in example %Robert%, press F8 to search Now you can see all the entries for Robert Smith in the Banner system, let say for this example we know the middle initial is A, so we will click on 800063580 and Go to Edit, Copy and click on the black X to exit 30 We will then go to FTMVEND, CTRL PAGE DOWN and you will see that the information is populated in FTMVEND 31 Control Page Down to see when the vendor was added to the system and a contact phone number and discount terms 32 Under the address tab, you can see if the current address is in the system, if not please click on the change of address box and fill in the new address. 33 After PA is complete, go to file, print preview 34 Set scale to 70% or 80% - check page 1 or # - should say 1 or 1 if printing on one page. 35 Click on Page Set up, go to Margins and Header/Footer page, set margins to zero, click OK and print


