How to install HiPath 8000 on VMware
advertisement
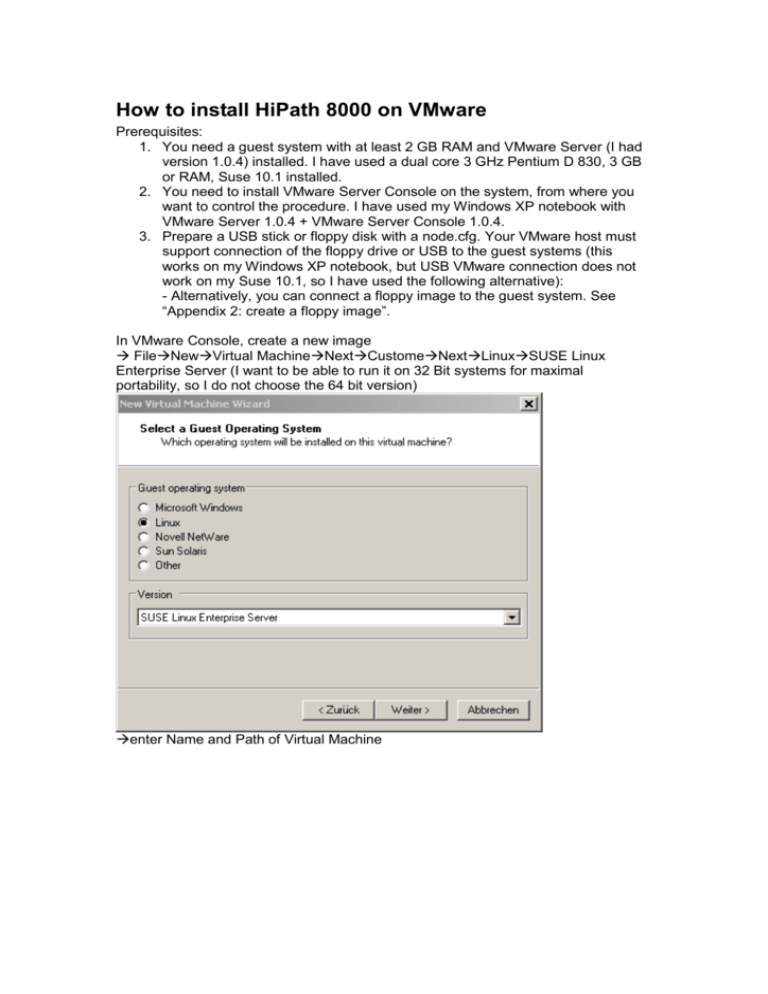
How to install HiPath 8000 on VMware Prerequisites: 1. You need a guest system with at least 2 GB RAM and VMware Server (I had version 1.0.4) installed. I have used a dual core 3 GHz Pentium D 830, 3 GB or RAM, Suse 10.1 installed. 2. You need to install VMware Server Console on the system, from where you want to control the procedure. I have used my Windows XP notebook with VMware Server 1.0.4 + VMware Server Console 1.0.4. 3. Prepare a USB stick or floppy disk with a node.cfg. Your VMware host must support connection of the floppy drive or USB to the guest systems (this works on my Windows XP notebook, but USB VMware connection does not work on my Suse 10.1, so I have used the following alternative): - Alternatively, you can connect a floppy image to the guest system. See “Appendix 2: create a floppy image”. In VMware Console, create a new image FileNewVirtual MachineNextCustomeNextLinuxSUSE Linux Enterprise Server (I want to be able to run it on 32 Bit systems for maximal portability, so I do not choose the 64 bit version) enter Name and Path of Virtual Machine Not private in my case. I want others to have access rights. Next Next I want to be able to run it one-processor systems (maximum of portability) Next You will need at least 1 GB of memory (I have not yet tested less). I want to be able to run it on machines with only 2 GB of memory, so I do not choose more (can be changed afterwards). It is better to use less for the image and NOT overwhelm the host system! Otherwise the host is dying and you will get 100 % CPU load. So, if you only have 1GB of memory either do not even try to host the image or try to run it with 600 MB memory (never tested before). I use host-only networking. For this to work, you need to enable IP forwarding on the host machine! Next Next Next BETTER use Split disk option! That eases the transport with FAT32 USB sticks or hard drives a lot! 144 GB, I did not allocate since I do not want to use more than 10 GB of it. Do not choose less the 144 GB in case of a node.cfg for the new IBM server assumes 144 GB. Formatting would fail afterwards. (In the details configuration during creation of the node.cfg file, you can specify to use only 72 GB. This is, what I have done successfully next time). Finish. Edit virtual machine settings AddNext choose Floppy Drive Use an existing floppy image like prepared in “Appendix 2: create a floppy image”. (creating a blank floppy might work, but you will need to format e.g. using a linux VMware image before you use it for the installation of the H8K) (Here a compressed floppy image containing an example node.cfg: I had copied the content of this zip file to the VMware folder of the virtual machine) Browse choose the imageOpen Finish Add a second Ethernet drive (for Bonding). Note: Installations done on a VMware virtual machine with only one Ethernet interface will fail and you need to start over again! Choose EthernetAdd Next Host-onlyFinish Now we need to either insert the SLES DVD in the DVD slot, or we connect the corresponding ISO image: Change from physical to “Use ISO image” Browse Choose the SLES imageOK Start this virtual machine quickly click into the main console window and press F2 You need to use – in the number block (NUM lock needed on a notebook) in order to move down the removable devices. Saving with F10, make sure the floppy drive is connected and reboot… Choose Configure and follow the instructions. Press Enter to reboot choose Install After choosing Install and pressing F2… Error message because the floppy drive is not connected and the node.cfg cannot be found: “A profile for this machine could not be found or retrieved.” Install Now it could retrieve the profile: <enter> Disconnect the floppy: <enter> O.K., will postpone the rest (suspending…) Appendix 1: Create node.cfg Note: 1. you can use the Installation Wizard found in the SW-Server for creating a node.cfg file needed for installation of the HiPath 8000. However, using the NCPE tool might be sufficient. 2. I have tested two possibilities: a. Use the Wizard ISO image directly on a Windows machine (I have mounted the iso image as DVD drive using the program Nero, see below. b. I have copied the relevant parts of the CD to a normal folder and I have started the tool from there. The relevant parts use only 5 MB space, see file://M:\Cs3_lan\SW\HiPath\HiPath 8000\H8K_V3.1_SW_Server\Installation Wizard Light. From there, start the file “create_node.cfg (same as RunIfGui).bat” c. Better forget about a and b and just use the ncpe tool (also only 5 MB). I am not sure why we need the ISO image at all… Here, the procedure using the full ISO image is shown. If you are using option 2b, then skip two screenshots, and start RunIfGui.bat in the folder specified in 2b. I do not want to burn the CD, so I mount the image from hard drive/M-drive. Mount the image via NeroImage: StartUtilitiesArchivingNeroNero ImageDrive Mounting M:\Cs3_lan\SW\HiPath\HiPath 8000\H8K_V3.1_SW_Server\Installation Wizard HIQ8k-LiveCD-12.5-24.iso Double-click RunIfGui.bat Install Simplex system in my case… Should not matter in my case (I try to create a VMware image) Names must not contain characters like “_” or “.” Using 10.152.0.0/24 since I want to make use of the VMware default gateway 10.152.0.1 on my machine and I do not want to be in need of more than a virtual doubled Ethernet interface. This is a simplex config, so I do not need NTP. However, NTP is needed in any duplex configuration! No NMC/SMC for the downscale version. Germany… Then a preview of the node.cfg pops up. Say OK and save it somewhere, where you will find it again. You will need it for the installation later on. Appendix 2: create a floppy image You can use a linux system (e.g. a free Suse Linux VMware image) in order to create a floppy image like follows (see http://www.rtfm-ed.co.uk/?p=158): 1. Logon to the Service Console as ROOT 2. Create an empty file which is 1440KB in size with: dd if=/dev/zero of=/vmimages/floppy.flp bs=1k count=1440 3. Then build a vfat file system for the flp file: mkfs.vfat /vmimages/floppy.flp Note: Browse to, and connect to the flp file within the VM. 4. Note: If you wished to access this floppy file from the Service Console use: 5. mount -t vfat -o loop /vmimages/floppy.flp /media/floppy After that, you can put the node.cfg to /media/floppy Appendix 3: Error messages “Could not format …” Error message because virtual drive has been chosen to 72 G (seems to be too small for the node.cfg chosen, new IBM server 3650T): Let us continue… Appears again for /dev/sda10 to /dev/sda14… “A profile for this machine could not be found …” Floppy with node.cfg is not connected. Insert the floppy or connect the floppy image and try again.
