Step2: Connect Cable - Sadoun Satellite Sales
advertisement
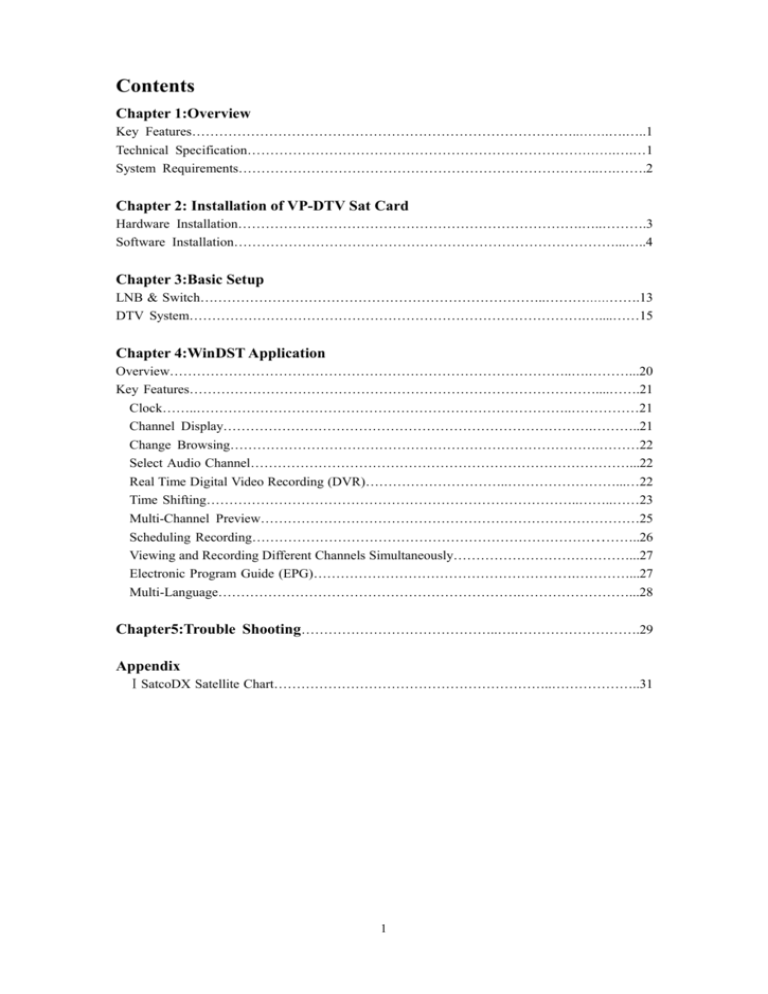
Contents Chapter 1:Overview Key Features…………………………………………………………………………..…….….…..1 Technical Specification……………………………………………………………………….….…1 System Requirements……………………………………………………………………..….…….2 Chapter 2: Installation of VP-DTV Sat Card Hardware Installation………………………………………………………………….…..……….3 Software Installation…………………………………………………………………………...…..4 Chapter 3:Basic Setup LNB & Switch…………………………………………………………………..………………….13 DTV System…………………………………………………………………………….…....……15 Chapter 4:WinDST Application Overview……………………………………………………………………………..….………...20 Key Features………………………………………………………………………………....…….21 Clock……..………………………………………………………………………..……………21 Channel Display……………………………………………………………………….………..21 Change Browsing……………………………………………………………………….………22 Select Audio Channel…………………………………………………………………………...22 Real Time Digital Video Recording (DVR)…………………………..……………………...…22 Time Shifting………………………………………………………………………..……..……23 Multi-Channel Preview…………………………………………………………………………25 Scheduling Recording…………………………………………………………………………..26 Viewing and Recording Different Channels Simultaneously…………………………………...27 Electronic Program Guide (EPG)………………………………………………….…………...27 Multi-Language………………………………………………………….……………………...28 Chapter5:Trouble Shooting……………………………………..….……………………….29 Appendix ⅠSatcoDX Satellite Chart……………………………………………………..………………..31 1 Chapter 1 Overview VP-DTV Sat Card (VP-1020 Card) allows you to watch digital TV & Radio programs via a PCI interface Card. VP-1020 Card is the most cost-efficient solution for digital satellite TV programs receiving. With VP-1020 Card, users are able to watch, record & play back high quality digital TV program on their PC Monitors. Key Features ● ● ● ● ● ● ● ● ● ● ● ● Support DVB protocol Support DVB Data Broadcasting(ETSI301 192) Support MPE (multiprotocol encapsulation) Digital Satellite TV and Radio Program Receiving Real time Digital Video Recording (DVR) and Scheduling Recording Time-shifting/Preset Time-Shifting Electronic Program Guide (EPG) Multi-Channel Preview Channel,Transponder,Satellite Auto Scan Viewing and Recording Different Channels simultaneously MPEG-II Software Decoding Software Upgradable Technical Specifications Tuner Input terminal: F-type 75 Ohm Receiving frequency: 950~2150 MHz tuning range Input level: -65~-25dBm Support MCPC and SCPC QPSK & FEC Symbol rate: 2~45Msps QPSK filter: Root-raised cosine filter with roll-off 0.35 Punctured codes: 1/2,2/3,3/4,5/6,7/8 and Auto LNB & Switch control LNB supply voltage: 13V/18V with Short Circuit Protection DiSEqC: 1.0 Support Data Burst & Tone Burst Antenna and LNB control: 22KHz Tone Max. LNB supply current: 400mA 2 PCI interface PCI bus: PCI 2.2 compliant Host bus burst rate: 132 MB/S Host bus width: 32 bit Demultiplexing Max No. Section filtering: 32PIDs Engine: software Descrambler: DVB descrambler Stream capture: PES & TS A/V Format Video format: MPEG-II Main Profile& Main Level Audio format: MPEG-II Audio layer I & II System Requirements Windows 98SE/ME/2000/XP 500MHz CPU or faster 128M RAM (Recommended) VGA Card with at least 8MB Memory Sound Card Microsoft Direct X 8.0 or above Digital Satellite Dish & LNB 3 Chapter 2 Installation of VP-DTV Sat Card Hardware Installation Before You Begin Make sure your computer system meet the system requirements Make sure the computer and all related equipments are power off Step1: Insert VP-1020 Card Remove the cover of the slot you intend to use and unscrew the mounting bracket Pick up the VP-1020 Card and position it over the expansion slot you have chosen Push the card firmly and evenly, confirm it seated in the slot entirely Screw the bracket of the VP-1020 Card onto the computer chassis Step2: Connect Cable Make sure the cable correctly connected with LNB from the satellite dish Connect the cable to the LNB-in connector and fasten the plug Software Installation Installation of VP-1020 Card Driver/ Application Software Before you begin 1. Make sure that VP-1020 Card is physically installed (as above). 2. Start your computer There are two ways (auto install/manual install) to install drivers as following: Auto install 1. If your system is running Microsoft Windows98SE/ME/2000/XP, the Found New Hardware dialog box will appear after restarting. 2. Please click “Cancel”. 3. Insert VP-1020 driver CD into your CD-ROM drive. 4. The dialog box of application software installation will appear . 5. Please Click “ Install Software ”. 6. The dialogue box of VP-1020 Card driver will appear, please Click “Yes”. 7. VP-1020 Card driver has installed automatically. 4 8. The dialog box of application software installation will appear after restarting. 9. A dialogue box appears for installing WinDST, and click “Next”. 10.Type your name, company and serial number, then click “Next” (The serial number is shown on the CD.) 11.Click “Next” to install to default folder. If you want to install to a different folder, click “Browse”. 12.Type new name in Program Folder, if you want to change folder name. If you want to select default name, click “Next”. 13.Now, your computer is copying all necessary programs into your hard disk drive. The installation is processed automatically. 14.If the driver is installed successfully, you will see following dialogue box. And click “Finish”. 15. Re-start the computer. 16. Check if WinDST application software is properly installed. Start>Programs>InterVideo WinDVB Manual install 1.If your system is running Microsoft Windows98SE/ME/2000/XP, the Found New Hardware dialog box will appear after restarting. Please inset VP-1020 driver CD into your CD-ROM drive, then you can click “Next” . 2. Right now it is installing your driver (DST Video Controller).. 3.If VP-1020 driver is successfully installed, you will see the dialogue box. 4.After installing DST Video Controller driver, you may install DST Audio Controller driver. The Found New Hardware dialog box (DST Audio Controller )will appear. Please click “Next”. 5. Right now it is installing your driver (DST Audio Controller). 6.If VP-1020 driver is successfully installed, you will see the dialogue box. Then click “Finish”. Note: Check whether the driver is properly installed. Start>Setting>Control Panel>System>Device Manager>DST Audio controller, DST Video 5 Controller 7. The dialog box of application software installation will appear. 8. Please click “ Install Software ” . 9. A dialogue box appears for installing WinDST, and click “Next”. 10.Type your name, company and serial number, then click “Next” (The serial number is shown on the CD.) 11.Click “Next” to install to default folder. IF you want to install to a different folder, click “Browse”. 12. If you want to select default name, click ”Next”. Type new name in Program Folder, if you want to change folder name. 13.Now, your computer is copying all necessary programs into your hard disk drive. The installation is processed automatically. 14.If driver was installed successfully, you will see following dialogue box. And click “Finish”. 15. Re-start the computer. 16. Check if WinDST application software is properly installed. Start>Programs> InterVideo WinDVB Chapter3 Basic Setup Before you watch satellite TV programs, you have to set up LNB & Switch DTV System/Scan satellite LNB& Switch Click ”Properties” and click into LNB & Switch 1. If you have only one signal source You may check the default of LNB & Switch in WinDST LNB & Switch setting table to see if it matches your antenna equipment. If the default of LNB & switch is correct, you could continue to next setting step – DTV system/Scan satellite Note: a. In Europe, LNB type is usually “Universal” , which is also the default in Setup2. For example, if you want to see “Astra” or “Hotbird” ’s programs, setup2 is correct default of LNB & Switch for you. 6 b. If you have no idea about what your antenna equipment information is, you could check the LNB frequency on your LNB user’s guide or consult your antenna manufacturer for more information. 2. If you have more than one signal source (more than one dish or LNB) You may check the default of LNB & Switch in WinDST LNB & Switch setting table to see if it matches your antenna equipment. To adjust LNB & Switch setting, please follow the instructions below: (1) Click ”Properties” and click into LNB & Switch (2) Set the LNB information to match your antenna equipment step by step as below. LNB Enable:Please select “Enable” LNB Type :There are three types of LNB, which are Normal (LNB Freq.1=5150MHz, LNB Freq.2=5750 MHz)、Universal (LNB Freq.1=10600 MHz, LNB Freq.2=9750 MHz)、Custom。If your LNB type is neither Normal nor Universal ,you have to select ”Custom” to enter proper digits. 22KHz Tone:For selecting 22K “Enable/Disable” function Tone Burst :For selecting Tone Burst “Enable/Disable” function Data Burst :For selecting Data Burst “Enable/Disable” function DiSEqC :For selecting DiSEqC “Enable/Disable” function When you have DiSEqC switch, you may choose the right passageway to right LNB (LNB A、LNB B、LNB C、LNB D) (3) After correctly setting LNB & Switch, you may continue to next setting step – DTV system/Scan satellite . 7 DTV System/Scan satellite Button Function Button Name Function Clean When click the Clean button, a message “This will delete all programs in the list, are you sure?” will appear. Click “Yes” to clean the list. Add Add a program to the list by manual input. In this function dialog, the system will ask you to fill out following parameters: Frequency (MHz), Symbol Rate (Ksps), VPID, APID,“1”for horizontal or “0” for vertical polarization. For example, when add “EuroNews” program of Astra 1B, 1C(019.2) to the list, please fill out as follows: Delete Edit Frequency Symbol Rate Polarization H/V VPID APID 11954 27500 1 2221 2233 Program Name EuroNews Delete the program on the list. Please note that the setting will be effective only after you save the file and exit the “Properties” panel. Edit the current program on the list. *Add To Favorite List Add your favorite programs into favorite list before watching them. *Scan by zone *Scan one satellite *Scan one transponder Allow you to scan one or more specific satellites by the location you are, please refer to Appendix I Allow you to scan one specific satellite above satellite’s name Allow you to scan one transponder on a specific satellite *Open List/Save List You can click” Open List” to see the pre-set programs list and click “Save List” to save present programs. Note: “*”The detailed functions are described as below: Open List / Save List For your convenience, WinDST presets a current channel list database for popular satellites, enabling you to watch TV programs with minimal setup. If you have set LNB correctly, you can click “Open List” to see the preset programs list and click “Save List” to save present programs. Note: If you are looking for more available channels, please refer to Auto Scan function as below . There are three types of Auto Scan : scan by zone、scan one satellite and scan one transponder. Scan one satellite is more timesaving. Scan by zone Scan by zone allows you to scan one or more satellites in the sky above you, you can refer to Appendix II for more information. Choose Scan by zone in Properties panel>DTV system. Please make sure the LNB frequency has been set correctly before scanning the programs; otherwise, the 8 function won’t work. Please select the correct zone and then click “OK” button. Tip: To save your time, you can choose Custom and select the satellites you want to watch only! Note: There are 9 zones, which are Europe 1, Europe 2, Asia 1, Asia 2, America 1, America 2, America 3, and Europe 3. Please refer to Appendix I for more information. Scan one satellite Choose Scan one satellite in Properties panel>DTV system. Select one satellite you want to scan from the satellite list, then click “OK” button. Scan one transponder Scan one transponder allows you to scan one specific transponder on one satellite. Please key in the Frequency, Symbol rate and H/V polarization of the transponder then click “OK” button. Add To Favorite List Click Add button and add programs from program list to Favorite list Click Delete button and delete the programs from Favorite list Click Add All button and add all of the programs from program list to Favorite list Click Delete All button and delete all of the programs from Favorite list Click Set Current Favorite List button and set up current favorite list The classification of programs WinDST classifies the programs into FTA, Scrambled, All, TV, Radio. You can choose what you want. Chapter4 WinDST Application Overview To navigate through all WinDST functions and settings, please use the controls shown in this section. The controls are designed to look like the controls on most media players such as DVD or other media players. Please note that all functions may not be available for all users in all areas. Some functions may depend on hardware or subscription services provided by broadcasters. 9 The icons of the control bar Icon Function Display favorite list Help Switch to next channel in program list Switch to previous channel in program list Hyperlink to SatcoDX Record video Time shift Play video Stop video Pause Fast rewind Fast forward EPG Multi-channel preview 10 Open recording file list Properties Display Signal quality Display Signal strength Left speaker on/off Right speaker on/off Adjust volume Key Features Clock Channel Display Change Browsing Selecting Audio Channel Real Time Digital Video Recording (DVR) Time Shifting Multi-Channel Preview Scheduling Recording Viewing and Recording Different Channels Simultaneously Electronic Program Guide (EPG) Multi-Language Clock The clock will automatically set itself to the host computer’s time. Channel Display The current channel name will be displayed on the control panel in the language assigned by the channel provider. Channel Browsing To change channels, please push channel-switching button. Or you can use the Page-Up and Page-Down keyboard keys) Note: “Scrambled” Channel may be scanned; but not available to be displayed. Selecting Audio Channel The speaker icons are to activate and deactivate the right and left audio channels. Clicking on the speaker icon will activate the channel or deactivate the channel. When the speaker icon is bold, the 11 channel is activated. In some scenarios, a radio frequency may be very closed to a channel frequency resulting in both being heard at the same time. To eliminate one, you must disable either the right or left channel. Real Time Digital Video Recording (DVR) You can record a stream of full-motion video & audio from satellite channels and save it in real-time using as m2s format directly to a designated area in your hard disk. Or you may transform it as mpeg format later on & burn it onto CD-R/DVD-R & played by other video software, which supports mpeg file playing. The recording time is based on the available space of your hard disk. 1.Press the “Record” button, WinDST starts recording the video source synchronously. 2.Stop recording and set program name 3.Open the “Record Play List” and choose the program you just recorded If you want to transfer the m2s to mpeg format, the process is described below: Start>Programs> InterVideo WinDVB >Convert Time Shifting Being interrupted while watching live satellite TV programs (such as pick up phone calls & answer the door), all you need to do is simply press the " " button and freeze the picture for a period of time, and then pick up right where you left off. 1.Please click “ ” to pause live broadcasting, at the same time, WinDST starts to record the live program and save it to hard disk . 2. Press “ ” again to play what you've missed, while the program is still being recorded. 3.To play back to “Live” mode, press “PLAY” button again and press “Yes” on the dialog popped out. Multi-Channel Preview This function allows you to preview multi-channels. Click ”Preview“ on the panel, it will pop out a dialogue that you can preview multi-channels. Note: you can only preview the channels from the same transponder. Scheduling Recording With this function you can easily set the time, date, and channel of the TV program you want to 12 record. Please click “Properties” and select “Schedule Recording” to preset recording time(including time, date and channel),the detailed set up is as below. Note: Your PC must stay power on as well as WinDST software is activated. Preset “Time –Shifting”: (1) Read the Notice on the bottom to know how many available space on your hard drive. You are not allowed to input the maximum time-shifting span longer than available space. Suggestion: It’s safer to record a span longer than the program you want to watch. (2) Select starting time and channel name Preset “Recording” This function allows you to record your favorite programs broadcasted during the schedule you’re not available. You can playback it anytime at your convenience. Read the Notice on the bottom to know how many available space on your hard drive. (1)Set the starting & ending time for recording and channel name. (2)Specify the path & folder you want the recording to be saved and leave your PC power on. The WinDST will execute your command at the designated time and start to record and save it to your hard disk. Viewing and Recording Different Channels Simultaneously You can watch channel A while recording channel B at the same time, simply using preset recording function. Notice: Channel A&B MUST be on the same transponder. Electronic Program Guide (EPG) Click the “EPG” on the panel, it will pop out a dialog that you can see all kinds of programs broadcasting schedule. If you click in one specific program, more detailed information of this program will show as below. You can update it anytime but it may take some time. Multi-Language With this function you can choose the language of the video. 1. Please click “Properties”/ “DTV system” and choose the program name on list name. 2. Please click the icon “Edit” ,then ”Set your program” will pop up. 3. Please find the “APID[Dec]” to select another default of APID. Note: Please check your content provider to see if the programs have multi-language. Chapter 5 Trouble Shooting 1. Windows can not find VP-1020 Card Check whether VP-1020 Card was inserted correctly. 13 2. Windows cannot find the driver of VP-1020 Card. Make sure the VP-1020 Card CD is in the CD-ROM drive. Please indicate the correct directory where the drivers located for Windows. 3. Can not set up the software Please check the operating system of version. VP-1020 Card is ready for Windows 98SE/ME/2000/XP. Please run “Setup.exe” on the CD. 4. Can not lock any program channel when auto scan Check whether the dish aims to the right satellite. Check the cable connection between VP-1020 Card and the dish. Check whether the voltage for LNB is correct. (18V-21V for Horizontal or 11V-14V for Vertical) Check the setting of satellite; for example, LNB frequency for C band or Ku band. Please re-insert the VP-1020 Card to another PCI slot. Please install Microsoft DirectX8.0 or higher version. 5. When the dialog “Unlock!” pops up Check whether the value of program frequency subtracts LNB frequency is between 950~2150MHz.Check the setting of polarization (H or V) 6. When error dialog box pops up or black screen appears Might be resulted from poor signal quality, the VP-1020 Card application program doesn’t receive enough data of program or receive wrong data. Please check the connection between VP-1020 Card and the cable. Please make sure your operation system is Microsoft Windows 98SE/ME/2000/XP and Microsoft Direct X8.0 or higher is installed. 7. Video is playing but Audio is failed Please check the sound card or the volume setting. 8. Failed to play program Make sure you have installed Sound Card Driver. This program is scrambled. 9. Set-Top-Box only receive 13V Program, VP-1020 only receive 18V Program LNB is biased 2 cm 10. Why can’t I receive 18V program Because LNB is 13V vertical LNB. 11. 22KHZ error Make sure VP-1020 Card is inserted to the right PCI slot. 14 Make sure your VP-1020 Driver is installed correctly. Clean the VP-1020 PCI interface by eraser. 12. I can’t play program when using 0 & 22Khz switch (2 in 1 out) You can choose 22khz enable or disable to control “22khz Switch”. 13. When playing program ,audio is ok, but screen is blank! Please make sure your VGA driver and DirectX8.0 or higher version are installed correctly. AppendixⅠSatcoDX Satellite Chart Europe 1 Europe 2 Europe 3 Asia 1 Asia 2 South Africa South Africa Brazil Madagascar Australia Namibia Botswana Greenland India Indonesia Angola Zimbabwe Iceland Sri Lanka Malaysia Congo Mozambique Spain Pakistan Philippines Botswana Zambia Morocco Turkey Taiwan Cameroon Malawi Algeria Kazakhstan Korea Nigeria Tanzania Mali Uzbekistan Japan Chad Kenya Mauritania Iran Mongolia Libya Ethiopia Guinea Saudi Arabia Russia Nigeria Spain Liberia Iraq Vietnam Mali Congo Ivory Coast Yemen Thailand Algeria Iberia Oman Tunisia Turkey Somalia Italy Belgium China France Ukraine Mongolia Germany Romania Burma Poland Bulgaria Afghanistan Switzerland Greece Russia Spain Sweden Norway Sweden Denmark Austria Slovenia Belgium 15 Asia 3 America 1 America 2 America 3 New Zealand Canada Canada Peru Australia USA USA Brazil Papua New Guinea Mexico Mexico Guiana Japan Belize Venezuela Russia Guatemala Chile Alaska Nicaragua Paraguay Costa Rica Bolivia Panama Colombia Peru Argentina Uruguay Greenland Canada 16
