Skills: Sterilization
advertisement
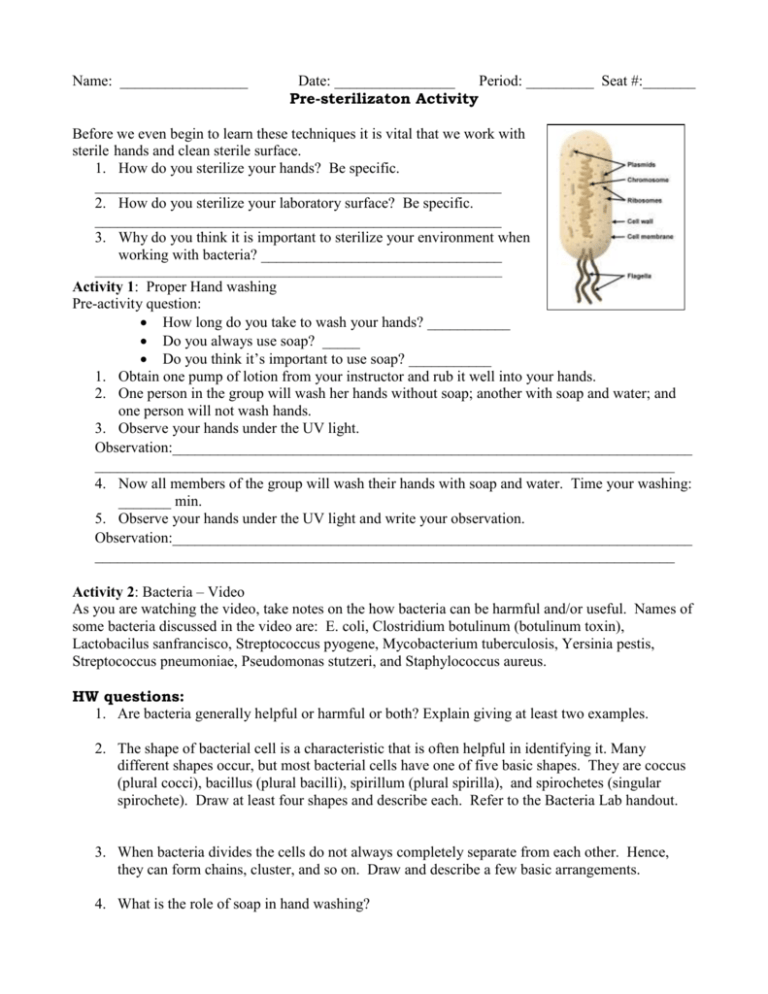
Name: _________________ Date: ________________ Period: _________ Seat #:_______ Pre-sterilizaton Activity Before we even begin to learn these techniques it is vital that we work with sterile hands and clean sterile surface. 1. How do you sterilize your hands? Be specific. ______________________________________________________ 2. How do you sterilize your laboratory surface? Be specific. ______________________________________________________ 3. Why do you think it is important to sterilize your environment when working with bacteria? ________________________________ _________________________________________________________________ Activity 1: Proper Hand washing Pre-activity question: How long do you take to wash your hands? ___________ Do you always use soap? _____ Do you think it’s important to use soap? ___________ 1. Obtain one pump of lotion from your instructor and rub it well into your hands. 2. One person in the group will wash her hands without soap; another with soap and water; and one person will not wash hands. 3. Observe your hands under the UV light. Observation:_____________________________________________________________________ _____________________________________________________________________________ 4. Now all members of the group will wash their hands with soap and water. Time your washing: _______ min. 5. Observe your hands under the UV light and write your observation. Observation:_____________________________________________________________________ _____________________________________________________________________________ Activity 2: Bacteria – Video As you are watching the video, take notes on the how bacteria can be harmful and/or useful. Names of some bacteria discussed in the video are: E. coli, Clostridium botulinum (botulinum toxin), Lactobacilus sanfrancisco, Streptococcus pyogene, Mycobacterium tuberculosis, Yersinia pestis, Streptococcus pneumoniae, Pseudomonas stutzeri, and Staphylococcus aureus. HW questions: 1. Are bacteria generally helpful or harmful or both? Explain giving at least two examples. 2. The shape of bacterial cell is a characteristic that is often helpful in identifying it. Many different shapes occur, but most bacterial cells have one of five basic shapes. They are coccus (plural cocci), bacillus (plural bacilli), spirillum (plural spirilla), and spirochetes (singular spirochete). Draw at least four shapes and describe each. Refer to the Bacteria Lab handout. 3. When bacteria divides the cells do not always completely separate from each other. Hence, they can form chains, cluster, and so on. Draw and describe a few basic arrangements. 4. What is the role of soap in hand washing? Name: _________________ Date: ________________ Period: _________ Seat #:_______ Basic Skill: Sterilization Part 1 - Sterilization of equipment Standard sterilizer for microbiological work is the autoclave. Cheaper versions of autoclave would be an electric benchtop steam sterilizer or a pressure cooker. Standard Setting: Pressure should be up to 15 lbs (or the temperature of 121 C) and must be held at that pressure/temperature for 15-20 minutes. Most bacteria will be destroyed at that setting. Refer to the machine manual for dryer setting. Safety: Be sure to read the autoclave machine manual and be familiar with the operation of the machine before proceeding with the sterilization by steam. Be extremely careful. Use gloves and protective facial shield when opening the machine at the end of the steam cycle. Be sure to check the water reservoir. It needs to be filled with distilled or deionized water to the fill line before operating. Important!: Be sure to place sterilization tape on the equipment before sterilization otherwise you will not be able to confirm the sterility of your equipment. i. Glassware and Metal Object Glass and metal objects can be sterilized by autoclaving at 121 C for 15 minutes. Alternatively glassware can be baked at 350F for 2 hours in the oven. Metal inoculating loop is sterilized in flame. ii. Plastic Items Plastic items must be autoclaved (Autoclave for 15 minutes at 121°C). Microcentrifuge tubes To sterilize tubes, put them in a beaker or other container; cover the container with foil; and follow the instructions given for steam sterilization. Do not touch the inside of the tubes as you use them. Use latex gloves if available. Notes: DNase, an enzyme that will degrade DNA is present on everyone’s finger tips. Micropipette tips To sterilize tips, put them in their autoclavable box. Petridish To sterilize Petridish, place them in a Petri-dish sterilization rack or wrap them in a foil. Pre-sterilized plastic ware: Pre-sterilized Microcentrifuge tubes, petridish, and Micropipette tips can be purchased from scientific supply vendors Activity 1: Sterilize cotton swabs. You will use them in the next bacterial culture lab. Place three cotton swab in a foil; fold the foil so the swabs are completely sealed. Place autoclave tape (you don’t need a lot) then place them in the autoclave machine. 1. Why is it important to place autoclave tapes on your equipment before sterilization? ______________________________________________________________________ 2. Why is a temperature of 121°C used? ______________________________________________________________________ Activity 2: Sterilize Test tubes which will be used to grow your bacterial culture. Place at least two test tubes in the autoclave with cover (if there is a cap you need to make sure it’s loose and if there is none, place a foil over it). Be sure to place autoclave tape. Activity 3: Before proceeding to part 2, you need to complete “Using the Bunsen Burner” lab to learn how to properly use your Bunsen burner 1. What kind of flame should you use when you want to have a sterile environment? ______________________________________________________________________ 2. What are some safety precautions you should take when working with a burner in the lab? ______________________________________________________________________ Part 2-Sterilization of media and solution Media and liquid should be sterilized by steam/autoclaving. Any time you sterilize a liquid, the container holding the liquid should be no more than half full (actually no more than ¾ full but we will be extra careful here). Otherwise, you may lose some of the liquid from boiling over because of the high heat and pressure changes. Also be sure to loosen the cap before placing them in the autoclave machine. Tighten the lids after the containers have been removed from the sterilizer and cooled slightly. For liquid media, dissolve all components except antibiotics, then sterilize. Note: You cannot sterilize antibiotics in the autoclave because it will denature and will render ineffective. To sterilize antibiotics, you will need to filter it using 0.22 µm filtration system. If you are planning to grow a single large culture, it is convenient to put the medium into the culture flask and sterilize it in place. Stoppers for culture flask can be easily made by rolling cotton up in small pieces of cheese cloth. Put the stopper in the flask mount and cover it with foil before steaming; the foil keeps moisture off the stopper. Such stopper can be used over and over. Luria-Bertani (LB) Broth Luria-Bertani broth, also known as LB broth or LB medium, is the most common liquid medium used to grow bacteria such as E. coli. It was named after two scientists who created it in the 1950s while they were studying phages. LB broth is an excellent medium because it is very efficient at stimulating growth and is suitable for many different organisms. LB broth contains tryptone, yeast extract, and NaCl. In most lab setting a premix containing all these ingredients is used. To make 1 liter of LB broth, 25 g of premix is used. Be sure to check the solution preparation direction on the bottle. The direction on the bottle supersedes all other direction. It is important to reduce the recipe in any case to fit your need (volume you are preparing). Activity: Prepare LB Broth 1. Prepare a 50 mL of Luria Bertani (LB) broth in an Erlenmeyer flask or in a Wheaton bottle. 2. Add the appropriate amount of LB broth premix to a clean flask (250 mL) that has been rinsed with dH2O. 3. Add 50 mL of distilled water to flask and stir to dissolve the dry ingredients. 4. Plug top with cotton or foam, cover with aluminum foil, then place autoclave tape if you do not have the proper cap for the bottle. 5. Autoclave for 15-20 minutes at 121 °C. Note: LB broth can be considered sterile as long as the solution remains clear. Cloudiness is a sign of contamination by microbes. Always swirl solution to check for bacterial or fungal cells that may have settled at the bottom of the flask or bottle. Show to the instructor before placing in the autoclave machine. Instructor signature: ________________________ 1. What is LB broth? How is it used? _____________________________________________ 2. Why do we need to keep the cap loosely closed during an autoclaving process? _____________________________________________________________________ LB Broth + Antibiotic - OPTIONAL To makes 100 mL, add 1 mL of 10 mg/mL sterile antibiotic to 100 mL of cool LB broth. Store at 4 ˚C (up to 3months). Questions: 1. Why is antibiotics not sterilized using the autoclave machine? ________________________ 2. How would you go about sterilizing antibiotics if it cannot be sterilized in the autoclave machine? __________________________________________________________________ Agar Medium Agar-containing medium is prepared by dissolving the medium components and then adding the powdered agar. The correct method for medium preparation is to boil the medium to melt the agar (in the microwave oven) and sterilize the solution while the agar is molten. As a short cut, the powdered agar can be added to the liquid medium and the mixture can be sterilized without boiling. Note: If you sterilize un-melted agar, the agar will melt during sterilization, but it will all go to the bottom of the flask. To distribute the molten agar throughout the medium, you must swirl the flask thoroughly after sterilization. Be careful as you do this. When molten agar medium is first removed from a steam sterilizer, it tends to foam wildly when shaken. Wait a few minutes, and then swirl the flask at first gently and then vigorously to mix the contents. -Pre-sterilized media: Pre-sterilized media can be purchased from scientific supply vendors. Pre-sterilized media must be melted. Loosen the cap on the bottle, and place the bottle in a water bath. Boil the water until the agar melts. Then cool agar to 55 C to 60 C. The bottle will be warm but not painful when touched to the cheek before adding any antibiotics. Pour plates as usual. LB Agar - In most labs premix of tryptone, yeast extract, NaCl, and agar is used. To make 1 liter is listed below 40 g of the premix is dissolved. It makes 35-40 plates. Store at 4 ˚C (6 months) or room temperature (3 months). Be sure to check the solution preparation direction on the bottle. The direction on the bottle supersedes all other direction. It is important to reduce the recipe in any case to fit your need (volume you are preparing). 1. 2. 3. 4. Prepare a 100 mL of LB agar in a 250 mL Wheaton bottle (wide mouth bottle). Add the correct amount of LB agar to a Wheaton bottle (250 mL) cleaned with distilled water. Add 100 mL of distilled water to the bottle. Stir to dissolve the dry ingredients. Loosely put on the caps. Autoclave for 15-20 minutes at 121 °C. Don’t forget the autoclave tape. Pouring LB Agar - During autoclaving, the agar may settle to the bottom of bottom. Swirl to mix agar evenly. Allow solution to cool until bottle can be held in bare hands (55-60˚ C). If solution cools too long and the agar begins to solidify, remelt by briefly autoclaving for 5 minutes or less (or microwaving) 1. While agar is cooling, mark culture plate bottoms with the date and a description the media (e.g. LB). Be careful, not to open to plates. If using presterilized polystyrene plates, carefully cut the end of plastic sleeves, and save the sleeves for storing the poured plates. Spread plates out on lab bench. Be sure to sterilize the lab bench. Keep Bunsen Burner on with non-luminous flame. 2. When agar flask is cool enough to hold, lift lid of culture plats only enough to pour solution. Do not place lid on lab bench. Quickly pour in agar near the burner flame to just cover plate bottom (approximately 3mm). Tilt plate to spread agar, and immediately replace lid. 3. Continue pouring agar into plates. Occasionally flame mouth of flask (Wheaton bottle) mouth to maintain sterility. 4. Allow agar to solidify undisturbed. 5. If possible, incubate plates lid side down for several hours at 37 C. This dries the agar (curing process), limiting condensation when plates are stored under refrigeration. It also allows the ready detection of any contaminated plates. 6. Before placing the plates in plastic sleeves, cover the Petri dish rims with parafilm. 7. Stack plates in their original plastic sleeves for storage. Show to the instructor before storing the plates in your lab cupboards or in the refrigerator. Instructor signature: ________________________ Question: 1. Suggest other methods used for sterilization in the lab (i.e. for the surface or to rid bacterial plates). __________________________________________________________________ 2. Why are LB agar plates placed lid side down in the incubator? _________________________________________________________________________ 3. Why is it beneficial to dry LB agar plates after they are poured? _________________________________________________________________________ LB agar + Antibiotic - Optional 1. Following the recipe for LB agar plates above. 2. When agar flask is cool enough to hold, sterilely add 10 mL of 10 mg/ml antibiotic. Ampicillin and kanamycin are destroyed by heat; therefore, it is essential to cool agar before adding antibiotic. 3. Swirl flask to mix antibiotics. Note: In a pinch, antibiotic-containing plates can be quickly made by evenly spreading 200 l of 10 mg/ml antibiotic on the surface of an LB agar plate. Allow the antibiotic to absorb into agar for 10-20 minutes before using. Disposal: If any of the agar or broth is contaminated (growth of unwanted bacteria and fungi), you need to place your agar (or agar plates) in the 10% bleach solution bucket. Lab Practical: Prepare a 100mL LB agar per group. Pour three LB plates per person. Be sure to properly label; cure; and store. After five days, the plates are going to be checked for contamination. To pass the practical you would need to have at least two plates to be free of contamination. ___ pass ____ fail (make up date ___________________)
