41& 42-Current Intensity and Potential Difference modified
advertisement
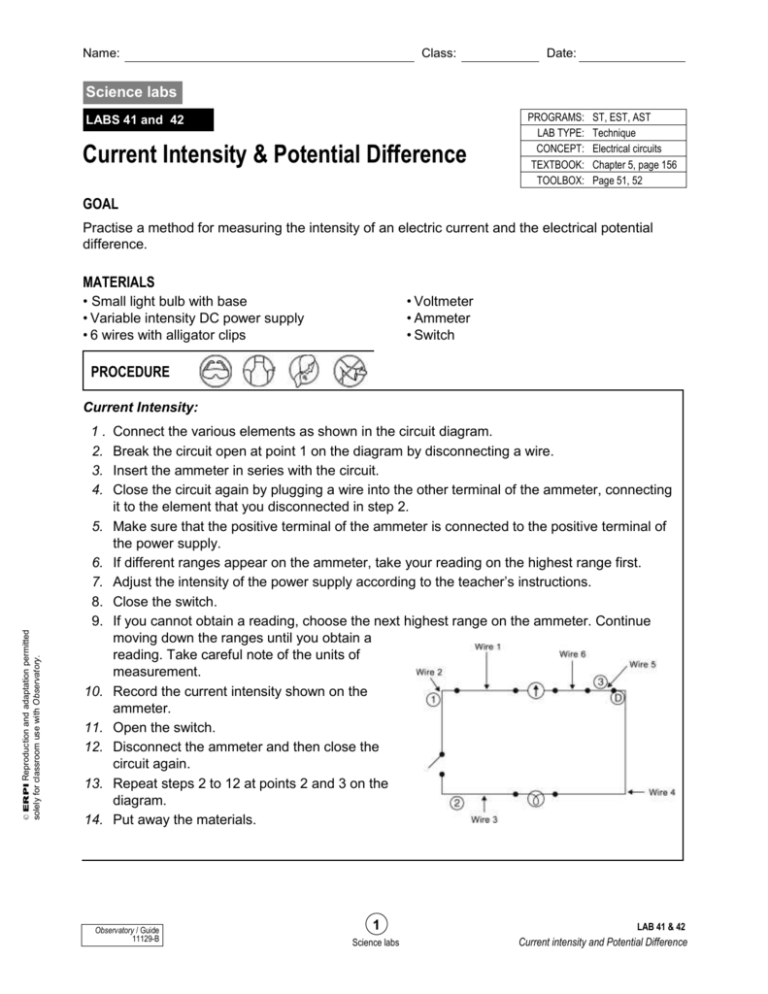
Name: Class: Date: Science labs LABS 41 and 42 Current Intensity & Potential Difference PROGRAMS: LAB TYPE: CONCEPT: TEXTBOOK: TOOLBOX: ST, EST, AST Technique Electrical circuits Chapter 5, page 156 Page 51, 52 GOAL Practise a method for measuring the intensity of an electric current and the electrical potential difference. MATERIALS • Small light bulb with base • Variable intensity DC power supply • 6 wires with alligator clips • Voltmeter • Ammeter • Switch PROCEDURE Current Intensity: 1. 2. 3. 4. 5. solely for classroom use with Observatory. © ERPI Reproduction and adaptation permitted 6. 7. 8. 9. 10. 11. 12. 13. 14. Connect the various elements as shown in the circuit diagram. Break the circuit open at point 1 on the diagram by disconnecting a wire. Insert the ammeter in series with the circuit. Close the circuit again by plugging a wire into the other terminal of the ammeter, connecting it to the element that you disconnected in step 2. Make sure that the positive terminal of the ammeter is connected to the positive terminal of the power supply. If different ranges appear on the ammeter, take your reading on the highest range first. Adjust the intensity of the power supply according to the teacher’s instructions. Close the switch. If you cannot obtain a reading, choose the next highest range on the ammeter. Continue moving down the ranges until you obtain a reading. Take careful note of the units of measurement. Record the current intensity shown on the ammeter. Open the switch. Disconnect the ammeter and then close the circuit again. Repeat steps 2 to 12 at points 2 and 3 on the diagram. Put away the materials. Observatory / Guide 11129-B 1 Science labs LAB 41 & 42 Current intensity and Potential Difference Name: Class: Date: PROCEDURE Potential Difference: 1. Connect the various elements as shown in the circuit diagram. 2. Connect a wire to each terminal of the voltmeter. 3. Connect the voltmeter to each side of element 1 in the diagram. Make sure that the positive terminal of the voltmeter is connected to the positive terminal of the power supply. If different ranges appear on the voltmeter, take your reading on the highest range first. If you cannot obtain a reading, choose the next highest range 4. Turn on the power supply as instructed by your teacher. 5. Close the switch. 6. If you cannot obtain a reading, choose the next highest range on the voltmeter. Continue until you obtain a reading. 7. Record the electrical potential difference shown on the voltmeter. 8. Open the switch. 9. Disconnect the voltmeter. 10. Repeat steps 2 to 9 with each other element in the circuit. 11. Put away the materials. RESULTS Record your results in the tables below. Title: Current Intensity at Different Points in the Circuit solely for classroom use with Observatory. © ERPI Reproduction and adaptation permitted Location of ammeter Current intensity (A) Title: Potential Difference across different elements in the circuit Element Observatory / Guide 11129-B Electrical potential difference (V) 2 Science labs LAB 41 & 42 Current intensity and Potential Difference Name: Class: Date: REFLECTING ON THE LAB TECHNIQUE 1. What is current intensity? 2. Was the current intensity the same at each point in the circuit? Explain your answer. 3. Explain how an ammeter measures current intensity. 4. What is electrical potential difference? 5. Was the potential difference the same for each circuit element? Explain your answer. solely for classroom use with Observatory. © ERPI Reproduction and adaptation permitted 6. Explain how a voltmeter measures potential difference. 7. What are the possible sources of error in this lab? 8. How could you improve the protocol for this lab? Observatory / Guide 11129-B 3 Science labs LAB 41 & 42 Current intensity and Potential Difference Class: Date: solely for classroom use with Observatory. © ERPI Reproduction and adaptation permitted Name: Observatory / Guide 11129-B 4 Science labs LAB 41 & 42 Current intensity and Potential Difference
