To Schedule a Discoverer Workbook:
advertisement
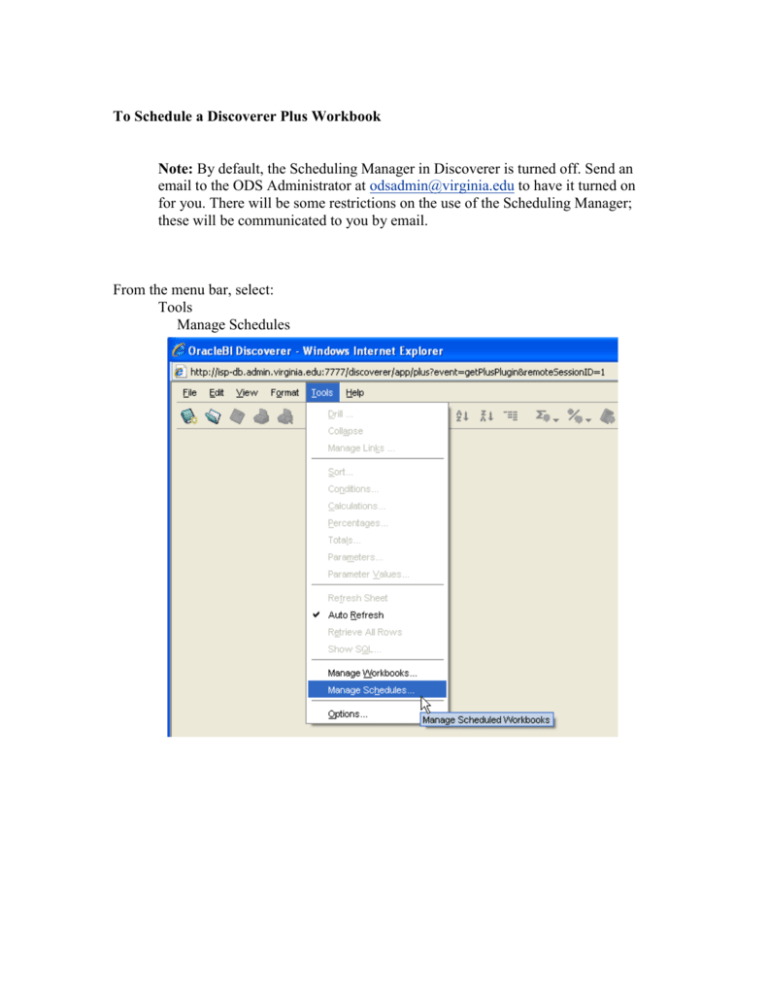
To Schedule a Discoverer Plus Workbook Note: By default, the Scheduling Manager in Discoverer is turned off. Send an email to the ODS Administrator at odsadmin@virginia.edu to have it turned on for you. There will be some restrictions on the use of the Scheduling Manager; these will be communicated to you by email. From the menu bar, select: Tools Manage Schedules Click Schedule Select the desired report to schedule: Click Select The schedule wizard will be launched to lead your through the scheduling process. 1. All scheduled workbooks must have a unique name. If you don’t change it here, Discoverer will prompt you when you leave this screen and make the name unique for you. 2. All worksheets are selected by default. Click the checked box to de-select worksheets you do not wish to schedule. 3. Click Next. Note: If you didn’t uniquely name the scheduled report, on the prior screen, Discoverer will raise a scheduling error and ask you want you want to do. Adjust as desired and then click OK. Enter the desired parameters for the worksheet(s) you scheduled. Note: you will be prompted to enter parameters for each worksheet you selected in the previous step. Click Next. Repeat this step for each of the worksheets that you scheduled. You can choose to schedule your workbook to run immediately or on a specified date and time. The default is the next day at 12:01 AM. If you want to schedule the report to run on a specific date /time, use the calendar wizard icon to select month, day, year. Click on the hour, minute or AM section(s) to type in the desired values. You can choose to just run it once (default), or schedule it to run every day, week, month, year, etc. If you choose to repeat the scheduled report, you can choose how many copies you want to keep (in case you want to do comparisons of the data, etc). You can also choose how long you wish to keep the results stored in the database. (Note: the ODS Administrator ultimately sets the max number of days data can be retained.) Adjust entries as needed and click Finish. The Scheduled workbook from is returned showing your report with a status of Scheduled” or “Pending”. Note: the icon of a clock over a workbook is used denote scheduled workbooks You may click Schedule to continue scheduling other workbooks, or Close to exit Scheduling Manager. Your workbook has successfully been scheduled. NOTE: A scheduled report is a copy of the report that runs on the server. You do not need to leave your computer “on” or even be logged onto Discoverer Plus once the report has been scheduled. The results of a scheduled report are saved in the database and available to you when completed freeing you to do other things rather than waiting for the report to run. Opening Scheduled Workbook Results. When you want to retrieve the results of your scheduled report(s), you can either open the scheduled workbook from the select the following from the menu bar in one of two ways: Method 1: from the Menu bar: File, Open Scheduled workbooks will appear in the Open Workbook from Database option with a Clock overlaying the workbook icon and can be opened directly from this menu. Method 2: from the Menu bar: Tools, Manage Schedules Check the status of your scheduled report. It is ready to be viewed if the status is “Complete”. Click on the (+) key next to the report to expose the “Results” Highlight and click Open Click Yes Your results are immediately displayed and you may print as desired. When you no longer need report results, return to the Scheduling Manager and delete them. Once the report results have been deleted and no longer show in the Scheduling Manager Window.
