ssrs create reports This tutorial shows you how to create a simple
advertisement
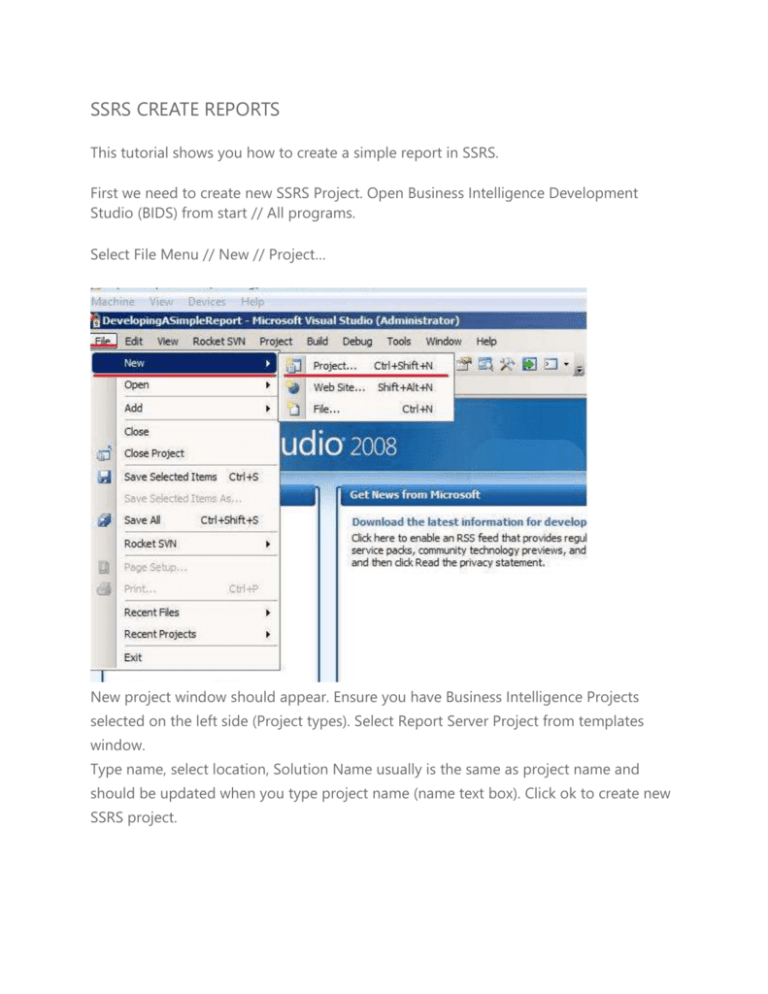
SSRS CREATE REPORTS This tutorial shows you how to create a simple report in SSRS. First we need to create new SSRS Project. Open Business Intelligence Development Studio (BIDS) from start // All programs. Select File Menu // New // Project… New project window should appear. Ensure you have Business Intelligence Projects selected on the left side (Project types). Select Report Server Project from templates window. Type name, select location, Solution Name usually is the same as project name and should be updated when you type project name (name text box). Click ok to create new SSRS project. Now that you have new SSRS Project created you should be able to view its content in solution explorer pane which is usually located on the right side (If you displayed than click view on the main menu and click solution explorer). Next step will show you how to setup Shared Data Source. Data source contains a connection string which is used to connect to your source of data which in SSRS is usually a SQL Server database. "Shared" just means you can re-use it for different reports. To set up shared data source in Solution Explorer pane right click "shared data soruce" and click "Add new data source". We should see Shared Data Source Properties window, change Name and click Edit button which will display "Connection Properties" window. In here you need to specify server name ( in this case is localhost which is default installaton name and instead of typing localhost we use shortcut which simply a dot "." without quotes). We will use UserWindowsAuthentication (you could use SQL authentication if you have SQL (not windows) username/password) next go to Select or enter a database name. If previous options are set correctly and you have permissions and connectivity this drop down box should show you available databases. Once you select database in our case tutorial we can double check connectivity by clicking TestConnection button and if is ok then select OK button. We can see that the connection string is auto generated using our input from previous window. Click ok to finish creating the shared data source. In Solution Explorer you should see your new Data Source which in my case is called “DevelopingASimpleReport”. Now we can Add New Report. In solution explorer right click reports folder and select Add, and than New Item. NOTE: "Add New Report" (with *) also allows you to create a report but using an SSRS wizard which we won't be using in this tutorial. My best practice recommendation is to create report templates and then copy/paste into new report. You will save yourself a lot of repetitive work. In "Add New Item" window we have two options to create Report we can just select Report or use Report Wizard. In this case I will use Report item (without wizard) At the bottom we need to type report name. Now we can see that the report was created and opened in design view. NOTE: We use SSRS 2008 R2 which is similar to 2008 and 2012 but is different to 2005 version. Now we need to create Data Set. A dataset contains Query String (in our case SQL query) which is executed at run-time and results are stored in the dataset and used by the report. To create new data set open "Report Data" pane if it is not there use view menu. Right click datasets folder and click Add Dataset In the Dataset Properties fill in dataset name and click New button next to "data source" drop down box. Data Source properties window is displaying and now we can use our shared data source that we created at the beginning by select it in "Use shared data sourced reference" drop down box. Click ok. Once that is ready select Query Designer to setup query string. Into Query Designer put your sql and click ok. (SQL Editor can help you generate your SQL query) Make sure if you have Name typed and you selected right Data source which we added in previous step and you can see your SQL query. Then click OK. Finally we can see that your Dataset is visible in Report Data pane which the fields we selected. Your Data Set is ready. Now we can create simple report table. To do this please open Toolbox (use view menu or icon on toolbar). and drag and drop text box and table item into design area. To place our fields from data set we can drag and drop the field or click on empty cell and in the right top corner a small rectangle schould appear; click one of the fields and it will appear in the report table. You can format the table by selecting a cell or entire row or column. Right clicking and going to properties. To view all avialable properties select a cell (row or column) and press F4 which will display properties pane. Finaly to run the report click preview tab See below the end result.

