II. Activities for Students who are Deaf
advertisement
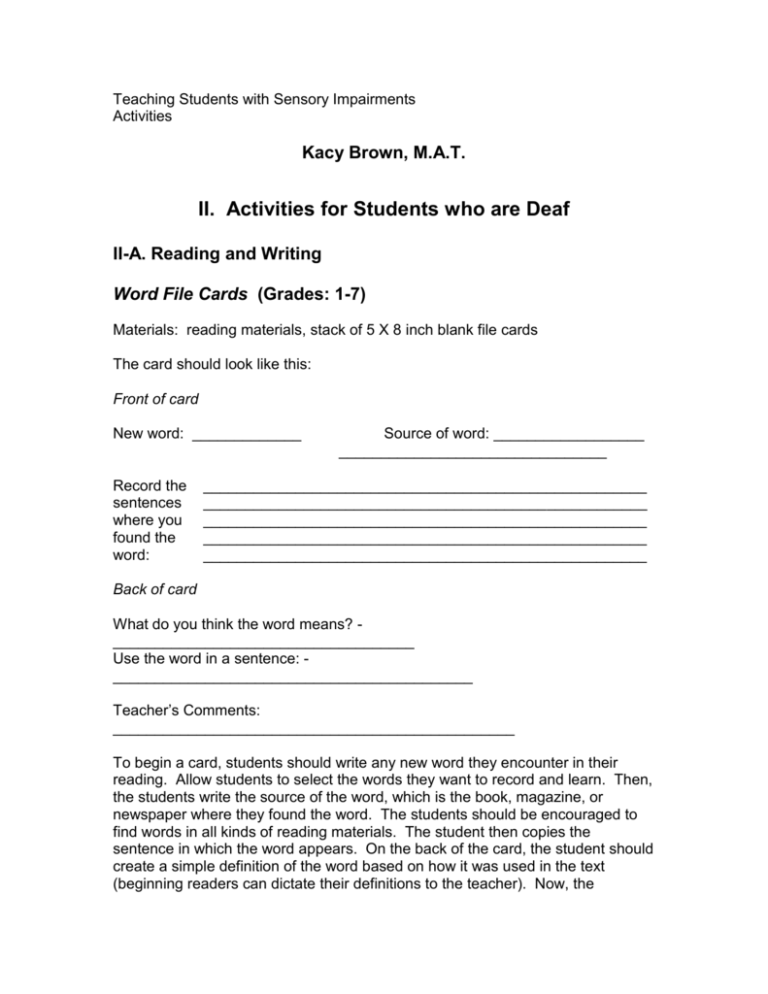
Teaching Students with Sensory Impairments Activities Kacy Brown, M.A.T. II. Activities for Students who are Deaf II-A. Reading and Writing Word File Cards (Grades: 1-7) Materials: reading materials, stack of 5 X 8 inch blank file cards The card should look like this: Front of card New word: _____________ Record the sentences where you found the word: Source of word: __________________ ________________________________ _____________________________________________________ _____________________________________________________ _____________________________________________________ _____________________________________________________ _____________________________________________________ Back of card What do you think the word means? ____________________________________ Use the word in a sentence: ___________________________________________ Teacher’s Comments: ________________________________________________ To begin a card, students should write any new word they encounter in their reading. Allow students to select the words they want to record and learn. Then, the students write the source of the word, which is the book, magazine, or newspaper where they found the word. The students should be encouraged to find words in all kinds of reading materials. The student then copies the sentence in which the word appears. On the back of the card, the student should create a simple definition of the word based on how it was used in the text (beginning readers can dictate their definitions to the teacher). Now, the students use the word in a sentence to show its meaning. Finally, the teacher decides if the student understands the definition of the word. If the student understands, he can file it in the word bank and try to use the word regularly when speaking and writing. If the student doesn’t understand, encourage him to continue looking for sentences containing the word to develop a different definition. Source: Hallau, M.G. (1982). Sharing and Learning in Language Arts. Perspectives for Teachers of the Hearing Impaired 1(2), 4. Dialogue Journals (Grades: 1-8) Materials: each student needs a personalized notebook to be used as their private journal At least once a day, each student writes a message to the teacher in his or her journal and the teacher responds by the next day, returning the journals to their owners. The student reads the teacher’s comments and writes again, continuing the dialogue between the student and the teacher. This activity will help develop the relationship between the students and the teacher. It also gives a purpose to writing and encourages growth in the students’ writing. The teacher should only respond to the content of the student’s message and should not comment on grammar, spelling, or anything academic. The teacher’s response should be about as long as the student’s entry so that she does not intimidate the student. This can also be motivating for the student because the longer the student’s entry, the longer the response from the teacher will be. The teacher should also use conversational language, making this more of an informal exchange. Source: Abrams, M. (1987). Learning on Paper: Dialogue Journals Build Language Skills. Perspectives for Teachers of the Hearing Impaired 5(4), 11-13. Rewrites (Grades: Kindergarten – 3) Materials: sentence strips, a poem or story you want to rewrite, pocket chart The students and teacher work together to create a new story or poem. They use a particular work as a model and rewrite it to express their own ideas. Using the structure of the original source (whether it be a poem or story), the class goes over each line and substitutes key words. For instance, the teacher can present this poem to the students: “Good-bye summer, Good-bye home. Good-bye swimming. Good-bye fishing. Hello, autumn. Hello, school. Hello, dorm. Hello friends.” To get the children ready for the rewrite, the teacher copies the poem onto sentence strips and cuts the paper so that only one word is on each piece. The teacher then places the poem in order on a pocket chart and reads it several times to the class to become familiar with it. Then, the teacher turns over the easiest words and has the children supply the missing words. She continues flipping over more and more words and they keep rereading the poem until everyone has the poem memorized. Then, the teacher turns over all the words she decides the class will change (in the example, the teacher would just leave up the words goodbye and hello). Then, she has the class give her ideas of what words they want to use in the poem. She writes every idea down on a piece of a sentence strip and displays them on the board with tape. Then the teacher calls on her students one at a time to fill in the blanks in the pocket chart by choosing their favorite ideas from those on the board. After each child has had a turn, the students go back to their desks and write down their own rewrite of the poem. They may use the ideas on the board or create new versions using their own words. When they are finished, they can share their poems with each other. This also works with books that have repetitive language in them. Source: Boite, A. (1988). “Rewrites” Are Just Right for Us. Perspectives for Teachers of the Hearing Impaired 6(3), 12-14. II-B. Arithmetic Getting to Know About Numbers (Preschool – Grade 1) Materials: containers, counting objects such as buttons, cubes, beans, etc., post-it notes to use for labeling containers with a number This activity builds three levels of skills – number concepts, connections, and symbols. At the concept level – Ask the students to count a given number of small objects into each container. For example, a student might be asked to count nine buttons into each of 4 baskets. At the connecting level, the teacher labels each basket with a number. The student must recognize the number and put the correct number of objects into the container. For instance, the student puts 4 crayons into the container marked with a 4. At the symbolic level, the students must record on a piece of paper or the board the total number of objects in each counting area. Source: Exploring Math, Discovering Wonder! (1990). Perspectives in Education and Deafness 8(5), 7. Measuring with Unifix Cubes (Preschool – Grade 2) Materials: unifix cubes, objects to measure The students can use unifix cubes to measure a variety of objects. These cubes are assorted in color and attach to each other. They should measure different objects by stacking and adding up the cubes. They can measure themselves and each other, tables, boxes, and they can also measure the length and width of the classroom. The teacher can create a worksheet on which they can record the different measurements and compare them. Source: Exploring Math, Discovering Wonder! (1990). Perspectives in Education and Deafness 8(5), 8. A Picture of Me (Preschool – Grade 1) Materials: colored squares of paper (7 different colors) cut to the size of the squares on the bar graph (or crayons), glue, and a prepared bar graph. Ask the students to identify and count the parts of their body. One head, two legs, two ears, etc. Show them the word for each body part, so they become familiar with it. Pass out the graphs and the colored squares of paper and guide the students in determining the correct number of squares to paste for each body part in the correct column. Use a different color square for each body part. You can use crayons for this activity instead of colored squares, but the colored squares emphasize 1 to 1 correspondence. Once the graph has been completed, ask the students questions so that they are required to interpret the graph. Which body parts have the same number? How does the graph show this? How many body parts show an even number? Odd number? If the students don’t understand these questions and are having trouble interpreting the graph, the teacher should have the students touch and count each of the body parts included in the graph again. As she does this with the students, she should emphasize the body parts that have the same number and show the children how they come to the same number on the graph. With the even and odd numbers, the teacher could have a visual for even and for odd to show the students. The even number picture should say partner and have a pair of stick people while the odd number picture should have only one stick person and say “odd man out.” The students can be shown how to pair up each of the body parts to see which have an odd number and which have an even number. Source: Dietz, C. (1982). Active Mathematics for Active Learners. Perspectives for Teachers of the Hearing Impaired 1(2), 6. Addition Activity (Grades: 1-5 ) Materials: tiles or beans or 2 –colored paper pieces, pencil, paper Present each pupil with a set number (e.g. 9) tiles. Have them make two piles. The teacher then asks if anyone can describe what they have done with the nine tiles. She has the students reason that they took the nine tiles and made a pile of 4 and a pile of 5, for example, showing the students how to write it in equation form (4+5=9). Then the teacher asks if there is another way to make two piles and they write a different equation. The teacher then assigns the students to think of as many different ways of making two piles as they can and record their answers. The students can do this activity each day with a different number of tiles. Once the children are familiar with this concept, the teacher can introduce putting the tiles in 3 piles so that there equations are 3+3+3=9. Instead of using tiles, the teacher can give students pieces of paper that are one color on one side and a different color on the other side (e.g. Red on one side and blue on the other) or beans that are white on one side and painted black on the other side. The students are then instructed to shake the papers/beans and drop them on their desks. The students then count how many of one color there are and then the other color. Then they write the equation. For instance 4 red + 5 blue = 9. They can continue to do this and see how many equations they can come up with. Source: Fridriksson, T., & Stewart, D. (1988). From the Concrete to the Abstract: Mathematics for Deaf Children. American Annals of the Deaf 133(1), 53. Subtraction Activity (Grades: 1-5) Materials: tiles, pencil, paper, Styrofoam cups To start, give the students a set number of tiles (e.g. 9) and have them make two piles. Then, have each student place a Styrofoam cup over one of the piles. Have the students explain what they have just done (made two piles and covered one up). Then, write the equation with the students (9-7=2) Then, see what the other children came up with and write more equations together. The students should then be left to come up with as many equations as they can. Use this activity multiple times and vary the number of tiles you give the students. You can also add more cups so that the students generate equations such as 9-3-2=4. Source: Fridriksson, T., & Stewart, D. (1988). From the Concrete to the Abstract: Mathematics for Deaf Children. American Annals of the Deaf 133(1), 54. Multiplication Activity (Grades : 3-5) Materials: tiles, pencil, paper Give 15 tiles to each of the students. Have them make different piles so that at least two of the piles contain the same number. For example, a student may make 3 piles of 3 and a pile of 6. The teacher asks the student to create an equation (3+3+3+6=15). The teacher then asks the student how many piles of 3 he made. (He made 3 piles of 3). Then the teacher shows the students a short way to record the equation (3 X 3 + 6 = 15) and she circles 3 X 3. The students continue to make piles and the count how many piles of one number they made and write the equation involving both multiplication and addition. Source: Fridriksson, T., & Stewart, D. (1988). From the Concrete to the Abstract: Mathematics for Deaf Children. American Annals of the Deaf 133(1), 54. Division Activity (Grades : 3-5) Materials: tiles, pencil, paper Give each student 16 tiles. Tell the students to separate them in to two different piles, but they have to make sure that the piles are even (tell them to pretend that one pile is for you and the other is for a friend), so they should deal one tile to each person until there are none left. This shows that you are able to divide 16 by 2 and have none left over. Show them how to write this. 16/2 = 8. Have them try dividing 16 into 3 piles. The students will discover that they have one tile left over. Show them that you would write 5 r.1. Have the students continue to divide 16 into 4 groups, 5 groups, 6, etc. and record their answers. The teacher should continue this activity changing the number of piles they receive. Source: Fridriksson, T., & Stewart, D. (1988). From the Concrete to the Abstract: Mathematics for Deaf Children. American Annals of the Deaf 133(1), 54-55
