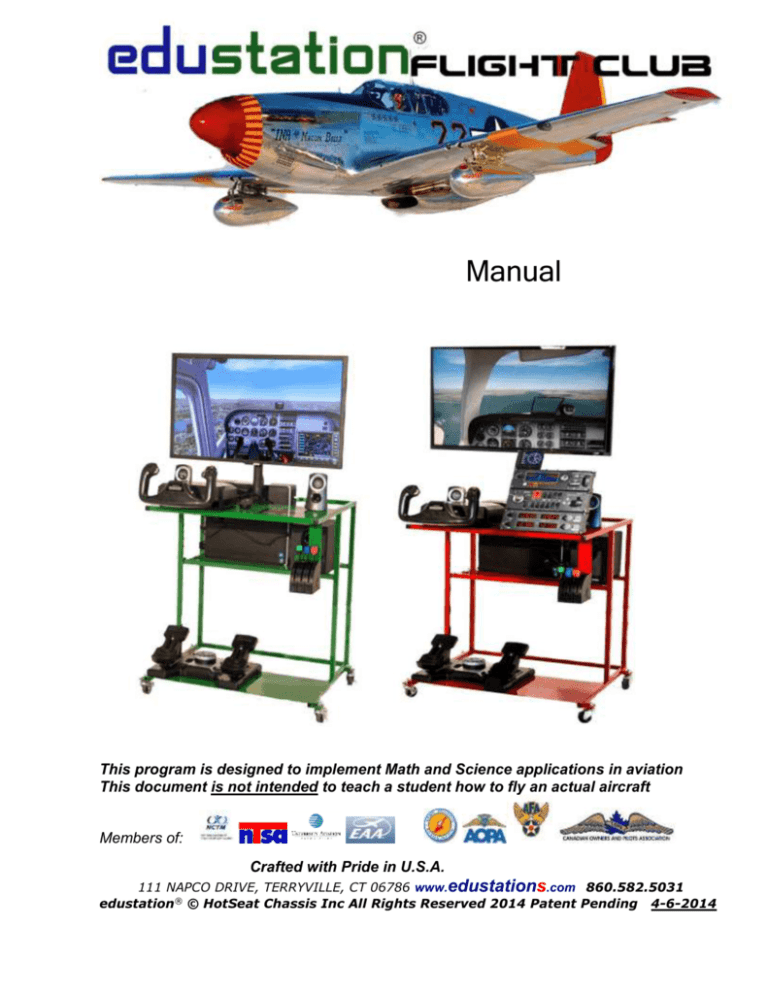
Manual
This program is designed to implement Math and Science applications in aviation
This document is not intended to teach a student how to fly an actual aircraft
Members of:
Crafted with Pride in U.S.A.
111 NAPCO DRIVE, TERRYVILLE, CT 06786 www.edustations.com 860.582.5031
edustation® © HotSeat Chassis Inc All Rights Reserved 2014 Patent Pending 4-6-2014
Welcome to the Flight Club Manual. Here we will give you the very basics of flying to
encourage you and your students to explore aviation and all of the math and science needed
to create exciting flights anywhere on the planet in one of 50 aircraft.
PC Startup Procedure:
1. Be sure the power strip is plugged in and turned on. Power up the pc & screen.
2. Double Click Flight Sim X icon on the home screen.
3. Tap the Rudder Pedal to let the system know they are there.
4. Level the plane with the Yoke if needed. Press the Pause button if needed.
5. If the Brake light is on in the left bottom corner of the screen, press the Brake Release
button on the yoke. It’s the small red button on the inside left side of the yoke.
6. The Power Quadrant on the right side of the edustation are Throttle (black),
Propeller Pitch (blue) and Fuel Mixture (red) is The correct position for all 3 is
75% position.
7. Fly around and maintain level flight. This is part of the four fundamentals of flight,
level flight, climbs, descents and mild turns.
8. Look outside at the scenery and enjoy making small movements of the yoke, left and
right to bank and turn, light pulling and pushing to pitch up and down. Try the rudder
pedals slide your right foot forward to yaw the plane to the right, slide your left foot
forward and the plane will yaw to the left. Remember, be gentle and wait for the
plane to respond. A light touch on the controls will save you from getting frustrated.
9. Press the Reset button on the Throttle Quadrant to restart the flight.
When you are finished, press the Esc key on the keyboard.
Pressing the ALT key will display / hide the flight simulator menu bar.
Pressing Control + E re-starts the engine(s).
Level 1 : The Basics
edustation® © HotSeat Chassis Inc. All Rights Reserved 2014 Patent Pending Page 1
Anatomy of Cessna 172:
Fuselage: The body of the
airplane
Wing: The lifting surface of the
aircraft. The shape of the wing
generates lift allowing the
plane to fly.
Aileron: The surface of the
wing that when moved up or
down generates roll allowing
the plane to turn.
Elevator: The surface on the
tail that when moved up or
down controls the pitch of the
plane moving the nose of the
plane up or down.
Flaps: Hinged surface that when extended down generates additional lift and drag. Flaps are
fully extended on landing to increase lift at lower speeds.
Rudder: The moveable portion of the vertical tail surface. In the air the rudder controls the
airplane around its yaw axis. On ground the rudder is used to steer the plane.
Engine: Power unit for the propeller is supplied by either a piston engine or a turbine engine.
Propeller: Are the blades on the engine-driven shaft that rotate producing thrust to propel the
plane forward.
Landing
plane to
landing
gear that
Gear: Wheels that allow the
land. Some planes have fixed
gear and others have landing
retracts to reduce drag.
There are
Four Forces of Flight:
edustation® © HotSeat Chassis Inc. All Rights Reserved 2014 Patent Pending
P2
Level 1 Flight:
Open Flight: Level 1
Your simulator has been programed to open at 3,000 ft. in level flight over New York City.
The purpose of Level 1 is for you to become familiar with the cockpit, the plane, 6 basic flight
instruments and 3 controls. The Yoke and Throttle Quadrant control the power and attitude of
the plane, the rudder controls yaw in the air and steering on the ground. When you’re on the
ground taxiing Slide your feet to control the direction of the plane. By pressing your toes
down applies the brakes, called Toe Braking. If you press only the left toe down, the plane
will turn left; when you press your right toe down, the plane will turn to the right. When landing
press both toes down, in the air the toe brakes have no effect. You are free to move the
throttle (black) as needed for power.
Press Shift + 3 will and Display the GPS Open it then resize it for comfort
The GPS shows you graphically your location on the area map. The screen indicates:
Your plane is shown in White, your Heading in Yellow, The Airport name is in RED,
Instrument Runway approaches are shown in Green, You can use these approaches to
line up to land
View Commands to display instruments:
Shift + 1 = Main Panel
Shift + 2 = Avionics Shift + 3 = GPS
Shift + 4 = Engine Controls Shift + 5 = Compass
This program is designed to implement Math and Science applications in aviation
This document is not intended to teach a student how to fly an actual aircraft
edustation® © HotSeat Chassis Inc. All Rights Reserved 2014 Patent Pending P3
The 6 basic flight instruments are shown in the center, known as the six-pack.
Speed Indicator
Electric Turn Coordinator
Artificial Horizon Altimeter
Directional Gyro Vertical Speed Indicator
The Air Speed indicator (ASI) shows the speed of the plane through the air. The plane
cannot fly until its speed is above 50 knots. Under 50 knots the plane cannot fly. 50 knots is
this plane’s Stall Speed, when it no longer can fly. The Yellow area is indicates the caution
range. Fly there in calm air only and do not move controls abruptly or the plane can be over
stressed. The Red line is the never exceed speed. Flying beyond this airspeed can destroy
the plane.
The Artificial Horizon or Attitude Indicator (I) indicates the attitude of the plane, if it’s level,
if the nose of the plane is up or down and if the wings are banked to the right or to the left.
The blue lines show the climb or descent angle of the plane by degrees. Normal ascent is 5’
to 10’ nose up. A good climb or descent angle will result in a 500 feet per minute up or down
rate on the Vertical Speed Indicator (VSI). The vertical lines to the right and left of the top
scale show the bank angle of the plane. Please make sure to keep banks fairly shallow, 20
degrees or less, until you become proficient at maintaining altitude and control of the plane.
The Altimeter indicates how high the plane is above Mean Sea Level, not above the ground.
The correct altitude is set using the barometric pressure adjustment on the altimeter for your
current location.
edustation® © HotSeat Chassis Inc. All Rights Reserved 2014 Patent Pending
P4
The Turn Coordinator (TC) is a visual aid indicating the Rate of turn of the airplane as well
as the quality of the turn. The 2 minute label indicates that at that bank angle, it takes two
minutes to complete a full circle. When banking left, try using a little left rudder to keep the
ball in the center. When banking right, use a little right rudder to keep the ball centered.
Without using the rudder pedals, the plane would be uncoordinated when turns are initiated
using only the yoke.
The Directional Gyro (DG) or Heading Indicator (HI) is like a Compass. It indicates the
plane’s magnetic heading in degrees 0 – 360 increments. It must be adjusted to match the
heading of the magnetic compass when the plane is on the ground or in straight and level
flight. Do this before takeoffs and landings. If you don’t see the compass on your screen, you
may adjust your DG to match the runway numbers you are on.
The Vertical Speed Indicator (VSI) indicates how many feet per minute you are going up or
down. You should try to maintain 500 feet per minute while going up or down, this way your
passengers will not get a major ear or headache.
The RPM indicator is not one of the six flight instruments but is essential for flight. It is on
the lower right of the instrument panel. It shows the engine speed in Revolutions per Minute
or RPM. When you move the plane on the ground, this is called Taxiing; the RPM should be
1000 RPM or less. For takeoff, use full power or about 2500 RPM. For landings, the power
should be set to 1500 RPM or Less.
Observe the instruments as you fly. Get comfortable with what’s going on inside
and outside the plane. Try looking outside more than staring at the instruments.
See how one control can affect one or more instruments.
Pressing the red button on the yoke right side moves the views. Use the hat
switch on the yoke with your left thumb to look around.
Remember, the number one rule of flight is safety. We practice this with “see
and avoid” so we don’t crash into other planes or the ground.
In the “outside” view you can move around the plane with the hat switch.
Enjoy the Ride & Have FUN
This program is designed to implement Math and Science applications in aviation
This document is not intended to teach a student how to fly an actual aircraft
edustation® © HotSeat Chassis Inc. All Rights Reserved 2014 Patent Pending P 5
Level 2 Taking Off:
Open Flight Level 2
Taking off requires that the plane achieve lift from the wings to overcome its weight, the
downward force due to gravity and drag or friction. Drag, like friction is also a force that wants
to stay put. It is caused by the friction between the parts of the plane and the surrounding air.
The Cessna 172 you are flying requires over 50 knots to fly. In order to get lift from the wings,
you must add power with the throttle to generate the force of Thrust which will move the
plane forward. The take-off procedure is as follows:
Set flaps to 1 notch down, the control surfaces behind the wings that increase lift when
down. We have done this for you.
Visually check that the runway is clear
Release the brakes by pressing the red button behind the left yoke arm
Apply full power and steer the plane on the ground with the rudders, NOT the Yoke.
Most planes tend to go to the right when rolling down the runway, so use a little left
rudder as needed. This is called the Left turning tendency.
When the airspeed is above 50 knots gently pull back on the Yoke until you have
between 5 and 10 degrees nose up. This is indicated on the Artificial Horizon
instrument as the little dot in the middle gets into the blue part of the instrument.
Caution!!! Don’t raise the nose too high. This will cause the plane to slow down and
stall. Try to maintain an air speed of 60-70 knots while climbing. Do this by gently
pushing or pulling on the yoke.
The Attitude Indicator (AI) also known as the Artificial Horizon (AH)
The brown section represents ground or water. The Blue half represents the sky. For now,
when you climb, keep the nose of the plane, the yellow dot in center at or near the 10 degree
line, shown in white, on the blue sky. When descending, keep the dot on the 5 degree line
(shown in white on the brown half of the AI). This is key to a safe and stable flight.
edustation® © HotSeat Chassis Inc. All Rights Reserved 2014 Patent Pending
P6
After reaching 300 feet of altitude, the long dial handle points to 3 on the Altimeter,
Using the switch on the right yoke arm, raise the flaps fully.
Maintain nose up 5-10 degrees to an altitude of 2000 feet then level off. Reduce
Power to 2800 rpm with the throttle and fly around the airport. Make a large circle and
try to hold altitude and do not go too far from the airport.
Try this several times to become comfortable with the climb out.
edustation® © HotSeat Chassis Inc. All Rights Reserved 2014 Patent Pending
P7
Level 3: Landing
Open Flight Level 3
After FSX opens, Select Load Flight and select Level 3. Here we have setup the Cessna
172 for a landing at Republic Airport (KFRG) in Long Island, New York. The preparation for
landing is to lower the Flaps all the way to give the plane more lift and drag. Pilots do this to
slow down yet maintain lift at lower speeds. We have done this for you. This plane has fixed
landing gear.
Then adjust the throttle from 2800 rpm to 2000 rpm to slow down. Remember watch your
airspeed. Do not let it get below 60 knots in this plane. Controls may be a bit sloppy because
of the slow speed but be gentle. The landing gear if fixed in the down position.
Line up with the runway. For now any runway will do but later e will want you to line
up with runway 19 (One Nine) 190 degrees.
Reduce power to 1,500 RPM. Slow down so the airspeed is within the white arc on
the Airspeed Indicator to approximately 60 knots, the plane will stall under 50 knots.
.
Visual Landing Aids (Visual Approach Indicator Lights or VASI):
At the end of the runway are 4 lights red or white. They are called the VASI lights. These act
as visual indicators to maintain the correct glide slope to land on the runway.
All Red means you are below the glide slope. Students learn “Red over Red, you
are dead”. Add power and raise the nose.
2 Red and 2 White mean that you’re on the glide slope. “Red over White, you’re all
right”.
All White means you’re above the glide slope; “White over White, you can fly all
night”.
Decrease power and Gravity will take care of lowering the nose for you.
edustation® © HotSeat Chassis Inc. All Rights Reserved 2014 Patent Pending P 8
As you approach the runway you must reduce your speed so that you are just above Stall
Speed, say 60 knots. Over the runway you reduce the power and you will fly below the stall
speed. This allows the force of Gravity to let the plane land and stay down. Too fast a speed
and the plane wants to fly off on its own. Too slow a speed, you may stall and land short or
crash before you reach the runway. Apply power as needed. Raise the nose a little as you
reduce the power. This increase in angle of attack will help create a bit of lift and drag to
balance the downward force of Gravity. Go ahead; practice.
Use the yoke and throttle together to keep the VASI lights RED over WHITE. That
means you are on the glide slope. Remember, fly just far enough from the airport so
you have time and space to maneuver for your final approach. Don’t rush it. Don’t
bank too much. This is the hardest part of flying. It takes time and practice.
edustation® © HotSeat Chassis Inc. All Rights Reserved 2014 Patent Pending P 9
Level 4: Take off – Circle Field – Land
Open: Level 2
Combing the skills you have mastered we can now complete a solo flight.
We are going to take off from runway 19 (190’) then circle and return to runway
19
Take a look at the illustration and follow the instructions below.
1. Take Off: Set flaps to one notch down – Set Power to Full – Use slight right rudder as
needed
Pull back on the yoke to rotate at 60 Knots – Hold heading 190’ with 5’ – 10’ nose up
attitude
To 800 Ft. AGL (900 Mean Sea Level)
2. Cross Wind Leg: Turn to heading 100’ – Maintain full power - Return flaps to full up
position
Climb to 1100’ AGL (1200 MSL) Level off and reduce power to 2800 rpm – Maintain
80 Knots
3. Down Wind Leg: At 45’ angle from the end of the runway turn to heading 10’
Maintain 1100 AGL
4. Prepare to Land: Set Flaps to 1 notch down – Begin descent at 500’ per minute
Reduce power to 1500 rpm
5. Base Leg: At 45’ from end of runway turn to heading 280’ – Altitude 800 AGL
Continue descent at 500 Ft Min – Set Flaps to second notch
6. Final Leg: From 600’ AGL turn to heading 190’ – Maintain descent 500 Ft. Min.
Set Flaps to 3rd notch down (Full Flaps) – Over Runway reduce power to Idle
As you pass through stall speed flare the nose up slightly – Apply Toe Brakes
edustation® © HotSeat Chassis Inc. All Rights Reserved 2014 Patent Pending P 10
FAA New York Sectional Chart used for navigation and topography
edustation® © HotSeat Chassis Inc. All Rights Reserved 2014 Patent Pending
P 11
Welcome to the World of Navigation.
We are not going to try and teach all of this to you here and now. Just
some notes so you can find out where your first flights will take place.
This airport was chosen for you to practice because it offers multiple opportunities to learn to fly in
complex airspace while using Visual Flight Rules and later, Instrument Flight Rules as you become
more proficient. It also lies beneath the New York Class Bravo (Class B), one of the busiest in the world,
and has some unique features for departure and landing approaches. It handles small planes and a
large fleet of corporate jets and will allow you to experience the full level of flight. It is also physically
close to both Islip airport (KISP) and to JFK.
It is a tower controlled airport situated directly west of three cemeteries and east of SUNY Farmingdale.
It is bordered by three major highways and expressways (the Long Island Expressway (LIE), the
Southern State Parkway (SSP) and Route 110). KFRG provides for both VFR and IFR approaches and
departures and is an all-weather airport. There are 10 readily and easily recognizable landmarks all
around KFRG including the Captree bridge, the Northport stacks, National Cemetery, Deer Park VOR,
the Microwave antenna and Belmont Lake. Of course the Atlantic Ocean is directly to the south with an
inner and outer shoreline. Finally, KFRG offers a Precision Instrument Landing System (ILS) for runway
14 and a non-precision instrument approach using the Babylon Non Directional Beacon (NDB) for
runways 1 and 32. In addition to GPS approaches, this makes it a perfect learning tool for basic and
advanced flight training
From the Home Page You can access the Learning Center.
You’re encouraged to explore the learning center in the flight simulation software for a more
detailed presentation of the subject. There you can learn to read maps and aviation charts,
you can review materials from Earth Science. You can review concepts of Latitude and
Longitude, contour lines, true and magnetic North, etc. In the end you will see how all this
school material can be used as you travel by air from KFRG airport to your destination, with
you as the pilot in command, finding your way without getting lost.
Easy activities:
Find your home field (KFRG) and fly from there over the ocean and long island sound to CT. .
While you fly, you can Cycle through the aircraft and outside views by pressing the red button
on the right yoke arm. You can circle around the plane in the outside view by also moving the
pan button around, the hat switch located on the left of the yoke.
Complex activities: May include planning a cross-country flight to other airports, learning to
fly a perfect traffic Pattern for Runway 14 at KFRG. Fly all five legs of the pattern, using
correct headings, altitude, flaps and power settings, then land on the center of the runway.
Try doing “Touch and Go” landings, that is, do a normal landing but instead of stopping and
making a full stop, just put flaps back up, add full power and take off again. Try soft-field or
short field landings, that is landing as smoothly as possible or in the shortest distance.
edustation® © HotSeat Chassis Inc. All Rights Reserved 2014 Patent Pending P 12
After mastering takeoffs and landings in non-complex airplanes, try flying the complex, high
performance Mooney. Don’t forget to lower the gear before landing. Try other airplanes,
other airports, especially small ones with short and narrow runways. If you fly jets, try La
Guardia airport (KLGA). The runways are very short and are all surrounded by water or one
must descend barely 50 feet over the Grand Central Parkway to land on runway 6. This can
be very challenging, especially with strong crosswinds and poor visibility.
You can change the aircraft from the menu bar.
Press Alt to display the menu bar
Select Aircraft
Pick the plane you want and double click on it.
You may want to save this configuration once setup is finished.
You can change your location from the menu bar.
Press Alt to display the menu bar
Select World
Select the field you want
You may want to save this configuration once setup is finished.
To “Save” a flight with the menu bar displayed
Select File
Save As
Name the flight
To Select a Saved flight
Press the ALT button to display the menu
Select Flights
Select: My Saved Flights
Select flight you want
Click: Apply or OK
At the End of each day:
Press Control + C to exit Turn off the monitor
Shutdown the PC
If you are having a problem or question Call Us 860-582-5031 x 126
Crafted with Pride in the U.S.A.
edustation® © HotSeat Chassis Inc. All Rights Reserved 2014 Patent Pending
P 13
Flights Club Fun Flights: Open Flight 1 - 5
A1: location: London England
Aircraft: Red Bull Extra stunt plane
Mission: Fly down the river Thames and see all of the sights.
A2: Location: Las Vegas NV.
Aircraft: P-51 Mustang WW II Combat Fighter
Mission: Fly over the strip and watch the Bellagio fountains.
A3: Location: New York Harbor.
Aircraft: Grumman Goose
Mission: Land a in the Hudson River in front of the Statue of Liberty
A4: Location: Chicago O’Hare International Airport
Aircraft: Boeing 747
Mission: Shoot Final Approach at night.
A5: Location: Runway 4 LaGuardia Airport NYC (KLGA)
Aircraft: Air Bus A-320
Mission: Fly the Miracle on the Hudson left climb out pattern to 3200
ft. Kill the Engines and land in the Hudson River See Approach Plate
in the appendix.
This program is designed to implement Math and Science applications in aviation
This document is not intended to teach a student how to fly an actual aircraft
Crafted with Pride in the U.S.A.
Member of:
edustation® © HotSeat Chassis Inc All Rights Reserved 2014 Patent Pending
P 14
Appendix:
Cessna 172: Aircraft Specifications
Empty Weight: 1,641 lbs
Useful Load: 917 lbs
Max Takeoff Wt.: 2,550 lbs
Fuel Capacity: Left Tank: 28 gal. Right Tank: 28 gal. Total useable Fuel: 53 gal.
Service Ceiling: 13,500 Ft. Take off distance Ground Roll: 960 Ft.
Takeoff Distance to clear 50’ object: 1,650 Ft.
Landing Distance: 575Ft. Landing Distance Clear 50” object: 1,335 Ft.
Cruise Speed: 122 Kn (140 mph) Never Exceed Speed: 163 Kn (188 mph )
Stall Speed: 47 Kn (54mph) power off Flaps Down
Wing Loading: 14.1 Lb. /Sq. Ft.
Max Climb Rate: 720 FPM
Cruise Range 75% power: @ 8,000 Ft: 518 nm 55% Power: 696 nm 12,000 ft.
edustation® © HotSeat Chassis Inc. All Rights Reserved 2014 Patent Pending
P 15
edustation® © HotSeat Chassis Inc. All Rights Reserved 2014 Patent Pending
P 16


