doc, 4mb - National Archives of Australia
advertisement

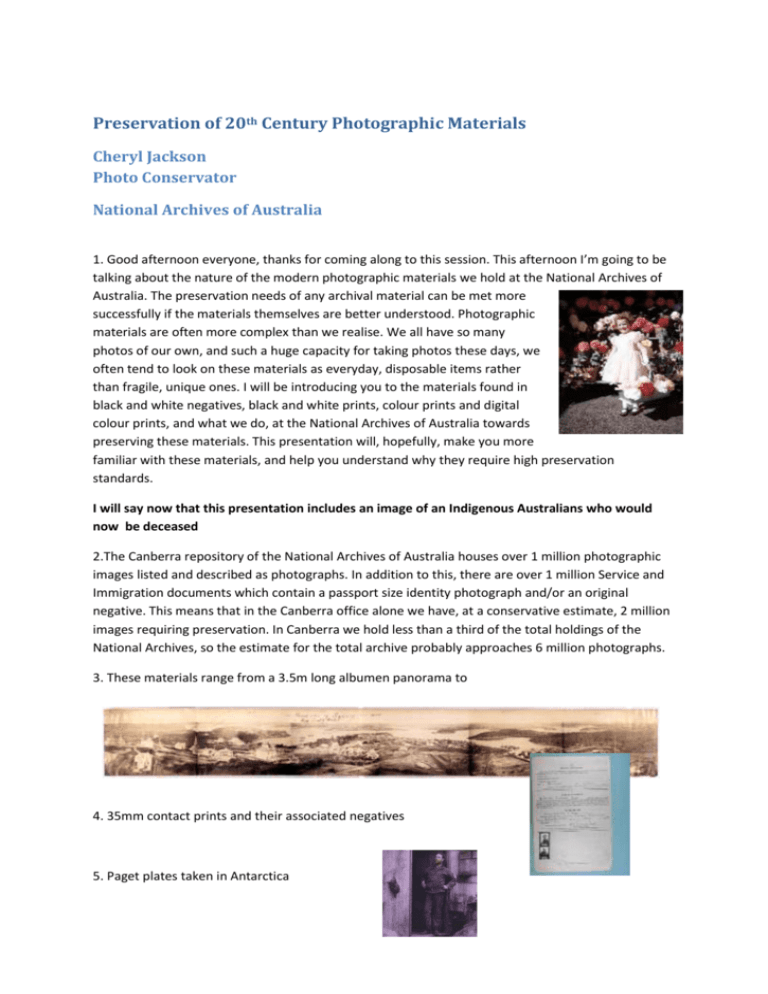
Preservation of 20th Century Photographic Materials Cheryl Jackson Photo Conservator National Archives of Australia 1. Good afternoon everyone, thanks for coming along to this session. This afternoon I’m going to be talking about the nature of the modern photographic materials we hold at the National Archives of Australia. The preservation needs of any archival material can be met more successfully if the materials themselves are better understood. Photographic materials are often more complex than we realise. We all have so many photos of our own, and such a huge capacity for taking photos these days, we often tend to look on these materials as everyday, disposable items rather than fragile, unique ones. I will be introducing you to the materials found in black and white negatives, black and white prints, colour prints and digital colour prints, and what we do, at the National Archives of Australia towards preserving these materials. This presentation will, hopefully, make you more familiar with these materials, and help you understand why they require high preservation standards. I will say now that this presentation includes an image of an Indigenous Australians who would now be deceased 2.The Canberra repository of the National Archives of Australia houses over 1 million photographic images listed and described as photographs. In addition to this, there are over 1 million Service and Immigration documents which contain a passport size identity photograph and/or an original negative. This means that in the Canberra office alone we have, at a conservative estimate, 2 million images requiring preservation. In Canberra we hold less than a third of the total holdings of the National Archives, so the estimate for the total archive probably approaches 6 million photographs. 3. These materials range from a 3.5m long albumen panorama to 4. 35mm contact prints and their associated negatives 5. Paget plates taken in Antarctica 6. and modern colour prints and their negatives. 7. “Black and White” photographs actually come in a variety of forms. They may have different supports. - Metal – daguerreotype, tintype. Glass – Ambrotypes, negatives, lantern slides. Paper – collodion silver, gelatine silver, cyanotypes. 8. Different binder layers. - Gelatine– from animal hides and skins Albumen – from eggs Collodion – nitrated cellulose None – image forming material absorbed into paper fibres 9. Or different image forming materials - Metals – Silver, Iron, Platinum Pigment – Carbon Prints, Collotypes, Inkjet 10. But by far the most common black and white materials in 20thC collections are silver gelatine prints and negatives. 11. Black and white negatives are our biggest photographic challenge at the National Archives of Australia at the moment. 12. We have conquered glass plates. 13. We have them in photo safe enclosures in a storage format that was tested by dropping a - dummy box from a 2 storey stair well, and not one of the dummy glass plates broke. All the storage materials we use for photographic items have been tested against the photographic Activity Test. This is a test developed by the Image Permanence Institute in Rochester, NY to see if packaging materials harm either the silver of an image or stain the paper support. Samples are sandwiched with test strips of colloidal silver film, and processed photographic paper and incubated at an elevated temperature and humidity level for 15 days. The samples are then assessed to see if they caused damage to the detector strips or not. Only material that passes the test is used at the National Archives. The National Archives is the only accredited testing facility carrying out the PAT in Australia. 14. The plates that come in to us already broken are individually housed and stored flat in the cold room. 15. And we have the professional expertise on staff to deal with highly fragile materials. 16. Cellulose nitrate negatives on paper files are a particular concern for us at the moment. 17. As nitrate film deteriorates it releases highly reactive nitro groups which combine with moisture and other gases in the atmosphere to produce highly acidic compounds. These acids will cause adjacent archival materials to deteriorate rapidly. They will attack the cellulose chain and cause it to break apart, they will attack the protein molecules that make up the gelatine layer, causing it to become soft and sticky and they will attack the silver image material causing it to lose density. 18. Accompanying photos and documents will become extremely brittle, and to save these items, the negative needs to be separated from the files. Unfortunately, with a million plus files, this is a huge task. 19. The negatives are being separated where they are obviously damaging the file, as the files are being digitised or described. The deteriorated negatives are digitised along with the rest of the file, even though there is no useful information left on them. They are done so that users of the digital file can be confident no part of the file has been left out. 20. As well as nitrate negatives, we have thousands of cellulose acetate negatives. In 2005, we conducted a Vinegar Syndrome survey in the acetate material using Acid Detection Strips from the Image Permanence Institute in Rochester, NY. Hot spots identified by that survey were prioritised for digitisation. The two highest priority levels have been digitised and the third level is ongoing at the moment. It should be pointed out here that acetate material that is completely deteriorated and channelled will not return a positive AD strip result. This is because all the acetic acid that was being released by the film has gone, and the film has already reached a severely deteriorated state. 21. In this representation of a cellulose acetate molecule, you can see the acetyl groups which can break off the side of the cellulose chain. Film that does not return a positive response to an AD strip has lost these side groups already. 22. During the survey, particular brands of negatives were found to deteriorate more readily, as were particular notch codes. Notch codes are applied to sheet negatives by the manufacturer to indicate the film type. “U” notched material has regularly been found in the National Archives to be deteriorating. It is not clear which manufacturer produced these negatives, as more than one has used this notch code. 23. This acetate negative, you can see, has a U notch code, and is actively deteriorating. The base has begun to shrink causing the gelatine layer to start to channel. You can also see that the acetate has developed a blue colour cast. This is caused when the antihalation dyes in the film base revert back to their original colour as the pH of the plastic changes to a more acidic state. These dyes may also form a pink cast. There is little that can be done for a negative once it has reached this point. Extremely valuable negatives can be treated to lift and remove the gelatine layer and transfer it onto a new sheet of film, but this is an extremely difficult process and requires a highly skilled operator. This negative was digitised and moved into frozen storage. Time Line of Photographic Film Bases 24. Fortunately, nitrate and acetate materials were replaced in the 1940’s and 50’s with cellulose triacetate film and polyester film. Cellulose triacetate is more stable than earlier cellulose acetate materials, but it will still degrade over time. Polyester film has proved to be the most stable – so far. Film type 1880 Nitrate Sheet Film Nitrate Roll Film 1890 1900 1910 1920 1930 1940 1950 1960 1970 1980 1990 ----------------------------------------------------------------] --------------------------------------------------------------] Diacetate Sheet film Diacetate Roll Film Cellulose Acetate Propionate Sheet Film Cellulose Acetate Propionate Roll Film Cellulose Acetate Butyrate Sheet Film Cellulose Acetate Butyrate Roll Film ---------------------] ---------------] -------------------] -------------------] ----------------------------------------------------------] B&W Triacetate Sheet Film B&W Triacetate Roll Film -------------------------------------------------- ------------------------------------------------- B&W Polyester Sheet Film B&W Polyester Roll Film ----------------------------------- ----------------------------------- --------------- denotes unstable materials 25. Black and white print materials appear in all sorts of series in the National Archives, and are always a pleasure to find. These images dates from1897 and are included in a very early Copyright series, C2229. They don’t really fit into the topic of this talk, but they are too beautiful to ignore. 26. Modern silver gelatine print materials are composed of a support layer, a baryta layer, a gelatine layer and silver as the image forming material. 27. Prints made prior to the 1960’s will have - a good quality paper base (it had to be good paper to avoid damaging the silver), - a baryta layer (which is barium sulphate in gelatine) to smooth out the paper surface and provide a bright white background for the image, - the gelatine layer (which is around 6 micrometres thick)( - and the silver image material (these clumps of silver are around half a micrometre in size). 28. Modern B&W papers and negatives use filamentary silver as their image forming material. The appearance of photographic silver is a direct result of the size and shape of the silver grains. The complex structure of the grains absorbs light evenly across the visible light spectrum giving the silver a black appearance. Such finely divided silver is, of course, highly vulnerable to deterioration, and it is only the enveloping gelatine layer that saves the silver from immediate damage. If the humidity in the storage area is allowed to rise, the gelatine layer will swell with the extra moisture and allow both the migration of unreacted silver through the gelatine, and the ingress of atmospheric pollutants. These pollutants may come from the environment or from poor quality enclosure materials. 29. The damage may appear as silver mirroring or yellowing of the silver. In the past, yellowed silver may have been bleached and redeveloped to reproduce a strong black and white image BUT this can have unpredictable results and can change the nature of the photograph permanently. It is no longer practised as a standard treatment. Removing the silver mirroring is also losing favour among photographic conservators as it is original image material that is being irreversibly removed from the photograph. 30. Unfortunately, silver mirroring can also hide detail in the maximum density areas of the image, and if the item is being duplicated, that detail is required. This is when a decision has to be made between conservators and other stakeholders as to whether the silver mirroring should be removed or not. 31. If the decision is made to remove the silver mirroring at the National Archives, the item undergoes intensive treatment with full documentation (including before and after treatment photos) and the silver mirroring is removed by hand. Chemical conversion treatments are not used. 32. The damage to the silver may also be localised rather than general. Here are two examples of beautiful fingerprints left behind by careless handlers. Fingerprints not only cause the silver to tarnish, but they also etch the gelatine layer and provide areas of disruption which mould spores may colonise. And when we remember that the gelatine layer may only be 6 micrometres thick, there is not a lot there to withstand any kind of damage. 33. Light, moisture and insects can have dire effects on photographic materials. Here we see the effects of all three combined – fly specs have caused softening of the gelatine layer thru moisture and enzyme attack, which has then become more vulnerable to damage from elevated humidity levels (here in Queensland) and UV light. The affected gelatine has crumbled away leaving the baryta layer exposed. Nothing can be done to reverse this damage. The item can be treated and stabilised in this condition, and cosmetically improved if required, but the gelatine has been lost and the damage cannot be undone. 34. At the National Archives of Australia we routinely carry out conservation treatments on photographic material. These treatments include: surface cleaning 35. Adhesive tape removal 36. Backing removals – in fact I’m just about to embark on a project to establish a faster, more efficient method of removing dry mount tissues from photographic materials. This research will, hopefully, be presented at the Joint AIC-ICOM-CC meeting in Wellington, NZ in February 2013. 37. washing, including capillary, immersion and float washing 38. humidification and flattening. 39. During the 1970’s Resin Coated paper was introduced. This material has a polyethylene layer applied to the front and the back of the paper to make it virtually waterproof. The gelatine binder layer and silver image are still present, but the baryta layer is replaced by a pigmented polyethylene layer on top of the paper. There is a second, clear PE layer on the back of the paper. These waterproof layers enabled much faster processing time, which in turn enabled automated processing. The faster processing times unfortunately meant that the binder layer was not always cleared as well as it should be and residual processing chemicals caused the silver to deteriorate quite quickly. 40. These prints presented their own problems in their early days – light caused the pigmented PE layer to crack all over, causing irreversible damage. This problem was later rectified by the addition of an antioxidant in the PE layer. 41. Colour photographs come in different forms too – early additive colour, silver dye-bleach prints, dye sublimation, instant colour, and by far the most common, chromogenic colour. 42. This colour system covers colour transparencies, negatives and prints. 43. Early prints were on good quality paper, with a baryta layer, and a gelatine layer, but this time, the gelatine contains a complex system of dyes and filters all in the one tiny image forming layer. 44. Before the print or film is processed, the image layers also contain silver halides. The silver halide is reduced to silver metal which activates the dyes. The silver is then bleached out leaving a pure colour image. 45. A colour film can have more than 9 different layers in the emulsion. Each individual dye layer can have three separate sublayers. And this whole binder is still only micrometers thick. 46. The primary concern with chromogenic colour material is dye shift. This is where one dye will fade faster than the other two. Here we see an image where the cyan dye has faded, leaving a magenta/yellow colour cast. These days, of course this can be corrected with the click of a computer button (click) but this does not help the original item. This print needs cold storage to slow down the existing deterioration. In response to this fading, chromogenic colour prints became more and more stable, particularly in the 1980’s. 47. This dye fade is caused by the complex organic dye molecule changing shape and therefore reflecting light differently. The colour of anything is a function of how light is absorbed or reflected by it. The structure of a magenta dye molecule causes it to reflect magenta light back to us. If the shape of the dye molecule changes, it won’t reflect light back in the same way, changing the colour we see. Chromogenic prints are particularly susceptible to this deterioration as the dyes start as two separate colourless molecules (a colour coupler and an oxidised developer) which are then joined together in the developing bath to form a coloured dye. These dyes always want to revert to their more stable colourless state, splitting apart and losing colour. This reaction is accelerated by warm temperatures, so cold storage is a must. 48. Colour couplers which are not properly washed out of a print can cause another problem among early colour prints. Even in dark storage these residual colour couplers can form a strong overall yellow stain. Currently, this deterioration is not reversible and can only be slowed down by placing the item in cold storage. 49. Modern colour materials are also made on resin coated papers with a similar structure to B&W RC paper. The earliest colour RC materials are also prone to cracking, as illustrated before. 50. RC papers have the added problem of being difficult to repair if they get torn. The resin coating will stretch along the tear, and a method of reintegrating the resin coating is yet to be developed. 51. These modern RC papers are the ones still being used in digital exposure of chromogenic prints. The dye systems are much the same as in light exposed prints, but they are exposed via lasers or LEDs, giving the prints a very slight linear appearance under magnification: 52. Because these types of digital prints have much the same dye sets as light exposed chromogenic prints, they should be stored in the same environmental conditions as light exposed chromogenic prints. 53. As newer materials start coming into the Archives, we need to become aware of their properties as well. Inkjet photo prints will become more prominent in transfers in the future, and although they are actually just ink on paper, they are considered photographs, and photo conservators will be asked to advise on them. Once again, they require the same storage and display conditions as chromogenic colour prints. 54. The dye images will be vulnerable to light fading and temperature induced deterioration, particularly if the inks and the papers are not matched. In these prints, the same ink and the same printer were used on the same day, but one paper matched the ink set and the other was a generic paper from the supermarket. They were both displayed side by side on my refrigerator for a period of only a couple of months. 55. The papers will require consideration as well as the images as they too are complex constructions with multiple layers of PE, paper, receiving layers, filtering layers, anti-blocking layers and anticurl layers. This technology is constantly changing and is closely guarded by the manufacturers, so at the moment we only have accelerated aging tests to go on, 56. Plus anecdotal evidence of our own poorly made prints at home. 57. Luckily, at the Archives national office in Canberra, we have a purpose built repository designed with preservation in mind. Our building is a massive concrete structure designed for maximum thermal mass, and little ingress of natural light. The windows face south (which in the Southern Hemisphere is away from the sun) and are double glazed to reduce thermal loss. It is built on a raised earth platform to avoid flood risks. Inside the building are the usual features of sprinklers, fire doors, environmental control, air filtering, secure entry and electronically controlled records to reduce the risk of damage or loss. 58. Within this building we have one room set aside which operates at cool temperatures. At the time the Mitchell building was constructed, (over 30 years ago) no cool room was included as the storage standard for photographic materials was not fixed in place. Around 5 years after the building was constructed, the need for cooler storage temperatures for photographic material was realised, and the “Cold Room” as we know it was established in one of the existing storage spaces. The air handling units for this room were set at 10 degrees C and 35% RH, which were the recommended storage conditions for photographic media at that time. 59. The advantages of cooler temperatures for black and white film are in slowing the deterioration of the film base. It does not have a major effect on image stability. For colour material, however, the advantages are two fold – the film base will be more stable, and the colour dyes will be more stable as well. The degradation of cellulose acetate and nitrate plastics is significantly slowed if the storage temperature is decreased. 60. This room remains at these conditions today, even though the storage standard has changed, as it is now a mixed media store. So, it now stores photographic negatives, colour prints and some black and white prints but also a large range of glass plate material and a limited amount of magnetic media, which governs how low the temperature can go. Magnetic media should not be stored below 10 C to avoid damaging the lubricant layers in the tape. 61. After a vinegar syndrome survey was done of the negatives in the Cold Room, and some material was found to be approaching the autocatalytic point in its degradation cycle, and as we could not reduce the temperature in the whole storage area, freezers were purchased to house the most at-risk material in an effort to reduce its on-going deterioration as much as possible. Negatives requiring storage in the freezers were (are) digitised, then vacuum sealed in tri-layer envelopes 62. These freezers run at -20 C which is the recommended temperature for maximum longevity of colour photographic materials. This is not a temperature we have set, but rather what this model of freezer runs at by default, which is convenient. 63. Fortunately, we are now in the very early planning stages for a new storage and preservation facility in Canberra and our colleagues in the Archives Sydney office are conducting research into options for specialised storage. In our new facility we are hoping to have subzero, cold and cool storage areas to better cater for the needs of our unique and irreplaceable photographic archives. 64. Thankyou BIBLIOGRAPHY https://www.imagepermanenceinstitute.org/resources/publications http://notesonphotographs.org/index.php?title=Research_from_the_Andrew_W._Mellon_Advance d_Residency_Program_in_Photograph_Conservation_at_George_Eastman_House_1999-2009 http://www.paulmessier.com/pm/papers.html http://www.graphicsatlas.org/ Coote, J, 1993, The Illustrated History of Colour Photography, Fountain Press, p161 Calhoun, JM and DA Leister, Effect of Gelatin Layers on the Dimensional Stability of Photographic Film, http://albumen.conservation-us.org/library/c20/calhoun1959.html) Tuit, RJ, Image Stability in Color Photography, Journal of Applied Photographic Engineering, 5, No 4, 1979 Hendricks, K. (198?) Fundamentals of Photograph Conservation: A Study Guide, Lugus Kodak, (1985), Conservation of Photographs, Rochester, NY, Reilly, J. (1986) The Care and Identification of Nineteenth Century Photographic Prints, Eastman Kodak Company, Rochester, NY Lavedrine, B., (2009) Photographs of the Past: Process and Preservation, The Getty Conservation Institute, Los Angeles Hess Norris, D. (Ed) 2010, Issues in the Conservation of Photographs, The Getty Conservation Institute, Los Angeles Hendricks, K and Rudiger Krall, (1993) Fingerprints on Photographs, Topics in Photographic Conservation, Vol 4, AIC PMG, pp Cheryl Jackson Photo Conservator National Archives of Australia Cheryl.jackson@naa.gov.au


