Context > Light and Sight > Teaching and Learning Approaches > Pinhole cameras and eyes
STUDENT ACTIVITY: Pinhole cameras and eyes
Activity idea
In this activity, students make a pinhole camera and see images formed on an internal screen.
They then use a lens and see brighter and sharper images. This models the human eye.
By
the end of this activity, students should be able to:
describe how a pinhole camera produces small upside-down images
explain why a larger hole produces brighter but less focused images
observe how a lens placed in front of the pinhole camera produces a bright and sharply
focused image
compare a pinhole camera with a human eye, describing similarities and differences.
Introduction/background notes
What you need
What to do
Discussion questions
Student instructions: Make a pinhole camera
Introduction/background
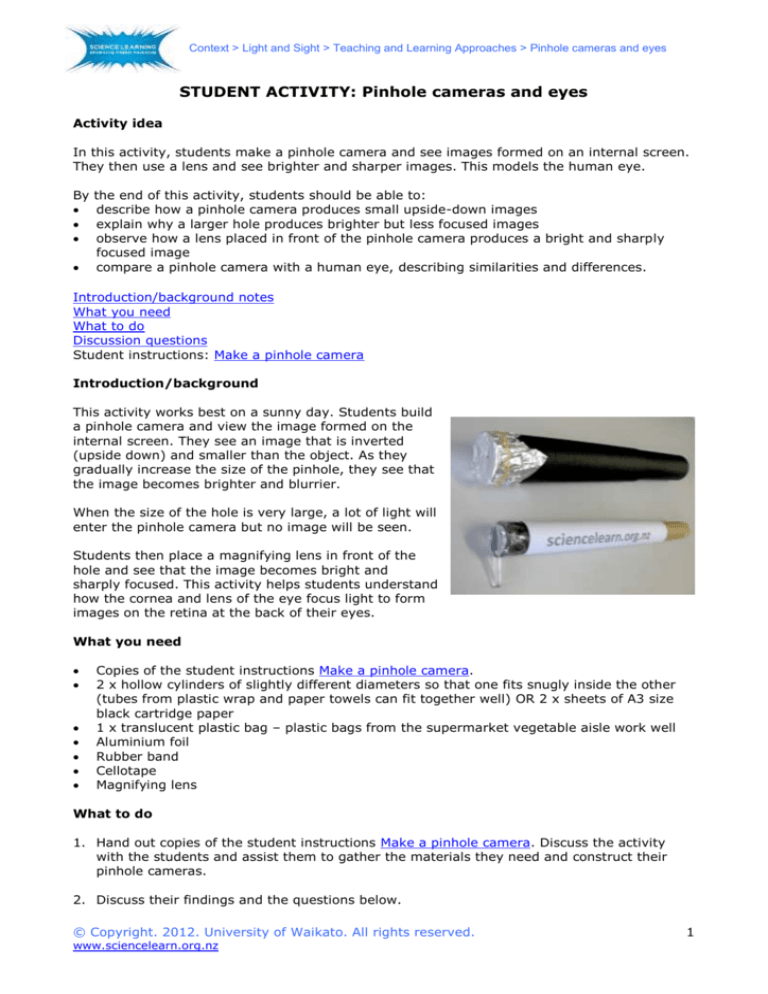
This activity works best on a sunny day. Students build
a pinhole camera and view the image formed on the
internal screen. They see an image that is inverted
(upside down) and smaller than the object. As they
gradually increase the size of the pinhole, they see that
the image becomes brighter and blurrier.
When the size of the hole is very large, a lot of light will
enter the pinhole camera but no image will be seen.
Students then place a magnifying lens in front of the
hole and see that the image becomes bright and
sharply focused. This activity helps students understand
how the cornea and lens of the eye focus light to form
images on the retina at the back of their eyes.
What you need
Copies of the student instructions Make a pinhole camera.
2 x hollow cylinders of slightly different diameters so that one fits snugly inside the other
(tubes from plastic wrap and paper towels can fit together well) OR 2 x sheets of A3 size
black cartridge paper
1 x translucent plastic bag – plastic bags from the supermarket vegetable aisle work well
Aluminium foil
Rubber band
Cellotape
Magnifying lens
What to do
1. Hand out copies of the student instructions Make a pinhole camera. Discuss the activity
with the students and assist them to gather the materials they need and construct their
pinhole cameras.
2. Discuss their findings and the questions below.
© Copyright. 2012. University of Waikato. All rights reserved.
www.sciencelearn.org.nz
1
Context > Light and Sight > Teaching and Learning Approaches > Pinhole cameras and eyes
Discussion questions
How is the image formed?
Light comes from the sun and travels
outwards in all directions.
When light from the sun hits an object
such as a person, the light reflects
(bounces) off the person and travels in
all directions.
Each ray of light keeps travelling in a
straight line until it hits something
else.
If some of the light goes through the
pinhole, it will keep travelling in a
straight line until it hits the screen at
the back of the pinhole camera.
This forms a brighter spot on the
screen.
Why is the image upside down?
Light that has come from a person’s
head will hit a part of the screen that
is lower down.
Light that has come from a person’s
feet will hit a part of the screen that is
higher up.
This means that there is an image
seen on the screen. This image will be
upside down (inverted) and smaller.
Why does the image become
bigger but not so bright when the
screen is moved further away
from the hole?
If the screen is close to the hole, the
image will be smaller and brighter.
If the screen is moved further away
from the hole, the image will appear
larger.
It will not be as bright because the
light has been spread out over a larger
area.
© Copyright. 2012. University of Waikato. All rights reserved.
www.sciencelearn.org.nz
2
Context > Light and Sight > Teaching and Learning Approaches > Pinhole cameras and eyes
Why do several images appear
when there are several pinholes?
This is because light passing through
each pinhole forms its own image. If
the pinholes are fairly small, each
image will appear to be quite well
focused.
Why does the image become
brighter but blurrier when the
hole is bigger?
If a larger hole is used, the light that
has come from the person’s head will
now hit a wider part of the screen.
This means that the image of the
person will now be unfocused. The
image will be brighter because more
light is now hitting the screen.
If the hole is very large, there will be a
lot of light entering the pinhole
camera, but no image will be seen at
all.
How does the lens cause the
image to become sharply focused?
If a lens is placed in front of the hole,
the light rays that have come from the
person’s head will now be focused
towards a single point on the screen
again. This makes the image appear
bright and sharply focused.
If a lens is used but the screen is moved so that the image is slightly blurry, placing a
smaller hole in front of the lens makes the image more focused again. This is similar to
squinting your eyes to let less light in so that an image appears more focused. This can
also be seen if you bring a page too close to your eyes so that the words appear out of
focus. Make a tiny hole between the tips of two fingers and your thumb. Holding this hole
close to your eye will make the words appear in focus again.
This effect is similar to using a smaller hole on the pinhole camera. The light rays entering
your eye will be less spread out so things will appear more in focus. People with poor
eyesight can see things more clearly in bright light because the pupils of their eyes form
smaller holes to let less light into the eye. Because the light entering the eye is now less
spread out, the image seen will appear more sharply focused.
In what ways is this model (with lens in place) similar to the human eye?
Both have an image formed on a screen.
Both have a lens system to focus the light sharply.
An upside down image is created.
Both images are in colour.
If a lot of light is let in, the image will be brighter.
If the hole is smaller (for the eye, that is controlled by the iris) then the image will be
more in focus.
© Copyright. 2012. University of Waikato. All rights reserved.
www.sciencelearn.org.nz
3
Context > Light and Sight > Teaching and Learning Approaches > Pinhole cameras and eyes
In what ways is it different to the human eye?
The retina of the eye contains light receptors that convert the light into an electrical
signal. This signal is passed along the optic nerve to the brain. It is the brain that
interprets these signals as an image.
The eye is filled with fluid to bring the focal point much further forwards.
The eye changes focus by adjusting the shape of the internal soft lens.
The pinhole camera with the lens can bring things into focus by moving the position of
the screen.
What causes short-sightedness? How can this model be used to demonstrate
short-sightedness? What sort of lens is needed to bring the image back into focus
for a short-sighted person?
Short-sightedness can be modelled by moving the screen slightly further away from the
hole so that a slightly blurry image is seen. For short-sighted people, the rays of light focus
at a point in front of the retina (screen of the eye). To make the rays focus a bit further
back, a slightly concave lens can be used to make the rays spread out a bit more before
they enter the eye.
What causes long-sightedness? How can this model be used to demonstrate longsightedness? What sort of lens is needed to bring the image back into focus for a
long-sighted person?
The opposite happens for a long-sighted person. A convex lens is needed to make the rays
focus inwards a bit more before entering the eye. This makes the image focus a bit further
forwards.
© Copyright. 2012. University of Waikato. All rights reserved.
www.sciencelearn.org.nz
4
Context > Light and Sight > Teaching and Learning Approaches > Pinhole cameras and eyes
Make a pinhole camera
1. Roll one sheet of black A3 paper into a hollow cylinder of 30 cm length with a diameter of
approximately 7 cm and tape along the entire length of the tube.
2. Place translucent plastic across one end of the tube you have made (or the tube from
plastic wrap) so that it is flat with no
wrinkles. Hold it in place with a rubber
band. This forms the screen on which the
image will be projected. Trim the excess
plastic and then tape the plastic all the
way around the tube to hold it taut and in
place. Remove the rubber band.
3. Roll the second sheet of black A3 paper around the first tube (or use the tube from the
paper towels). Ensure that it is a snug fit, but so that the inside tube can still slide easily
within the outside tube.
4. Cut a square of aluminium foil
approximately 10 x 10 cm. Place this to
form a flat surface over the end of the
outside tube. Fold the side of the
aluminium foil around the outside of the
tube and hold it in place with a rubber
band. (You may use black paper instead of
aluminium foil.)
5. Use a sharp pencil to place a small hole of 1 mm diameter in the centre of the aluminium
foil.
6. Place the inner tube inside the outer tube. Ensure that the plastic screen is at the same end
of the tube as the aluminium foil.
7. Pull the inside screen slightly away from the aluminium foil so that the hole and the screen
are separated.
8. Point the hole towards a sunny scene and hold the open end to your eye. Make sure the
Sun is behind you. You may like to look at a student standing about 5 metres in front of
you. Observe what happens if the person waves their arms and jumps up and down.
9. Record your observations. Investigate what happens to the size, brightness and sharpness
of the image when:
the screen is further or closer to the hole
the size of the hole is increased
several holes (e.g. 5 holes) are used at the same time
a large hole (e.g. 1 cm diameter) is used
a magnifying lens is placed over the same sized (e.g. 1 cm) large hole
10. With the lens attached and the image sharply in focus:
What happens when the screen is moved slightly further away from the hole?
Without moving the screen, observe what happens to the focus of the image when a
smaller hole (e.g. 3 mm diameter) is placed just in front of the lens.
© Copyright. 2012. University of Waikato. All rights reserved.
www.sciencelearn.org.nz
5

