file
advertisement
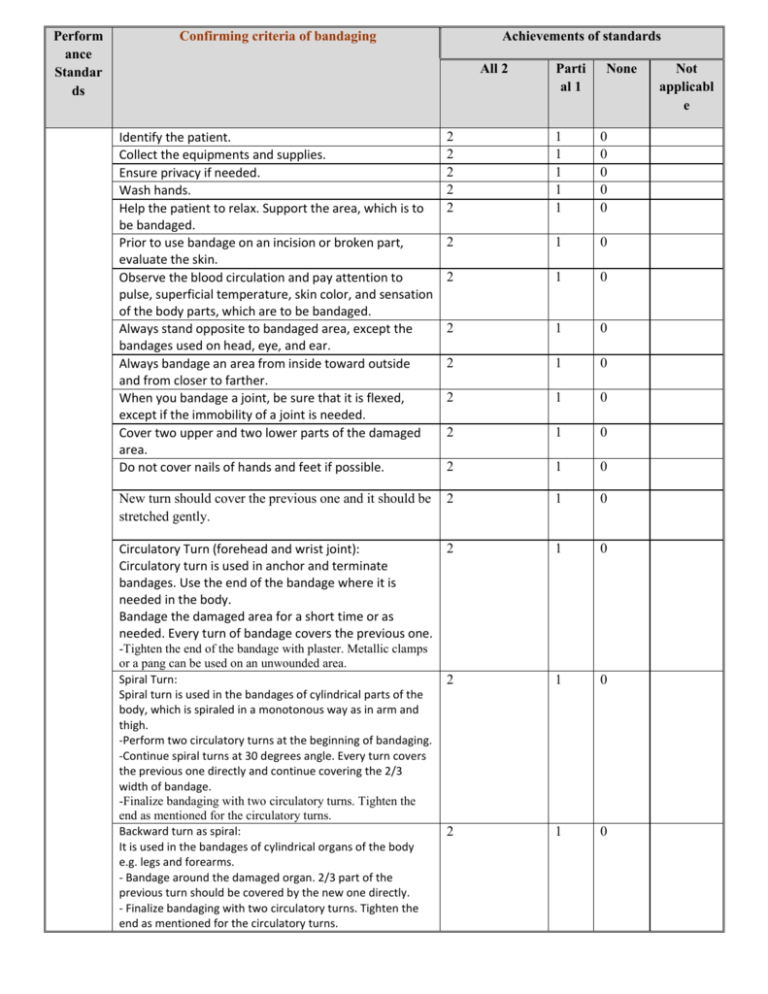
Perform ance Standar ds Confirming criteria of bandaging Achievements of standards All 2 Parti al 1 None Identify the patient. Collect the equipments and supplies. Ensure privacy if needed. Wash hands. Help the patient to relax. Support the area, which is to be bandaged. Prior to use bandage on an incision or broken part, evaluate the skin. Observe the blood circulation and pay attention to pulse, superficial temperature, skin color, and sensation of the body parts, which are to be bandaged. Always stand opposite to bandaged area, except the bandages used on head, eye, and ear. Always bandage an area from inside toward outside and from closer to farther. When you bandage a joint, be sure that it is flexed, except if the immobility of a joint is needed. Cover two upper and two lower parts of the damaged area. Do not cover nails of hands and feet if possible. 2 2 2 2 2 1 1 1 1 1 0 0 0 0 0 2 1 0 2 1 0 2 1 0 2 1 0 2 1 0 2 1 0 2 1 0 New turn should cover the previous one and it should be stretched gently. 2 1 0 2 Circulatory Turn (forehead and wrist joint): Circulatory turn is used in anchor and terminate bandages. Use the end of the bandage where it is needed in the body. Bandage the damaged area for a short time or as needed. Every turn of bandage covers the previous one. 1 0 2 1 0 2 1 0 -Tighten the end of the bandage with plaster. Metallic clamps or a pang can be used on an unwounded area. Spiral Turn: Spiral turn is used in the bandages of cylindrical parts of the body, which is spiraled in a monotonous way as in arm and thigh. -Perform two circulatory turns at the beginning of bandaging. -Continue spiral turns at 30 degrees angle. Every turn covers the previous one directly and continue covering the 2/3 width of bandage. -Finalize bandaging with two circulatory turns. Tighten the end as mentioned for the circulatory turns. Backward turn as spiral: It is used in the bandages of cylindrical organs of the body e.g. legs and forearms. - Bandage around the damaged organ. 2/3 part of the previous turn should be covered by the new one directly. - Finalize bandaging with two circulatory turns. Tighten the end as mentioned for the circulatory turns. Not applicabl e Turn as eight: 2 1 0 2 1 0 2 1 0 This type of turn is used in elbow, knee or ankle joints. This procedure permits some movements after bandaging. -Start bandaging around the joint area. -Bandage the joint area in a circulatory way and then the lower part. Continue the turns as eight above and lower the joint. 2/3 width of the previous turn should be covered by the new one. -Finalize bandaging of the joint with two circulatory turns and tighten the end properly. Thumb Spica (several shapes of eight on thumb): Spica bandage means several shapes of eight. It is used to bandage gluteal region, thigh, shoulder, breasts, and thumb. The size of spica bandage for thumb is 2.5 cm or one inch, and its size for gluteus and shoulder is 7.5cm or 3 inches. Start bandaging around the wrist joint with two circulatory turns. Bring bandage lower to the base of thumb and perform two circulatory turns. Keep the other end of thumb uncovered. Bring bandage lower around the wrist joint, then upper around the thumb. 2/3 width of the previous turn should be covered by the new one. Repeat the mentioned activities and bandage the upper and lower part of thumb until the bandage covers it. Finalize bandaging around the wrist joint with two circulatory turns and tighten the end properly. Recurrent turn: This type of repeated turn is used to cover the base of the body e.g. the end of a finger, skull, and the end of an external cut organ. Place bandage centrally on the forehead. Start bandaging around the head with two circulatory turns. Fold one part of the bandage in the back and place it over the head centrally. Hold it tightly with another hand and turn the other end of the bandage around the head to cover the previous one. Bring the first part of the bandage repeatedly to the left side. Similarly, turn the first half with 1/3 width of bandage. Repeat this procedure at the other side for the third turn. Bring bandage against the forehead. Continue this procedure by changing to the right and left sides until the area is covered. When we turn one end of the bandage around the head, it must cover 2/3 of the previous bandage. Finalize bandaging with two circulatory turns and tighten it over the forehead. Finder bandage for arm: This type of bandage is used for the different parts of the body. For example, triangular or finder bandage fixes the arm. It is used to support bulky parts of the body, e.g. abdomen, arm or chest. Place the base of the triangular bandage along the body from the shoulder toward the undamaged area. In this case the bandage is against the patient’s chest downwards and its apex is on the damaged area toward the elbow joint. Take the above angle and encircle it round the neck until it is suspended on the shoulder, which is toward the wounded part. Place the lower angle of bandage on the arm and shoulder of the wounded part and tie here. Assemble the two margins and tie toward the damaged part of shoulder. Fold the apex near the elbow joint and tighten it with plaster or pang anteriorily. Triangular bandage of arm: This type of bandage is used to support arm, elbow joint and forearm of the patient. It is also used to prevent edema of hands. Slender triangular bandage of arm: Fold the triangular bandage, which has little width. Place its one end on the damaged chest and shoulder. Flex the injured arm in elbow joint by less than 90 degrees. Take the other end of the folded bandage and encircle it round the undamaged wrist joint. 2 1 0 2 1 0 2 1 0 2 1 0 Next, encircle that end round the arm and neck of the damaged side. Tie on the damaged side superior to clavicle. St. Johns triangular arm bandage: Flex the injured arm on the chest such that the nails of fingers reach the clavicle bone of the opposite side. Place one side of bandage along with the apex on the flexed arm toward the elbow joint. Set the remaining parts of bandage under the flexed arm carefully. Take the folded bandage to the other shoulder in the back. Tie on the surface of clavicle in the unwounded part. Write down the nursing notes. Record date, the procedure, type of bandaging, type of injury and response of patient. Number of the achievements Coefficient of the achievements Total score and percentage 2 1 0 2 1 0 2 1 0
