Session Plan 4
advertisement
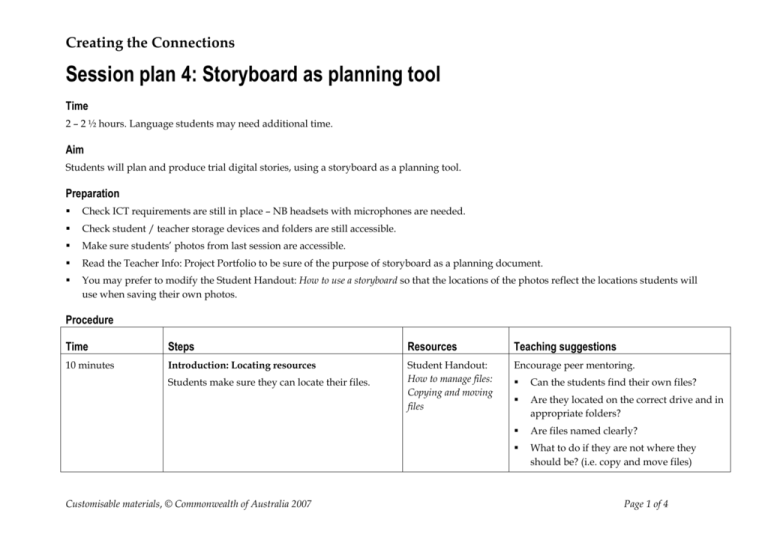
Creating the Connections Session plan 4: Storyboard as planning tool Time 2 – 2 ½ hours. Language students may need additional time. Aim Students will plan and produce trial digital stories, using a storyboard as a planning tool. Preparation Check ICT requirements are still in place – NB headsets with microphones are needed. Check student / teacher storage devices and folders are still accessible. Make sure students’ photos from last session are accessible. Read the Teacher Info: Project Portfolio to be sure of the purpose of storyboard as a planning document. You may prefer to modify the Student Handout: How to use a storyboard so that the locations of the photos reflect the locations students will use when saving their own photos. Procedure Time Steps Resources Teaching suggestions 10 minutes Introduction: Locating resources Student Handout: How to manage files: Copying and moving files Encourage peer mentoring. Students make sure they can locate their files. Customisable materials, © Commonwealth of Australia 2007 Can the students find their own files? Are they located on the correct drive and in appropriate folders? Are files named clearly? What to do if they are not where they should be? (i.e. copy and move files) Page 1 of 4 Creating the Connections 10 minutes Project skills: Storyboarding Review and extend the idea of planning a digital story using a storyboard. Develop understanding of narration Storyboard from Samples (to match the sample digital story, below) Reintroduce the sample storyboard to demonstrate how the makers of the sample digital story had planned it before building it. Discuss the advantages of doing this. Teacher Info: Project Portfolio (Storyboard section) Discuss how the makers could have got their information, i.e. interviews, brochures, internet. Digital story from Samples (to match the storyboard, above) Play a sample digital story and examine how the makers put it together. Students need to understand that the end product is not a series of isolated pictures and comments but a linked story. This could be done through: The digital story script (from Samples) A discussion of each image and its accompanying text and narration Sequencing a cut up narration script (from Samples) while listening to the digital story. 30 minutes Project skills: Planning the trial story Choice and ordering of photos (possibly integrated with next step) Using storyboard as a planning tool, students negotiate with team members re: In their teams, students: Choice and order of photos Narration to accompany photos Text to accompany photos Title and credits Music (from Photo Story 3 or copyright-free websites). Note: If students become restless with the planning, integrate it with the next step. It is advisable that they Customisable materials, © Commonwealth of Australia 2007 Student Task: Storyboard Begin a new story in Photo Story 3 Click on Import pictures and navigate to where their photos are stored Decide which photos they will use for their trial digital story and import them Edit them if necessary Decide on the order of the photos On blank Storyboard sheets, record the order they have decided on by writing the Page 2 of 4 Creating the Connections work together to construct the narration but after that the following (see next step for details) could be done by individuals or in pairs and taken back to the team for approval: Writing text on photos Recording the narration Choosing the music. Designing the title and credits screens name of the picture and its location. This will make each picture easy to find again if necessary. Teams continue to work together to complete their storyboard, i.e. deciding on the narration and on the text to write on photos. Students need to draft these on their storyboard and get the draft checked before they write the text or record the narration on their trial digital story. I hour ICT skills: Building the trial digital story Students negotiate who will do each task: (possibly integrated with previous step) Using Photo Story 3, students: Adding the text Write text on photos Record the narration Student Task: Add music Narration Add a title and credits. Recording It is recommended that students practise their narration before recording. Language students, in particular, may find the Narration task useful. Remind students to check and adjust volume levels of the recording and redo if necessary. Music Students create music from the music supplied in Photo Story 3 or select from the copyrightfree websites (see Web Links). Title and credits Student Handout: How to use a scanner Customisable materials, © Commonwealth of Australia 2007 Students can design titles and credits screens in Microsoft Word using WordArt. Printouts can be scanned and then imported into their digital story. Page 3 of 4 Creating the Connections 20 minutes Reviewing digital stories The class group watches and critiques each other’s trial digital stories. 10 minutes Reflecting on teams, tasks and styles In preparation for beginning their communitybased digital story project, students review tasks involved in making a digital story and reflect on their own skills and aptitude. Students discuss their interests re making their community-based digital stories and form teams. As a class group, watch some or all of the trial digital stories. In preparation for the major project, students can comment on what works well and why/ what could be improved and how. Bring the discussion around to what this means in terms of: Completing the project Team formation Learning from the skills of others. Assist students to decide on their team members and project focus (ideally teams have a combination of the ‘Team Work’ types and a maximum of 4 people). Student choices of community organisations and individuals will need to be made from among those who were supportive of the project when previously contacted. Some students may have also contacted people. 5 minutes The next session Students will finalise teams and start to plan for the major project about a community-based organisation or person in the community. Students under 18 years of age should take home, and get signed, a permission form to participate in the project (i.e. leave the premises). Customisable materials, © Commonwealth of Australia 2007 Before the next session, teachers will need to confirm the participation of the organisations and individuals nominated by the teams. If necessary, alternatives will have to be found. Participation needs to be confirmed so that teams can plan their project knowing they won’t be refused when they phone to make the interview time. Page 4 of 4
