Energy Audit
advertisement
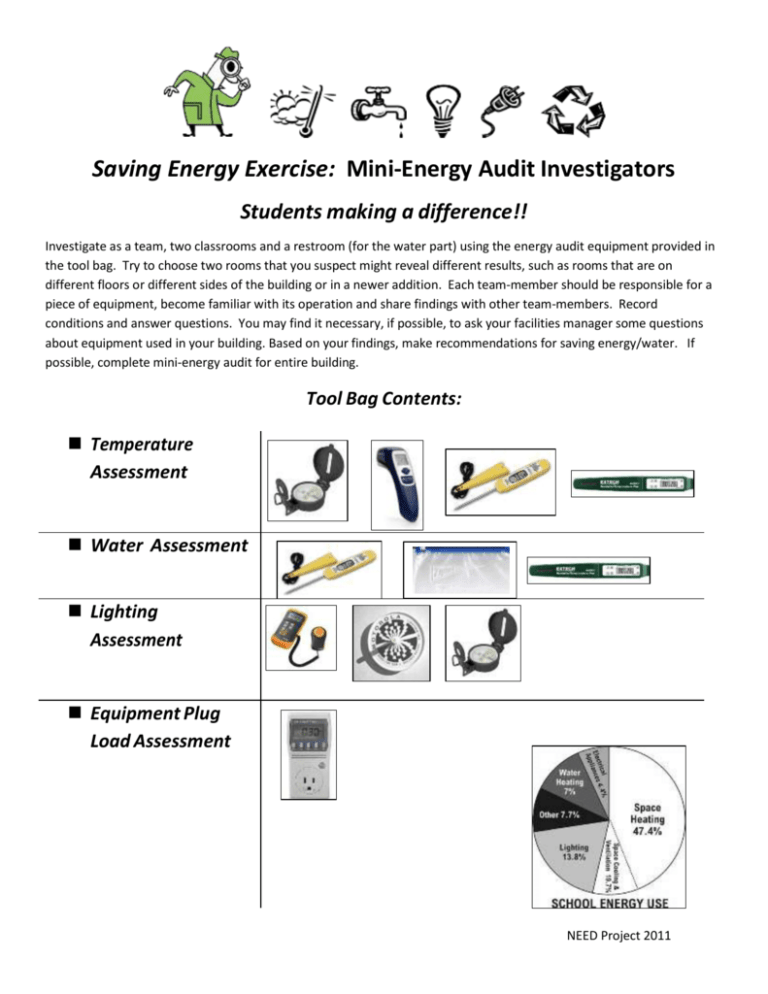
Saving Energy Exercise: Mini-Energy Audit Investigators Students making a difference!! Investigate as a team, two classrooms and a restroom (for the water part) using the energy audit equipment provided in the tool bag. Try to choose two rooms that you suspect might reveal different results, such as rooms that are on different floors or different sides of the building or in a newer addition. Each team-member should be responsible for a piece of equipment, become familiar with its operation and share findings with other team-members. Record conditions and answer questions. You may find it necessary, if possible, to ask your facilities manager some questions about equipment used in your building. Based on your findings, make recommendations for saving energy/water. If possible, complete mini-energy audit for entire building. Tool Bag Contents: Temperature Assessment Water Assessment Lighting Assessment Equipment Plug Load Assessment NEED Project 2011 TEMPERATURE MANAGEMENT Dry Magnetic Pocket Compass – (orientation tool) Determine the approximate direction the windows face by holding the compass level with the ground and directly face the windows. Read the dial position farthest from you and determine the closest match: N – NE – E – SE – S – SW – W – NW. What implications does this orientation have? Plantings? (Coniferous trees on North side for blocking wind Deciduous trees on South side for shade in summer, sun in winter) Window treatments? (Blinds, awnings, green curtains) Room scheduling? (summer school classes on cooler north side of building) Findings & Recommendations: Type Room #/Name Below Window Direction Recommendations Room 1: Room 2: Digital Infrared Thermometer – (spot and long range temperature gauge) The button on the front switches the reading from Celsius to Fahrenheit. The button underneath shoots the infrared ray. Do not point at people!! Use this tool to determine if there are differing temperature zones within a room which may cause uncomfortable areas for occupation, i.e. strong heating or cooling flow, cold floors, poor air seal causing drafty areas. (When the weather is moderate these leaks or flows are not as evident.) Recommend placement of insulation, rugs, air sealing (caulking, weather-stripping, door-snakes), ceiling fans, and operable vents. Findings & Recommendations: Findings Recommendations Room 1 Room 2 Digital Thermometer Pen – (temperature gauge) Measure both the outdoor and indoor air. Suggested ranges: Heating 68° when occupied (lower when unoccupied) / Cooling 78° when occupied (higher when unoccupied). Temperature Recommendations Room 1 Room 2 Is there an operable thermostat? Is it programmed to raise and lower the heating/cooling when the building is occupied or not (ask Facilities Manager)? Lowering heating or raising cooling 1° = 1% savings on fuel costs for 8 hours of setback or 2-3% savings for a 24 hour setback. Are there open windows while the heating/cooling is running? Findings & Recommendations: Is there an operable thermostat Recommendations Room 1 Room 2 Digital Hygrometer Pen – (humidity gauge) When measuring both the indoor and outdoor air, let the pen adjust for several minutes. Be sure not to hold the pen near the sensor on the left side, as it will detect perspiration from your hand. The display will show the temperature on the left and the humidity on the right. An overly humid room can create mold and subsequent health issues such as allergies or asthma, and in the summer will make the room feel hotter. Low humidity can create sinus problems, and in the winter will make the room feel colder. Suggested ranges: less than 60% in the summer / between 25 – 40% in the winter. Findings & Recommendations: Room Humidity Room 1 Room 2 Recommendations WATER MANAGEMENT Digital Thermometer Pen – (water temperature gauge) Measure the hot water temperature of the nearest bathroom sink faucet by removing the yellow thermometer cap to expose the metal stem of the thermometer which should be placed halfway into the water. Do not get the yellow part wet. Record the highest temperature. Lowering water temperature 10° saves 5% in water heating costs. Suggested temperature: Hot Water 120° Room 1 Water Temperature= Room 2 Water Temperature= Water Usage means Energy Usage! Are there any dripping faucets, pipes, or commodes? Room 1 Room 2 Are commodes running properly or do they flush automatically properly? Room 1 Room 2 Are there spring-loaded faucets that turn off automatically? Room 1 Room 2 Are there low-flow faucet aerators (see Flowrate Experiment below)? Aerators provide high pressure spray and can reduce water consumption by 30 - 45%. Room 1 Room 2 Flowrate Experiment: Using a 1 gallon ziplock baggie, with the faucet fully on, time how long it takes to fill the baggie. 1 gallon shower/sink water = seconds Divide this number into 1 ( 1/x) and multiply the result by 60 to get gallons/minute = GPM Low-Flow, Water Saver Sink Faucet: use 1.5 – 1.0 gal/min. Standard Sink Faucet: Uses 2.2 gal/min. Low-Flow, Water Saver Shower: use 2.0 gal/min. Standard Shower: Uses 2.5 gal/min. Outdoor water conservation ideas: Check for hardy, native vegetation adapted to local climate and rainfall. (ask Facilities Manager) Are the plants/trees mulched for moisture retention? Room 1 Room 2 Does the school use rain collection barrels or have a rain garden? Findings & Recommendations: LIGHT MANAGEMENT Light Meter – (light gauge) After turning on power and removing the meter sensor cover, press the LUX/FC button to read FC (foot candles). Press the range button twice to get the proper reading. The meter sensor (part with the cover) should be held or set where the activity will be taking place in that location i.e. on the desk in a classroom for reading or at eye level in a gymnasium for sport activity. Be aware that the meter reading will fluctuate as people move in the room between the meter sensor and the light source (lights or windows). With all of the lights turned on, and all of the blinds open, take your readings. Check various areas of the room for comparison to the attached “Recommended Light Levels” chart. Note whether it is a sunny day or not, and the time of day. Findings & Recommendations: Are the lights adjustable/dimmable? Adjustable/Dimmable Foot candles reading Room 1Room 2Does one switch turn on all the lights or can you select individual banks of lights? Room 1Room 2- Fluorescent Tube Size Check to see what type of fluorescent light bulbs are used: T12 (1 ½”diameter)/ T8 (1” diameter)/ T5 (5/8” diameter)you will need to talk to your facilities maintenance person for the answer. T8 bulbs are 20% more efficient than T12 bulbs! T12 1 ½” 34 - 40 watts; 2600 lumens; 65 lumens/watt T8 1” 28 - 32 watts; 2850 lumens; 89.06 lumens/watt Findings & Recommendations: Room 1 Room 2 Flicker Checker – (fluorescent light ballast determination) Upon spinning like a top, smooth concentric circles indicate newer electronic ballasts (30% more efficient) that turn on and off between 10,000 and 20,000 times per second. A checkered pattern moving from ring to ring indicates older magnetic ballasts that turn on and off 60 times per second. The ballast limits current through the tube. Findings & Recommendations: Room 1 Room 2 LED lighting (Light Emitting Diodes) Do the emergency exit signs use LED or incandescent bulbs? You will need to talk to your facilities maintenance person for the answer. LED Exit signs are cost-effective for schools and use 95% less energy than signs using incandescent bulbs. LED bulbs do not need to be changed much since they last 25 years versus incandescent bulbs last 2,500 – 10,000 hours, so there are less light bulb changing labor costs. Schools can get them free or get rebates from utility companies. (see handout to figure life cycle costs) Room 1 Room 2 Outdoor light conservation ideas: Outside Lighting can be turned off between midnight and 6 AM Findings & Recommendations: Room 1 Room 2 PLUG LOAD MANAGEMENT Kill-A-Watt EZ (Optional) – (electrical device energy usage gauge) In addition to showing how many watts are being used, this model is able to calculate the cost/hour/day/week/month/year to operate the equipment by programming in your local utility rate. If you do not know your rate, use $0.10/kWh. Only try this activity with easily accessible equipment that can be turned off before pulling the plug in and out and without disruption to the room. Room 1 Room 2 Check for phantom loads (wasting 5- 10% of US total energy). Are there electronics that are plugged in, but turned off? Are they still drawing electricity? Room 1 Room 2 Computer Use Study – see handout to figure life cycle costs Turning computers off overnight - School district with 500 computers = savings of $14,000 a year Are the computers left on overnight? Over the weekends? Are the Power Management Functions Activated? Do the control settings turn off monitor if not using > 20 minutes and CPU if not using for > 2 hours? Is the computer equipment plugged into a power strip so you can turn off the switch to avoid phantom loss? Smart Strip Surge Protector - shuts everything off with one click when not using or leaving the house Findings and recommendations: Can you identify any Energy Star equipment in the room? Is this an Energy Star School? Room 1 Room 2 Vending Machines Lights can be turned off for savings or switch to LED Can be shut-down for long breaks Vending Miser – can reduce energy consumption an average of 40% - easily installed – rebates from utility companies payback period of less than 2 years Findings and recommendations: Additional Investigation Recycling Bins – Take note of recycling opportunities (or lack of) available in the room or nearby. Does this facility have a recycling policy? Which of these are recycled at this facility? Paper| Plastic | Glass | Metal | Cardboard | Compost | Electronics | Batteries | Wood Does this school have a Green Team? Do you think the school needs a Green Team? Why? Summary of Recommendations: NEED Learning and Conserving Student Guide 2012 - 2013


