Perfecta3D® Hanging Drop Plates Protocol:
Setting up the Agilent Bravo Liquid Handling
Platform for HDP1096
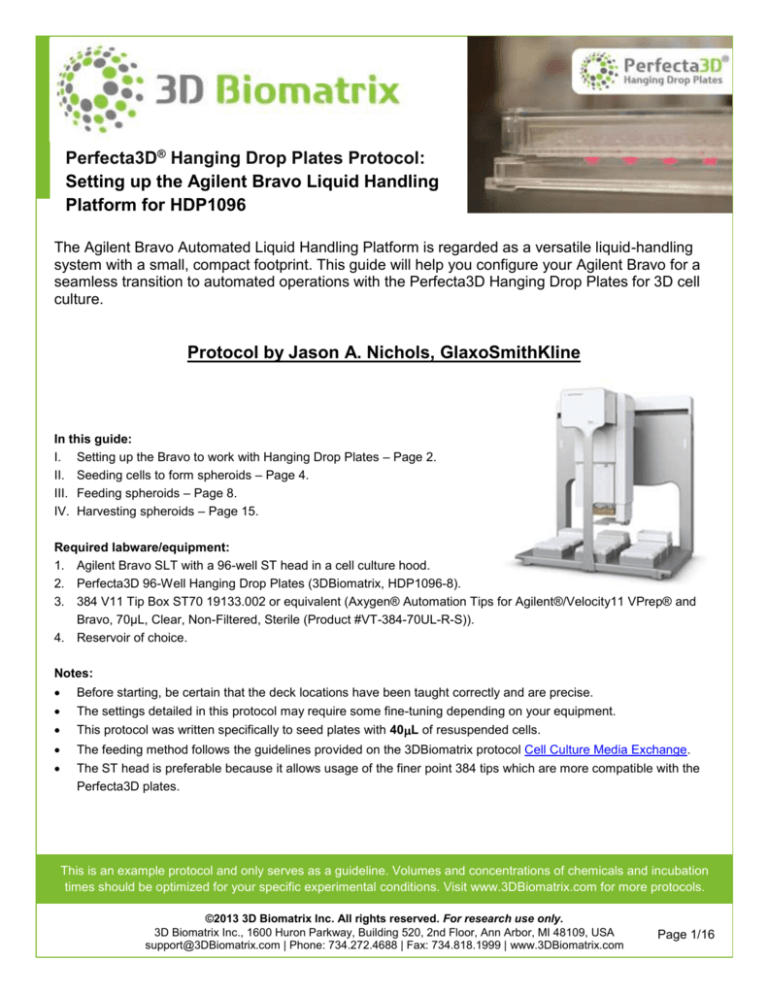
The Agilent Bravo Automated Liquid Handling Platform is regarded as a versatile liquid-handling
system with a small, compact footprint. This guide will help you configure your Agilent Bravo for a
seamless transition to automated operations with the Perfecta3D Hanging Drop Plates for 3D cell
culture.
Protocol by Jason A. Nichols, GlaxoSmithKline
In this guide:
I. Setting up the Bravo to work with Hanging Drop Plates – Page 2.
II. Seeding cells to form spheroids – Page 4.
III. Feeding spheroids – Page 8.
IV. Harvesting spheroids – Page 15.
Required labware/equipment:
1. Agilent Bravo SLT with a 96-well ST head in a cell culture hood.
2. Perfecta3D 96-Well Hanging Drop Plates (3DBiomatrix, HDP1096-8).
3. 384 V11 Tip Box ST70 19133.002 or equivalent (Axygen® Automation Tips for Agilent®/Velocity11 VPrep® and
Bravo, 70μL, Clear, Non-Filtered, Sterile (Product #VT-384-70UL-R-S)).
4. Reservoir of choice.
Notes:
Before starting, be certain that the deck locations have been taught correctly and are precise.
The settings detailed in this protocol may require some fine-tuning depending on your equipment.
This protocol was written specifically to seed plates with 40L of resuspended cells.
The feeding method follows the guidelines provided on the 3DBiomatrix protocol Cell Culture Media Exchange.
The ST head is preferable because it allows usage of the finer point 384 tips which are more compatible with the
Perfecta3D plates.
This is an example protocol and only serves as a guideline. Volumes and concentrations of chemicals and incubation
times should be optimized for your specific experimental conditions. Visit www.3DBiomatrix.com for more protocols.
©2013 3D Biomatrix Inc. All rights reserved. For research use only.
3D Biomatrix Inc., 1600 Huron Parkway, Building 520, 2nd Floor, Ann Arbor, MI 48109, USA
support@3DBiomatrix.com | Phone: 734.272.4688 | Fax: 734.818.1999 | www.3DBiomatrix.com
Page 1/16
Define the plate:
1. Open the Labware editor.
2. On the Plate Properties tab, set the thickness to 11.25 mm.
3. All other values can remain at 0 (Figure 1).
Figure 1
This is an example protocol and only serves as a guideline. Volumes and concentrations of chemicals and incubation
times should be optimized for your specific experimental conditions. Visit www.3DBiomatrix.com for more protocols.
©2013 3D Biomatrix Inc. All rights reserved. For research use only.
3D Biomatrix Inc., 1600 Huron Parkway, Building 520, 2nd Floor, Ann Arbor, MI 48109, USA
support@3DBiomatrix.com | Phone: 734.272.4688 | Fax: 734.818.1999 | www.3DBiomatrix.com
Page 2/16
4. Click on the Pipette/Well Definition tab and enter the values below (Figure 2).
Well volume (l) = 280
Well depth (mm) = 6.75
Well diameter (mm) = 2
Well Geometry = Round
Well-Bottom shape = V-shaped
Row-wise well to well (mm) = 9.0
Column-wise well to well (mm) = 9.0
5. Save the labware with an appropriate name
Figure 2
This is an example protocol and only serves as a guideline. Volumes and concentrations of chemicals and incubation
times should be optimized for your specific experimental conditions. Visit www.3DBiomatrix.com for more protocols.
©2013 3D Biomatrix Inc. All rights reserved. For research use only.
3D Biomatrix Inc., 1600 Huron Parkway, Building 520, 2nd Floor, Ann Arbor, MI 48109, USA
support@3DBiomatrix.com | Phone: 734.272.4688 | Fax: 734.818.1999 | www.3DBiomatrix.com
Page 3/16
Create a liquid class:
1. Open the Liquid Library Editor and enter the values below (Figure 3).
2. Aspirate Parameters
Velocity = 5 l/sec
Acceleration = 150 l/sec2
Post-aspirate delay = 100 ms
3. Z-Axis Aspirate Parameters
Velocity into wells = 3 mm/sec
Acceleration into wells = 5 mm/sec2
Velocity out of wells = 3 mm/sec
Acceleration out of wells = 5 mm/sec2
Figure 3
Set up the labware on the deck:
Set up the deck with a tip box (see required labware above for type), a reservoir, a Perfecta3D 96-well hanging
drop plate and some sort of receptacle for tip trash (Figure 4). The user should define the reservoir, trash and
tips in the Labware editor
This is an example protocol and only serves as a guideline. Volumes and concentrations of chemicals and incubation
times should be optimized for your specific experimental conditions. Visit www.3DBiomatrix.com for more protocols.
©2013 3D Biomatrix Inc. All rights reserved. For research use only.
3D Biomatrix Inc., 1600 Huron Parkway, Building 520, 2nd Floor, Ann Arbor, MI 48109, USA
support@3DBiomatrix.com | Phone: 734.272.4688 | Fax: 734.818.1999 | www.3DBiomatrix.com
Page 4/16
Figure 4
Set up the method by
making the following
changes within a
Bravo Sub-process:
1. Set head mode to all
barrels (Figure 5).
2. Tips on.
3. Shake the reservoir (if
applicable).
4. Aspirate from the
reservoir.
5. Dispense to the 96-well
Hanging Drop plate.
6. Tips off.
7. Move head away from
plate so it can be picked
up.
Figure 5
This is an example protocol and only serves as a guideline. Volumes and concentrations of chemicals and incubation
times should be optimized for your specific experimental conditions. Visit www.3DBiomatrix.com for more protocols.
©2013 3D Biomatrix Inc. All rights reserved. For research use only.
3D Biomatrix Inc., 1600 Huron Parkway, Building 520, 2nd Floor, Ann Arbor, MI 48109, USA
support@3DBiomatrix.com | Phone: 734.272.4688 | Fax: 734.818.1999 | www.3DBiomatrix.com
Page 5/16
Set up the seeding method by making the following changes:
1. Load the tips. By allowing automatic tracking of tip usage the Bravo will keep up with the tips remaining in the
box after each use (Figure 6).
Figure 6
2. If a shaker is available, use it to ensure that the cells are re-suspended in the reservoir (Figure 7).
Figure 7
3. Aspirate the desired volume plus 3 l (Figure 8). A variable can be assigned in the Startup Protocol screen if
necessary. In the screenshot a variable (volume) is used. The extra 3 L is aspirated to prevent air bubbles
from being dispensed into the wells.
This is an example protocol and only serves as a guideline. Volumes and concentrations of chemicals and incubation
times should be optimized for your specific experimental conditions. Visit www.3DBiomatrix.com for more protocols.
©2013 3D Biomatrix Inc. All rights reserved. For research use only.
3D Biomatrix Inc., 1600 Huron Parkway, Building 520, 2nd Floor, Ann Arbor, MI 48109, USA
support@3DBiomatrix.com | Phone: 734.272.4688 | Fax: 734.818.1999 | www.3DBiomatrix.com
Page 6/16
Figure 8
4. Dispense all but the 3 L overage into the wells using the hanging Drop liquid class. Dispense to the center of
the well at 0.4 mm from the well bottom (Figure 9).
Figure 9
This is an example protocol and only serves as a guideline. Volumes and concentrations of chemicals and incubation
times should be optimized for your specific experimental conditions. Visit www.3DBiomatrix.com for more protocols.
©2013 3D Biomatrix Inc. All rights reserved. For research use only.
3D Biomatrix Inc., 1600 Huron Parkway, Building 520, 2nd Floor, Ann Arbor, MI 48109, USA
support@3DBiomatrix.com | Phone: 734.272.4688 | Fax: 734.818.1999 | www.3DBiomatrix.com
Page 7/16
To feed the spheroids set up a method with the following steps:
1. Within a Bravo SubProcess (Figure 10):
Set head mode to all barrels
Tips on
Aspirate from the reservoir
Dispense to the Perfecta3D Hanging Drop plate
Tips off
Figure 10
This is an example protocol and only serves as a guideline. Volumes and concentrations of chemicals and incubation
times should be optimized for your specific experimental conditions. Visit www.3DBiomatrix.com for more protocols.
©2013 3D Biomatrix Inc. All rights reserved. For research use only.
3D Biomatrix Inc., 1600 Huron Parkway, Building 520, 2nd Floor, Ann Arbor, MI 48109, USA
support@3DBiomatrix.com | Phone: 734.272.4688 | Fax: 734.818.1999 | www.3DBiomatrix.com
Page 8/16
2. Load the tips. By allowing automatic tracking of tip usage the Bravo will keep up with the tips remaining in the
box after each use (Figure 11).
Figure 11
3. Aspirate the desired volume plus 3 l. A variable can be assigned in the Startup Protocol screen if desired.
In the screenshot a variable (volAdd) is used. The extra 3 L is aspirated to prevent air bubbles from being
dispensed into the wells.
Figure 12
This is an example protocol and only serves as a guideline. Volumes and concentrations of chemicals and incubation
times should be optimized for your specific experimental conditions. Visit www.3DBiomatrix.com for more protocols.
©2013 3D Biomatrix Inc. All rights reserved. For research use only.
3D Biomatrix Inc., 1600 Huron Parkway, Building 520, 2nd Floor, Ann Arbor, MI 48109, USA
support@3DBiomatrix.com | Phone: 734.272.4688 | Fax: 734.818.1999 | www.3DBiomatrix.com
Page 9/16
4. Dispense all but the 3 L overage into the wells using the hanging drop media addition liquid class. Dispense
to the center of the well at 4.5 mm from the well bottom (Figure 13).
Figure 13
5. Shuck the tips into the trash.
This is an example protocol and only serves as a guideline. Volumes and concentrations of chemicals and incubation
times should be optimized for your specific experimental conditions. Visit www.3DBiomatrix.com for more protocols.
©2013 3D Biomatrix Inc. All rights reserved. For research use only.
3D Biomatrix Inc., 1600 Huron Parkway, Building 520, 2nd Floor, Ann Arbor, MI 48109, USA
support@3DBiomatrix.com | Phone: 734.272.4688 | Fax: 734.818.1999 | www.3DBiomatrix.com
Page 10/16
For media exchange set up a method with the following steps:
1. You will need 2 reservoirs for this method. One for fresh medium and one for the waste as it is
removed from the plate (Figure 14a & 14b).
Figure 14a
Figure 14b
This is an example protocol and only serves as a guideline. Volumes and concentrations of chemicals and incubation
times should be optimized for your specific experimental conditions. Visit www.3DBiomatrix.com for more protocols.
©2013 3D Biomatrix Inc. All rights reserved. For research use only.
3D Biomatrix Inc., 1600 Huron Parkway, Building 520, 2nd Floor, Ann Arbor, MI 48109, USA
support@3DBiomatrix.com | Phone: 734.272.4688 | Fax: 734.818.1999 | www.3DBiomatrix.com
Page 11/16
2. Use a variable so the volume can be changed as needed. Aspirate volume from plate using the hanging
drop liquid class (Figure 15).
Figure 15
3. Dispense the old medium to the waste reservoir (Figure 16).
Figure 16
This is an example protocol and only serves as a guideline. Volumes and concentrations of chemicals and incubation
times should be optimized for your specific experimental conditions. Visit www.3DBiomatrix.com for more protocols.
©2013 3D Biomatrix Inc. All rights reserved. For research use only.
3D Biomatrix Inc., 1600 Huron Parkway, Building 520, 2nd Floor, Ann Arbor, MI 48109, USA
support@3DBiomatrix.com | Phone: 734.272.4688 | Fax: 734.818.1999 | www.3DBiomatrix.com
Page 12/16
4. Shuck tips into the tip trash (Figure 17).
Figure 17
5. Get new tips (Figure 18).
Figure 18
This is an example protocol and only serves as a guideline. Volumes and concentrations of chemicals and incubation
times should be optimized for your specific experimental conditions. Visit www.3DBiomatrix.com for more protocols.
©2013 3D Biomatrix Inc. All rights reserved. For research use only.
3D Biomatrix Inc., 1600 Huron Parkway, Building 520, 2nd Floor, Ann Arbor, MI 48109, USA
support@3DBiomatrix.com | Phone: 734.272.4688 | Fax: 734.818.1999 | www.3DBiomatrix.com
Page 13/16
6. Again, use a variable to allow volume changes as needed. Aspirate from the reservoir of fresh medium
the desired volume plus 3 L. The extra 3 l is to help prevent air bubbles from being blown into the
wells (Figure 19).
Figure 19
7. Dispense the desired volume to the plate using the hanging drop media addition liquid class (Figure 20).
8. Shuck tips into the tip trash.
Figure 20
This is an example protocol and only serves as a guideline. Volumes and concentrations of chemicals and incubation
times should be optimized for your specific experimental conditions. Visit www.3DBiomatrix.com for more protocols.
©2013 3D Biomatrix Inc. All rights reserved. For research use only.
3D Biomatrix Inc., 1600 Huron Parkway, Building 520, 2nd Floor, Ann Arbor, MI 48109, USA
support@3DBiomatrix.com | Phone: 734.272.4688 | Fax: 734.818.1999 | www.3DBiomatrix.com
Page 14/16
Defining the plate for Harvesting Spheroids:
1. To harvest the spheroids, the hanging drop plate is placed on top of a Greiner 96-well flat bottom plate (or
equivalent).
2. Open the labware editor.
3. On the Plate Properties tab, set the thickness to 24.350 mm (Figure 21).
4. All other values can remain at 0.
5. Click on the Pipette/Well Definition tab and make the following changes
Well volume (l) = 0
Well depth (mm) = 6.75
Well diameter (mm) = 2
Well Geometry = Round
Well-Bottom shape = Rounded
Row-wise well to well (mm) = 9.0
Column-wise well to well (mm) = 9.0
6. Save the labware with an appropriate name such as 96_Hanging_Drop_Cell_Harvest
Figure 21
This is an example protocol and only serves as a guideline. Volumes and concentrations of chemicals and incubation
times should be optimized for your specific experimental conditions. Visit www.3DBiomatrix.com for more protocols.
©2013 3D Biomatrix Inc. All rights reserved. For research use only.
3D Biomatrix Inc., 1600 Huron Parkway, Building 520, 2nd Floor, Ann Arbor, MI 48109, USA
support@3DBiomatrix.com | Phone: 734.272.4688 | Fax: 734.818.1999 | www.3DBiomatrix.com
Page 15/16
Write method for harvesting and then harvest spheroids:
1. Open the method that was created to seed the plates and save it with a different name such as “3D Spheroid
harvest”.
2. Replace the 96_Hanging_Drop plate on the deck with 96_Hanging_Drop_Cell_Harvest
3. Right click on the Shake from Cell Reservoir step (if applicable) and delete it.
4. Fill the reservoir with medium
5. In deck position 4 place a standard 96-well plate. Remove the bottom of the Perfecta3D Hanging Drop Plate
and carefully place it on top of the standard 96-well plate.
6. Run method as before except set the variable volume to 72 L (3D Biomatrix recommends using 100L but we
are limited by tip volume)
7. As the Bravo slowly dispenses the medium into the wells the drops should fall into the standard 96-well plate.
Because this method uses less volume than recommended by 3D Biomatrix, it might be necessary to run the
harvesting method twice.
This is an example protocol and only serves as a guideline. Volumes and concentrations of chemicals and incubation
times should be optimized for your specific experimental conditions. Visit www.3DBiomatrix.com for more protocols.
©2013 3D Biomatrix Inc. All rights reserved. For research use only.
3D Biomatrix Inc., 1600 Huron Parkway, Building 520, 2nd Floor, Ann Arbor, MI 48109, USA
support@3DBiomatrix.com | Phone: 734.272.4688 | Fax: 734.818.1999 | www.3DBiomatrix.com
Page 16/16


![PW Heavy Equipment Operator [Read More]](http://s3.studylib.net/store/data/006999445_1-8417856b741c62f00336b7e979d86f7e-300x300.png)

