2-5 Assemblage, sculpture, collage, cardboard construction, painting
advertisement

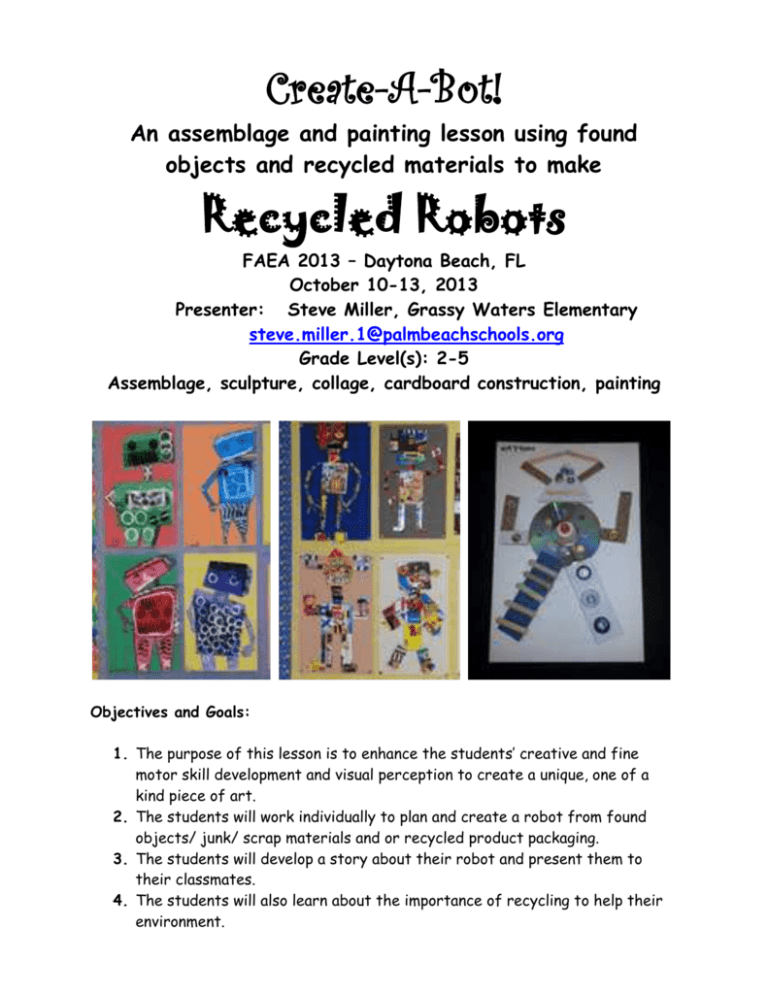
Create-A-Bot! An assemblage and painting lesson using found objects and recycled materials to make Recycled Robots FAEA 2013 – Daytona Beach, FL October 10-13, 2013 Presenter: Steve Miller, Grassy Waters Elementary steve.miller.1@palmbeachschools.org Grade Level(s): 2-5 Assemblage, sculpture, collage, cardboard construction, painting Objectives and Goals: 1. The purpose of this lesson is to enhance the students’ creative and fine motor skill development and visual perception to create a unique, one of a kind piece of art. 2. The students will work individually to plan and create a robot from found objects/ junk/ scrap materials and or recycled product packaging. 3. The students will develop a story about their robot and present them to their classmates. 4. The students will also learn about the importance of recycling to help their environment. 5. This focuses on reducing, reusing and recycling. 6. This lesson has a science and art focus with connections to language arts, social studies and math. Materials: 1. 2. 3. 4. Scrap mat board or cardboard for the robot background Pre-cut scarps of mat board and cardboard Recycled materials Scraps of objects: bottle caps, broken jewelry, old phone parts, computer parts, keys, nuts and bolts, wires 5. Other recycled/scrap materials as available 6. Small containers to place materials in 7. Aluminum foil – optional to add that metallic robot look 8. Elmer’s Glue or tacky glue 9. Scissors 10. glue gun and glue sticks (for teacher use) 11. paper 12. Permanent markers Preparation: The teacher should pre-cut the card board and mat scraps to be used to create the bodies of the robots. Another convenient method would be sort all recycled materials that are allowed to be used for details to be placed in shallow cardboard boxes (the tops of copy paper boxes work great). Please note that this lesson can be used as an extension lesson to a 2D drawing lesson incorporating shapes and forms. I have included a few of my students’ examples of their completed projects. Procedures: The lesson can be divided into as many sessions as you feel appropriate. It all depends on the amount of time you have for each class and the amount of details you would like the robots to have. My classes are 30 minutes each and it took 3 class periods to achieve the results. As a note make sure you leave ample storage space to place the robots to dry. Make sure the students know that the lesson is not who can build the tallest robot using the materials as that will make it very difficult for storage. The students prepare and begin to glue the basic robots shapes that they arranged from the cardboard and mat board scraps. This is the foundation step for this lesson. I started off making sure the robots had a solid torso shape. This allowed the students to begin to extend their materials from here. Encourage the students to make the robots arms look as if they are moving and not placed straight down on the side of the robot. . At this step all of the students will now use the provided materials to add the details. All extras should be placed in the cardboard box or plastic container on each table. This is where it looks as if the robots come alive. The students can use several materials and glue them to create a realistic looking robot. Remind the students that the small objects used will really need to be glued and the Elmer’s glue does dry clear. When completed set aside to dry. This step can take as long as you allow depending on the results you are looking for. Secondary Lesson: Painted Robots combining form, value and printing This lesson uses a combination of the art elements and principles of design. You will see that this painting and printing lesson combines a lot of math and art standards. This is divided into what I call mini lessons. You can choose to follow the steps or skip them to create your own completed robots. I first review and introduce shapes and forms, turning 2D shapes into 3D forms. The students follow along the teacher directed drawing lesson as I use my document camera to complete a step by step drawing lesson. For this drawing we use the 12x18 drawing paper and a black crayon to begin drawing the forms. I encourage the students to draw some of them off the paper. Once the forms are completed and the students have drawn their robots it is time to introduce the painting lesson. This will be a value painting assignment. Each part of the robot will be painted a value shade of the color given to each table or you can allow the students to choose. Complete painting and let dry. For the next lesson the printing process is introduced. I have already prepared each table with some printing materials and the black and white tempera paint. Each student will now begin to use the gadgets to print the shapes onto their completed robots. See completed examples. Once dry I have each student choose the complimentary color of paper. Another lesson that can be completed using recycled materials is the Recycled Packing Robots. I collect boxes, containers, cardboard with colors usually from the aftercare because of snack time. I pre-cut all of the boxes into many varied sizes that can be used to make a robot. The students will use the packaging and recycle them while creating a robot. They can cut the cardboard to make any shape or size they need. This is a great way to show how to reduce, reuse and recycle all product packing. See completed examples. Vocabulary: 1. 2. 3. 4. 5. 6. Recycle Assemblage Collage Sculpture Found-Object Shape - Two-dimensional (2D) 7. Form - Three-dimensional (3D) 8. Narrative 9. Printing Resources - (Art Visuals & Literacy Connections): various art visuals of posters placed around the art room showing examples of robots, assemblages from various artists, recycled materials. Robot Drawing Book by Ralph Masiello Recycled Robots by Robert Malone The Robot Book by Heather Brown Robot Eyewitness books by Roger Bridgman The Robot and the Bluebird by David Lucus Discussion Questions: What is Recycling? How do you recycle? Why is it important to recycle? What is a found object? What are robots made of? What are robots used for? Have you ever seen a robot? Evaluation: 1. Did the student use the class time appropriately in order to complete their robot? 2. Is the understanding of the vocabulary evident in the work? 3. Is the robot well thought out and executed? 4. Does the narrative fir the robot? Visual Art Standards: VA.5.S.1.2 – Use media, technology, and other resources to inspire personal art making decisions. VA.5.S.2.3 – Visualize the end product to justify artistic choices of tools, techniques, and processes. VA.5.S.3.1 – Use materials, tools, techniques, and processes to achieve expected results in two and/or three-dimensional artworks. VA.5.S.3.3 - Use materials, tools, techniques, and processes in a safe and responsible manner. VA.5.O.1.3 – Explain how creative and technical ability to produce a work of art. VA.5.O.3.1 – Create meaningful and unique works of art to effectively communicate and document a personal voice. VA.5.H.2.2 – Describe the ways in which artworks and utilitarian objects impact everyday art. Students understand and use similarities and differences between characteristics of the visual arts and other arts disciplines.


