Online Statements & Email Approval
advertisement
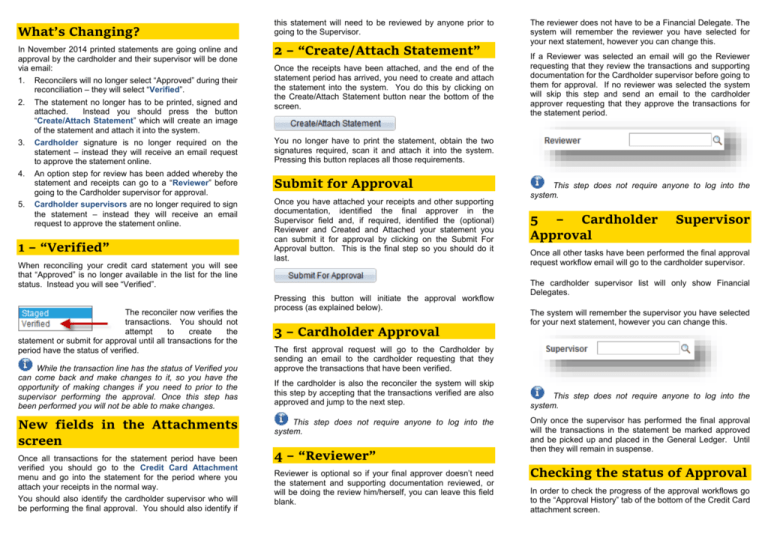
What’s Changing? In November 2014 printed statements are going online and approval by the cardholder and their supervisor will be done via email: 1. Reconcilers will no longer select “Approved” during their reconciliation – they will select “Verified”. 2. 3. 4. 5. The statement no longer has to be printed, signed and attached. Instead you should press the button “Create/Attach Statement” which will create an image of the statement and attach it into the system. Cardholder signature is no longer required on the statement – instead they will receive an email request to approve the statement online. An option step for review has been added whereby the statement and receipts can go to a “Reviewer” before going to the Cardholder supervisor for approval. Cardholder supervisors are no longer required to sign the statement – instead they will receive an email request to approve the statement online. 1 – “Verified” When reconciling your credit card statement you will see that “Approved” is no longer available in the list for the line status. Instead you will see “Verified”. The reconciler now verifies the transactions. You should not attempt to create the statement or submit for approval until all transactions for the period have the status of verified. While the transaction line has the status of Verified you can come back and make changes to it, so you have the opportunity of making changes if you need to prior to the supervisor performing the approval. Once this step has been performed you will not be able to make changes. New fields in the Attachments screen Once all transactions for the statement period have been verified you should go to the Credit Card Attachment menu and go into the statement for the period where you attach your receipts in the normal way. You should also identify the cardholder supervisor who will be performing the final approval. You should also identify if this statement will need to be reviewed by anyone prior to going to the Supervisor. 2 – “Create/Attach Statement” Once the receipts have been attached, and the end of the statement period has arrived, you need to create and attach the statement into the system. You do this by clicking on the Create/Attach Statement button near the bottom of the screen. The reviewer does not have to be a Financial Delegate. The system will remember the reviewer you have selected for your next statement, however you can change this. If a Reviewer was selected an email will go the Reviewer requesting that they review the transactions and supporting documentation for the Cardholder supervisor before going to them for approval. If no reviewer was selected the system will skip this step and send an email to the cardholder approver requesting that they approve the transactions for the statement period. You no longer have to print the statement, obtain the two signatures required, scan it and attach it into the system. Pressing this button replaces all those requirements. Submit for Approval Once you have attached your receipts and other supporting documentation, identified the final approver in the Supervisor field and, if required, identified the (optional) Reviewer and Created and Attached your statement you can submit it for approval by clicking on the Submit For Approval button. This is the final step so you should do it last. Pressing this button will initiate the approval workflow process (as explained below). 3 – Cardholder Approval This step does not require anyone to log into the system. 5 – Cardholder Approval Supervisor Once all other tasks have been performed the final approval request workflow email will go to the cardholder supervisor. The cardholder supervisor list will only show Financial Delegates. The system will remember the supervisor you have selected for your next statement, however you can change this. The first approval request will go to the Cardholder by sending an email to the cardholder requesting that they approve the transactions that have been verified. If the cardholder is also the reconciler the system will skip this step by accepting that the transactions verified are also approved and jump to the next step. This step does not require anyone to log into the system. 4 – “Reviewer” Reviewer is optional so if your final approver doesn’t need the statement and supporting documentation reviewed, or will be doing the review him/herself, you can leave this field blank. This step does not require anyone to log into the system. Only once the supervisor has performed the final approval will the transactions in the statement be marked approved and be picked up and placed in the General Ledger. Until then they will remain in suspense. Checking the status of Approval In order to check the progress of the approval workflows go to the “Approval History” tab of the bottom of the Credit Card attachment screen. 1. use this to approve or deny the claim 2. enter any comments you may wish to make 3. submit the entry Approved – approval has been performed. Pending – an approval request has been sent but not yet actioned. Not Routed – an approval request has not yet been sent, most likely because the action prior to this has not yet been performed. When will the email actions update NSF A process runs every hour, on the hour, to update NS Financials based on the action taken in the workflow email (approve or deny) so you will not see the transaction line approved immediately. Once you have pressed the submit button an email will be created to NS Financials with an update. Please send the email without making any changes to the email. Workflow email explanations Changing the Approver In the emails that are sent to the Cardholder, Reviewer and Cardholder Supervisor will be three attachments. If you have already submitted your statement for approval you can’t change the approver. Please do not insert an approver because this will add an additional approver and still require approval from the original approver. To change the approver from one person to another you will need to contact the Credit Card Administrator for assistance. 1. click on this attachment to open the page where you perform the actual approval. 2 . This file contains copies of the supporting documentation that was attached by the person who reconciled the statement. 3 . This file contains the statement for the period. Where to get help Visit the Finance Knowledge Base to find more information on Expenses including reference guides, user manuals and training videos. Contact the Finance Help Desk if you need assistance or have any questions at financehelp@unsw.edu.au or call x53330. An Information session was held and recorded, this will be made available on the Credit Card page of the Finance Knowledge Base. When you launch the attachment (see 1 above) the approval page will open and you will see a summary of the spend for the period as well as a year to date summary. Credit Card Online Statements & Email Approval Quick Reference Guide For all of the University’s Financial Policies and Guidelines, refer to the Finance Website: www.fin.unsw.edu.au
