Grade 2 Module 6 Facilitator`s Guide
advertisement
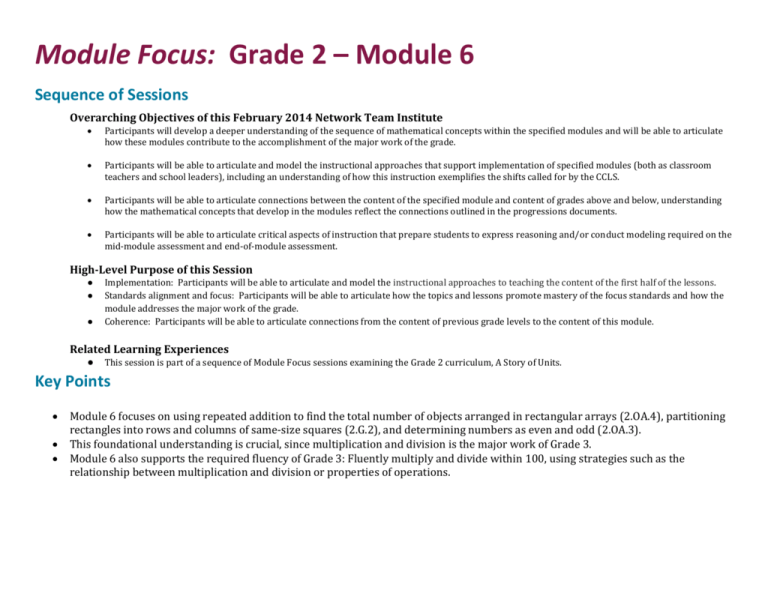
Module Focus: Grade 2 – Module 6 Sequence of Sessions Overarching Objectives of this February 2014 Network Team Institute Participants will develop a deeper understanding of the sequence of mathematical concepts within the specified modules and will be able to articulate how these modules contribute to the accomplishment of the major work of the grade. Participants will be able to articulate and model the instructional approaches that support implementation of specified modules (both as classroom teachers and school leaders), including an understanding of how this instruction exemplifies the shifts called for by the CCLS. Participants will be able to articulate connections between the content of the specified module and content of grades above and below, understanding how the mathematical concepts that develop in the modules reflect the connections outlined in the progressions documents. Participants will be able to articulate critical aspects of instruction that prepare students to express reasoning and/or conduct modeling required on the mid-module assessment and end-of-module assessment. High-Level Purpose of this Session ● ● ● Implementation: Participants will be able to articulate and model the instructional approaches to teaching the content of the first half of the lessons. Standards alignment and focus: Participants will be able to articulate how the topics and lessons promote mastery of the focus standards and how the module addresses the major work of the grade. Coherence: Participants will be able to articulate connections from the content of previous grade levels to the content of this module. Related Learning Experiences ● This session is part of a sequence of Module Focus sessions examining the Grade 2 curriculum, A Story of Units. Key Points Module 6 focuses on using repeated addition to find the total number of objects arranged in rectangular arrays (2.OA.4), partitioning rectangles into rows and columns of same-size squares (2.G.2), and determining numbers as even and odd (2.OA.3). This foundational understanding is crucial, since multiplication and division is the major work of Grade 3. Module 6 also supports the required fluency of Grade 3: Fluently multiply and divide within 100, using strategies such as the relationship between multiplication and division or properties of operations. Session Outcomes What do we want participants to be able to do as a result of this session? Participants will develop a deeper understanding of the sequence of mathematical concepts within the specified modules and will be able to articulate how these modules contribute to the accomplishment of the major work of the grade. How will we know that they are able to do this? Participants will be able to articulate the key points listed above. Participants will be able to articulate and model the instructional approaches that support implementation of specified modules (both as classroom teachers and school leaders), including an understanding of how this instruction exemplifies the shifts called for by the CCLS. Participants will be able to articulate connections between the content of the specified module and content of grades above and below, understanding how the mathematical concepts that develop in the modules reflect the connections outlined in the progressions documents. Participants will be able to articulate critical aspects of instruction that prepare students to express reasoning and/or conduct modeling required on the mid-module assessment and end-of-module assessment. Session Overview Section Time Overview Prepared Resources Facilitator Preparation Introduction to the Module 15 mins Establish the instructional focus of Grade 2 Module 6 Grade 2 Module 6 PPT Faciliators Guide Review Grade 2 Module 6. Topic A Lessons 20 mins Examine the lessons of Topic A. G2 M6 Lesson Excerpts G2 M6 Problem Set Excerpts Review Topic A. Topic B Lessons 30 mins Examine the lessons of Topic B. G2 M6 Lesson Excerpts G2 M6 Problem Set Excerpts Review Topic B. Topic C Lessons 30 mins Examine the lessons of Topic C. G2 M6 Lesson Excerpts Review Topic C. G2 M6 Problem Set Excerpts G2 M6 Lesson Excerpts G2 M6 Problem Set Excerpts Topic D Lessons 30 mins Examine the lessons of Topic D. Summary 15 mins Reiterate the key points of Grade 2 Grade 2 Module 6 PPT Module 6 and facilitate discussion Faciliators Guide Review Topic D. Session Roadmap Section: Grade 6 Module 2 Time: 135 minutes [135 (143) minutes] In this section, you will… Materials used include: Time Slide Slide #/ Pic of Slide # Script/ Activity directions 30 sec Welcome! In this module focus session, we will examine Grade 2 – Module 6. 1 GROUP 1 min 2 The ultimate objective is to prepare you to implement Module 6. To do this we will: •Examine the development of mathematical understanding across the module using a focus on Concept Development within the lessons. •Introduce mathematical models and instructional strategies to support implementation of A Story of Units. 30 sec 3 We will begin by exploring the module overview to understand the purpose of this module. Then we will dig in to the math of the module. We’ll lead you through the teaching sequence, one concept at a time. Along the way, we’ll also examine the other lesson components and how they function in collaboration with the concept development. Finally, we’ll take a look back at the module, reflecting on all the parts as one cohesive whole. Let’s get started with the module overview. 30 sec 4 The sixth module in Grade 2 is Foundations of Multiplication and Division. The module includes 20 lessons and is allotted 24 instructional days. 10 min 5 Take 8 minutes to read the descriptive narrative of the Module 6 Overview. As you read, highlight language that shows the progression of learning in this module. Summarize the sequence of the major learning in Module 6. (After 8 minutes) Share with others at your table: What is new and different about the way these concepts are presented? (students are not multiplying or dividing; the focus is on conceptual understanding, building from their work with addition and subtraction.) Note that most of the fluency focuses either on a review of core fluency or skip counting, leading students towards multiplication work in Grade 3. 30 sec 6 Now that you have a broad view of the module, we will examine the sequence of learning, topic by topic. 3-4 min 7 Take 1 or 2 minutes to think about these questions and discuss them at your table. (Allow a minute to share out.) In Topic A, students follow the concrete-pictorial-abstract path, first arranging objects to form equal groups, then drawing pictorial representations of equal groups and relating their drawings to the corresponding repeated addition number sentences. By the end of the topic, students draw tape diagrams to represent the number of groups, the number in each group, and the total. 5 min 8 Topic A begins at the concrete level as students use objects to create equal groups, providing a foundation for the construction of arrays in Topic B. First, students distinguish equal from unequal. Then, as they manipulate objects, they discover that there are different ways to arrange a given number of objects into equal groups, e.g., 3 equal groups of 4 or 4 equal groups of 3. **Guide participants through the lesson excerpt.** 2-3 min 9 Complete these problems from the Problem Set, then discuss the questions with a partner. (Allow 2-3 minutes.) The Problem Set reinforces the day’s concept development, as students independently form equal groups. Working with a static image moves them a step beyond their work with objects. The debrief questions are designed to encourage the articulation of their understanding. Note that the second question sets the stage for Lesson 2, in which students will relate equal groups to repeated addition. 5 min 10 Lessons 2 and 3 move to the pictorial level, introducing math drawings to represent equal groups. Students are asked to show groups: “Show me 3, now 3 more. Add 3 more, now 3 more than that.” They then determine the number of objects and write the corresponding repeated addition number sentence. Lesson 3 extends this understanding as students look for and practice a more efficient way to add, by bundling. For example, for 4 groups of 3, the student might say, “I bundled 2 threes to make sixes, so 6 + 6 = 12.” They begin to see that they are adding units of 3. **Participants work with a partner and alternate the roles of teacher and student. For this lesson, Partner A is the teacher and Partner B is the student. In the following lesson, they will switch roles.** 2-3 min 11 In this lesson, students continue working at the pictorial level, using math drawings to represent equal groups and relating those groups to repeated addition. They also use addition strategies, such as doubles, to add more efficiently. Complete the first page of the Problem Set to get a feel for this work. Note: A Rekenrek is an excellent way to show repeated addition. Show the same number of beads in each row, and then show the repeated addition sentence that goes with the beads. For example, show 3 rows of 4 beads, and write 4 + 4 + 4 to show the addition. Also, some students may make the connection between repeated addition and multiplication. Praise their observation, but keep the focus on repeated addition for the lessons and assessments. Multiplication will be taught in Grade 3. 5 min 12 As students work with equal groups, they begin to understand that numbers other than 1, 10, and 100 can serve as units. In Lesson 4, students represent the total of a given number of units with tape diagrams. **Guide participants through the lesson excerpt.** 2-3 min 13 Lesson 4 is an example of when the Application Problem might follow the Concept Development. This problem gives students the chance to apply their learning in a real world context. Note that students follow the same procedure of moving from concrete to pictorial to abstract when working with tape diagrams. In the lesson, they filled their tape diagrams first with objects, then drawings, and finally abstract numerals. Take a moment to complete the Application Problem posted, then share your work with a partner. 3 min 14 Topic B focuses on spatial relationships and structuring as students organize equal groups (from Topic A) into rectangular arrays. They build small arrays (up to 5 by 5) and use repeated addition of the number in each row or column (i.e., group) to find the total. Take a moment to think about and share at your table why the array is a useful model for representing equal groups. (Organized rows and columns makes it easy to add on; this leads to running totals in G3. Also, commutative property.) Ask Grade 3 teachers to share how this work might be beneficial to the study of area in Grade 3. 3 min 15 Take a moment to read this excerpt from the Grade 2 section of the Geometry Progression. It helps explain both what spatial structuring is and why it’s important. It also gives insight into how the work of Topic B, and then Topic C, lays the foundation for later work with multiplication and area in Grade 3. 5 min 16 In Lesson 5, students compose arrays either one row or one column at a time and count to find the total, using the scattered sets from Topic A. Students observe that each row or column contains the same number of units. Thus, for 4 rows of 3, a student might observe that there are 4 equal groups of 3. This is foundational to the spatial structuring students will need to discern a row or column as a single entity, or unit, when working with tiled arrays without gaps and overlaps in Topic C. **Participants work with a partner and alternate the roles of teacher and student. For this lesson, Partner B is the teacher and Partner A is the student. In the following lesson, they will switch roles.** 5 min 17 In Lesson 6, students compose arrays and then decompose them by both rows and columns. For example, they see that an array of 4 rows of 3 beans can be pulled apart to show 4 rows of 3 or 3 columns of 4. Also, students see that when another row or column is added or removed, so is another group or unit. As the lesson progresses, students move the objects in the array closer together so there is no gap or overlap, forcing them to discern the rows and columns without the visual aid of spacing. Initially, students work with beans and then transition to square tiles, which builds the foundation for the area model in Grade 3. Students will do more extensive work with square tiles in future lessons. **Guide participants through the lesson excerpt.** 2-3 min 18 Complete these problems from the Problem Set, then discuss the questions with a partner. (Allow 2-3 minutes.) 5 min 19 In Lesson 7, students move to the pictorial as they use math drawings to represent arrays and relate the drawings to repeated addition. They use their personal white boards and markers to draw horizontal or vertical lines to show the rows and columns within the array. Note that students may naturally skip count to find the total. Praise the observation, and perhaps allow the student to explain the connection between skip counting and repeated addition. However, the focus is on establishing a strong connection between the array and repeated addition. **Guide participants through the lesson excerpt.** 3-4 min 20 In Lesson 8, students work with square tiles to create arrays with gaps, composing the arrays from part to whole, either one row or one column at a time. They draw individual, separated tiles as a foundational step for Topic C where they will be working with square tiles without gaps. As usual, students relate the arrays to repeated addition. **Participants work with a partner and alternate the roles of teacher and student. For this lesson, Partner A is the teacher and Partner B is the student. In the following lesson, they will switch roles.** 2-3 min 21 Take a moment to complete the Application Problem, then share your work with a partner. Discuss: How does solving this problem lead to deeper understanding of the structuring and usefulness of arrays? 3-4 min 22 In Lesson 9, Solve Word Problems Involving Addition of Equal Groups in Rows and Columns, students apply their understanding of arrays to word problems that involve repeated addition, interpreting array situations as either rows or columns and using the RDW process. In addition to drawing objects, they also represent the situation via more abstract tape diagrams, just as they did in the final lesson of Topic A. Complete this posted problem from the Problem Set. Which model made it easier to solve the problem, the tape diagram or the array? Note that student responses to this question can be an indicator of their level of understanding; most struggling students rely on the array and counting all. More advanced students will use the more abstract model, the tape diagram. 2-3 min 23 In Topic C, students build upon their work with arrays to develop the spatial reasoning skills they will need in preparation for Grade 3’s area content. They work with same-size squares to compose arrays with no gaps or overlaps and then count to find the total number of squares. After composing rectangles, students partition, or decompose, rectangles, first with tiles, they with scissors and paper, and finally, by drawing and iterating a square unit. In doing so, they begin to see the row or the column as a composite of multiple squares or as a unit, which is, in turn, part of the larger rectangle. Note that students are not multiplying or dividing in Grade 2, rather, this topic lays the foundation for the relationship between the two operations: As equal parts can be composed to form a whole, likewise, a whole can be decomposed into equal parts. 5 min 24 In Lessons 10 and 11, students compose a rectangle by making tile arrays with no gaps or overlaps. In Lesson 10, given a number of tiles (up to 25) students are asked to create rectangular arrays that show equal rows or columns (up to 5 by 5). Students build on their understanding of manipulating arrays by either adding or removing rows or columns to create various square arrays. In Lesson 11, students build upon this understanding, manipulating a set of 12 square tiles to compose various rectangles (e.g., 1 row of 12, 2 rows of 6, and 3 rows of 4). As students share their rectangles, they are encouraged to ask themselves, “How can I construct this differently?” **Guide participants through the lesson excerpt.** 5 min 25 In Lesson 12, students arrange square tiles into a specified rectangular array without gaps or overlaps. Then they trace to construct the same rectangle by iterating the square unit much as they iterated a length unit in Module 2 to create a centimeter ruler. Next, students use spatial reasoning developed so far in the module to draw the same rectangle without tracing, using their understanding of equal columns and equal rows. **Participants work with a partner and alternate the roles of teacher and student. For this lesson, Partner B is the teacher and Partner A is the student. In the following lesson, they will switch roles.** 5 min 26 In Lesson 13, students use their understanding of number bonds and part-whole relationships to decompose square tile arrays. This lesson develops the foundation for later work with the distributive property beginning in Grade 3 Module 1. **Guide participants through the lesson excerpt.** 3-4 min 27 In Lesson 14, the Problem Set is used during the Concept Development. Students fold and cut paper models of arrays to further develop their ability to visualize arrays. They see that just as a rectangle is composed of equal rows or columns, each row or column is composed of squares, or iterated units. *Participants are given this description only. They do not complete the PS. 5 min 28 In Lesson 15, students think more abstractly, using math drawings to partition rectangles. They shade in rows or columns and relate them to the repeated addition number sentence. Then, given a rectangle with one row or column missing, students draw in the remaining squares to complete the array and find the total by relating their completed array to repeated addition. Give participants 5 minutes to complete the Problem Set and discuss the Student Debrief questions with a partner. 5-6 min 29 In this lesson, students use the Problem Set during the Concept Development to extend their earlier work of composing and decomposing rectangles using tiles. Here, they create tessellations, fitting their inch tiles together with no gaps or overlaps to make patterns that could, theoretically, extend indefinitely. This highly engaging activity serves the important purpose of further developing students’ spatial structuring ability, preparing them to work with area in Grade 3, while generating work well suited for classroom display. **Guide participants through the lesson excerpt.** (They iterate a core square, or unit. This builds spatial structuring because students are iterating “units of units” and reflecting on the resulting structures.) 3-4 min 30 Topic D focuses on doubles and even numbers, thus setting the stage for the multiplication table of two in Grade 3. As students progress through the lessons, they learn the following interpretations of even numbers: 1.A number that occurs as we skip-count by twos is even. 2.When objects are paired up with none left unpaired, the number is even. 3.A number that is twice a whole number (doubles) is even. 4.A number whose last digit is 0, 2, 4, 6, or 8 is even. Armed with an understanding of the term even, students learn that any whole number that is not even is called odd, and that when 1 is added to or subtracted from an even number, the resulting number is odd. 5 min 31 Lesson 17 introduces even numbers via doubles. In other words, when we double any number from 1 to 10, the resulting number is even, and any even number can be written as a doubles fact. They discover that doubles facts yield even numbers even when the number being doubled is odd. **Participants work with a partner and alternate the roles of teacher and student. For this lesson, Partner A is the teacher and Partner B is the student. In the following lesson, they will switch roles.** 5 min 32 In Lesson 18, students pair up to 20 objects and see that when objects are paired with none remaining, the number is even. They see that objects arranged in columns of two also create two equal groups. They count by twos up to 20 and then back down. When they reach 0, the question is posed: “Does this mean 0 is even? Can I write 0 as a doubles fact?” As a result, students see that 0 is even. This practice lays the foundation for the multiplication table of two in Grade 3. Following the opening physical activity, students continue to look for these patterns using counters. **Guide participants through the lesson excerpt.** 3-4 min 33 In Lesson 19, students learn a faster way to identify even numbers, by looking for 0, 2, 4, 6, or 8 in the ones place. They circle the multiples of two on a number path and make the observation that the ones digits are 0, 2, 4, 6, and 8. Then, students revisit the number path: Would the pattern continue past 20? They continue counting by twos and see that the pattern continues. They then discern whether or not a larger number is even, and they prove their findings by using the interpretations taught in the previous lessons. Once students work with various interpretations of even numbers, they are ready to name all other whole numbers as odd. The lesson ends with students discovering that when 1 is added to or subtracted from an even number, the resulting number is odd. 2-3 min 34 5 min 35 Take a minute to complete the Homework excerpt and restate the rule to a partner. In Lesson 20, students use arrays to investigate even and odd numbers. Students add even numbers to other even numbers, odd numbers to other odd numbers, and even numbers to odd numbers to see what happens to the sum in each case: that the sum of two even numbers is even, the sum of two odd numbers is even, and the sum of an odd number and an even number is odd. Through these explorations, students build an intuitive understanding of prime, composite, and square numbers, which will be foundational for later grade levels. **Participants work with a partner and alternate the roles of teacher and student. For this lesson, Partner B is the teacher and Partner A is the student. ** 30 sec 36 6 min 37 Now that you’ve had the chance to see and practice the concepts, skills, and models of Module 6, let’s take a moment to reflect back on the module overall. Take 2-3 minutes to turn and talk with others at your table. Share out for 2-3 minutes. 2 min 38 Let’s review some key points of this session. Use the following icons in the script to indicate different learning modes. Video Reflect on a prompt Turnkey Materials Provided Grade 2 Module 6 PPT Grade 2 Module 6 Faciliatators Guide Grade 2 Module 6 Lesson Excerpts Grade 2 Module 6 Problem Set Excerpts Additional Suggested Resources A Story of Units Curriculum Overview How to Implement A Story of Units A Story of Units CCLS Checklist Active learning Turn and talk
