23_PCB_Project_and_Worksheet
advertisement
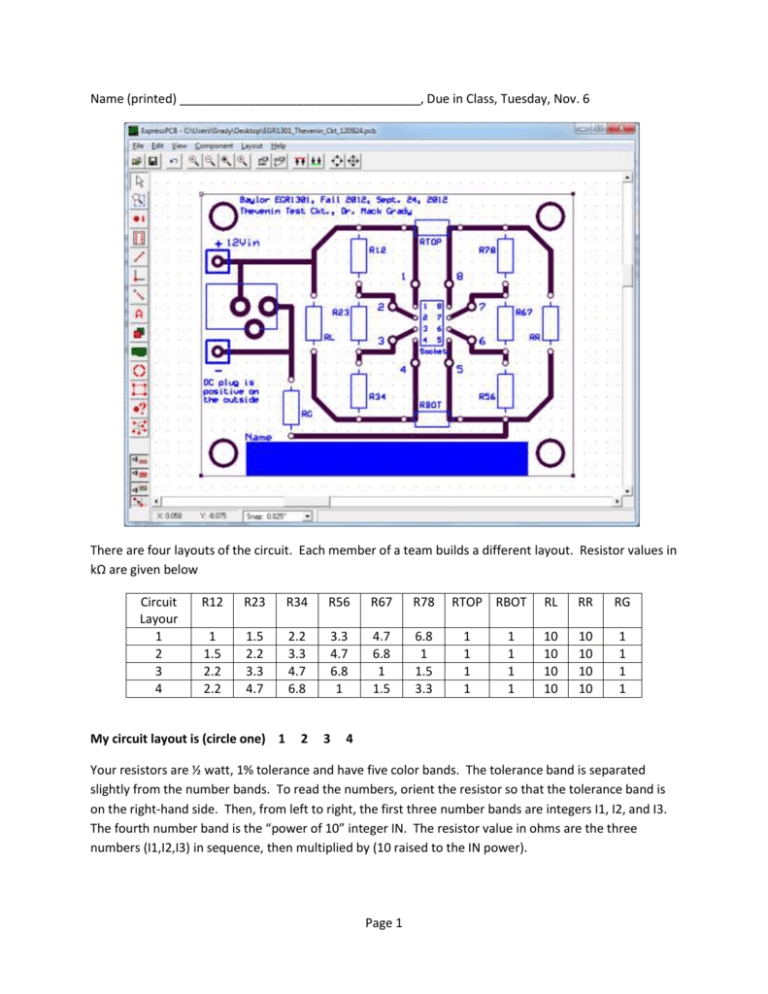
Name (printed) ___________________________________, Due in Class, Tuesday, Nov. 6 There are four layouts of the circuit. Each member of a team builds a different layout. Resistor values in kΩ are given below Circuit Layour 1 2 3 4 R12 R23 R34 R56 R67 R78 1 1.5 2.2 2.2 1.5 2.2 3.3 4.7 2.2 3.3 4.7 6.8 3.3 4.7 6.8 1 4.7 6.8 1 1.5 6.8 1 1.5 3.3 My circuit layout is (circle one) 1 2 3 RTOP RBOT 1 1 1 1 1 1 1 1 RL RR RG 10 10 10 10 10 10 10 10 1 1 1 1 4 Your resistors are ½ watt, 1% tolerance and have five color bands. The tolerance band is separated slightly from the number bands. To read the numbers, orient the resistor so that the tolerance band is on the right-hand side. Then, from left to right, the first three number bands are integers I1, I2, and I3. The fourth number band is the “power of 10” integer IN. The resistor value in ohms are the three numbers (I1,I2,I3) in sequence, then multiplied by (10 raised to the IN power). Page 1 Name (printed) ___________________________________, Due in Class, Tuesday, Nov. 6 The resistor color code is 0 1 2 3 4 5 6 7 8 9 black brown red orange yellow green blue violet gray white Conversion Examples Given 1.5 kΩ, convert to four number bands. 1.5 kΩ = 1500 Ω. First three number bands are 1 brown, 5 green, 0 black (corresponding to 150). Then, multiply by 10^1 (brown) to yield 1500. The four number bands are then brown,green,black,brown. The fifth band is for tolerance. Given four number bands yellow,violet,black,red. Converting gives 470 multiplied by 10^2 = 47000 = 47 kΩ. Step 1. Memorize the color code. Step 2. Mount the four #6-32 nylon threaded spacers and screws. Step 3. Solder in the resistors, with color bands ordered from top to bottom, or left to right, being very careful with color code. Step 4. Solder in the 8-pin socket, with notch on the socket 1 side. Step 5. Solder in the DC power receptacle. Step 6. Use an ohmmeter to measure the resistance from the +12Vin terminal box to the minus box. My measured value is ___________________. Step 7. Use series and parallel resistor rules to calculate the resistance between the +12Vin and minus box. My calculated value is ___________________. Measured values should be within 100Ω or so of calculated. If not, stop here and fix. Step 8. Same as Steps 6 and 7, but using sockets 1 and 8. My measured value is ___________________. My calculated value is ___________________. Measured values should be within 100Ω or so of calculated. If not, stop here and fix. Page 2 Name (printed) ___________________________________, Due in Class, Tuesday, Nov. 6 Step 9. Energize the circuit with a 12V wall wart power supply (the orange-painted ones). Measure the voltage between the +12Vin and minus box. My measured value is ___________________. Step 10. Measure the voltage between sockets 1 and 5. My measured value is ___________________. Step 11. Calculate the voltage between sockets 1 and 5. My calculated value is ___________________. The comparison with measured should be within tenths of volts. If not, find out why and fix or explain. Step 12. Measure the voltage between sockets 1 and 8. My measured value is ___________________. Step 13. Use the voltage divider principle with the results of Step 11 to calculate the voltage between sockets 1 and 8. My calculated value is ___________________. The comparison with Step 12 should be within tenths of volts. If not, find out why and fix or explain. Step 13. Insert the positive (longest) lead of the red LED into socket #1. One-by-one, move the LED’s negative lead to socket 8, 7, 6, 5. Which one of 8, 7, 6, 5 yields the brightest light? My brightest socket is ________________. Step 14. Leaving the LED negative lead in the brightest socket, measure the voltage across the LED. My measured value is ___________________. Step 15. Remove the LED, and re-measure the voltage between the same sockets. My measured value is ___________________. Step 16. Comment below on why the voltage measurements in Steps 14 and 15 are not identical. (Hint – a fully bright LED draws about 2 volts) ________________________________________ Staple your calculations for Steps 7, 8, 11 and 13 to this document. Turn in during class on Tuesday, Nov. 6. Page 3

